
Introduction
While designing a website, you need to look for any addition of creativity to enhance user engagement. In this era of competitive marketing, many company owners prefer to promote their brands with high-quality images. To make their products look more appealing and enhanced they are trying to look for different design techniques. One technique is to outsource an experienced editor with designing skills, but this requires investing a lot of money.
What if I tell you there is a way to transform your average square and circular-shaped images into unique ones? The Beaver Builder image masking module is a great way to add a creative look and feel to your images easily. You don’t need to hire any designer or developer for this purpose.
Unfortunately, beaver page builder does not offer any default module to add image masking. But you can avail this opportunity by downloading beaver builder addons pack for your website with the image masking feature. Apart from that, you need to get skilled in certain tips to ensure the proper usage of the image masking module.
So, Before finding out the advanced tips and tricks, let’s first take a look at what is image masking and how can we use it.
What is Image Masking in Beaver Builder?
Image masking is the latest technique to transform your dull image. It gives a unique look to the images with different shapes to elevate user engagement. In WordPress, several masking or vector shapes are used for the images to conceal and reveal some areas of the images.
“In short, image masking is basically the process of
highlighting specific areas of the images to enhance the
quality and making it more visually appealing”
This method does not require technical and coding skills in beaver builder. The Beaver Builder image masking module covers all the necessary design requirements to mask images attractively. It typically allows you to make custom changes in the width, height, and opacity and other image styling to enhance the appearance of the website.
Why do Professionals Need Image Masking?
At present, with the advancement in website design, most professionals need image masking services for their websites. Here are the top 5 reasons explained to why every brand needs image masking!
1- Conceal and Show Areas of Images
With image masking, professionals can conceal and show areas of the images for further editing. It allows them to apply different adjustments, colors, and effects selectively to specific regions without affecting the rest of the image. This level of control is important when professionals need to enhance or modify specific areas while keeping the overall image intact.
2- Easy Method
Image masking is an easy method and does not require any extra designing or coding. Seems interesting, right? It helps professionals get creative by changing the opacity of images for the translucent backdrop. By utilizing the image masking technique, you can easily fine-tune the image masks as per the requirements. The only requirement is to select the images and upload them to apply different masks and effects with a few clicks.
3- Modifying Image’s Dimension
Image masking plays a significant role in modifying the dimension of images. It enables professionals to scale and resize and crop the images while maintaining the visual quality of the images. You can easily adjust the dimensions of your images for different channels without having to worry about the pixels or resolution.
4- Branding & Advertising
Professionals need image masking feature to advertise their products. Image masking can help them create consistent branding elements such as product logos and graphical overlays. It allows them to maintain visual hierarchy and brand identity across various marketing platforms.
“Embrace the web designing advancements
and let innovation be your guide”
How To Use Beaver Builder Image Masking Module In WordPress
Xpro’s Beaver Builder image masking module is a powerful tool that effortlessly enhances the overall appearance of your website. This tool comes with 55+ preset shapes that you can use to mask your images. Don’t want to use our preset shapes? don’t worry, we have got you covered! You can apply custom vector shapes to your images.
With the help of the image masking module, you can undoubtedly boost the quality of your image by giving it an elegant look. With this ultimate module, you can adjust the position of your images, sizes, dimensions, width, height, and even opacity for a translucent look.
Let’s take a look at how to use the Beaver builder image masking module in 4 easy steps.
Step 1: Download & Install Xpro Beaver Builder Addons
The first step is to download and install Xpro beaver builder addons- Lite from the WordPress repository. After that, purchase our premium package and activate the license in order to use the beaver builder image masking module.
Step 2: Drag’n’Drop Beaver Builder Image Masking Module
Now, drag and drop the image masking module in WordPress and start customizing it. Here, you’ll get multiple advanced features to give a striking look to your website.
Step 3: Apply 55+ Pre-built Masks or Custom Shapes
The next step is to apply 55+ premade mask shapes to add to your images. Pick out the best one by trying out each shape. Don’t worry, the plugin will provide you with enough options that you won’t take much time to find the right image masking shape. You can also add custom vector shapes to match your website branding.
Step 4: Give Your Images A Unique Twist!
This is the step where you can show your creativity! Xpro beaver builder image masking module bridges the gap between your vision and reality. You can easily style the shapes by changing their opacity, width, height, and alignment
Explore more by visiting our step-by-step guide on how to use the Beaver builder image masking module.
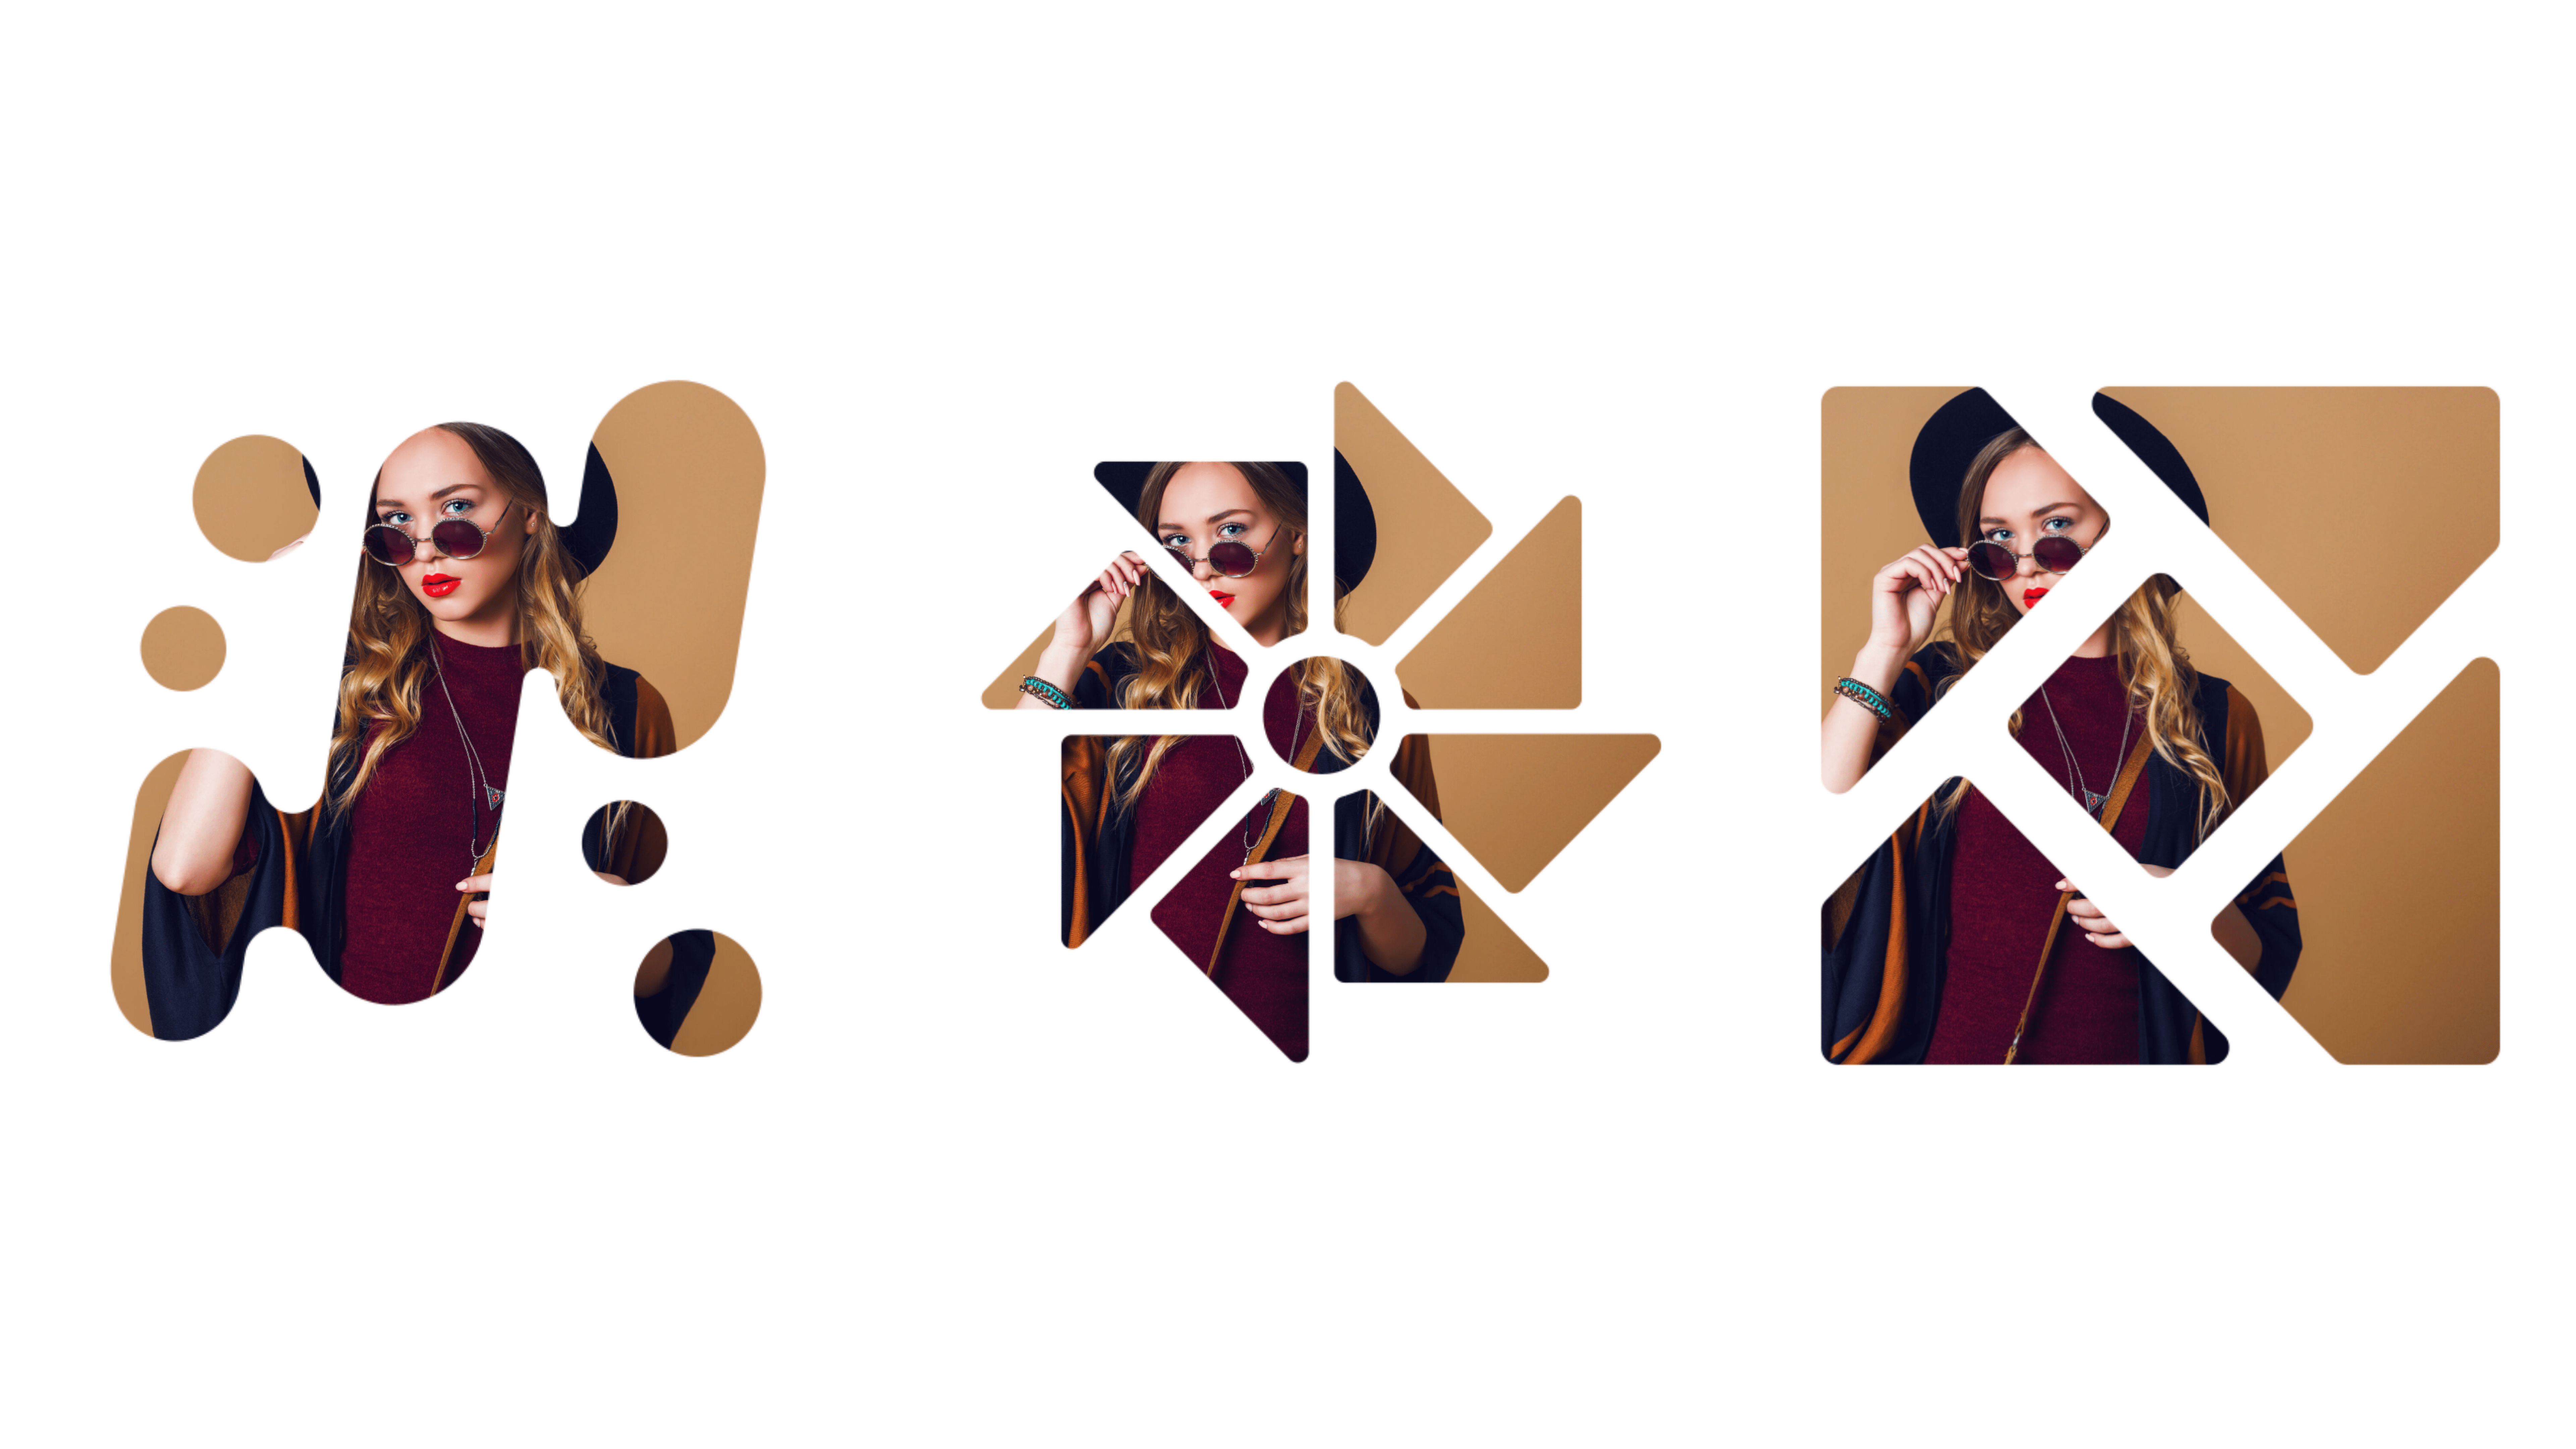
Take a look at how you can unleash your creativity using the beaver builder image masking module. While writing this article, we couldn’t resist exploring the image masking feature and ended up creating a cool layout.
Advanced Tips and Tricks for Beaver Builder Image Masking Module
Getting perfect aesthetics that align your website design and branding requires exploring! You need to test different combinations until you get the design that communicates your website message effectively. Here we have shortlisted some of the significant tips & tricks that you can utilize to achieve a professional and elegant look for your website.
Let’s dive right into it!
Creating Custom Image Masks With SVG Files
Who doesn’t want to make their images on the website stand out? Here we have the tip on how can you customize the masking shapes to match your website design.
While selecting an image masking module, make sure that it has the feature of applying custom image masks. The custom masks option gives you the freedom to design any vector shape to sync with your branding elements. By using masks, you can emphasize specific product features or highlight key details, helping customers focus on the essential aspects of the product.
Xpro’s image masking module provides the option to apply custom SVG files of shapes to the images. This feature allows you to take complete control of how you want to display your images, either in the form of circles, triangles, or irregular contours.

Combining Image Masking with other Beaver Builder modules for unique effects
Have you ever thought of applying image masking to different sections of your website, apart from the images? Well, here is a tip to add an artistic flair to your website. Try combining image masking with other beaver builder modules for unique effects. Several other modules have the feature to add images for the masking effect. You can use image masking to create visually striking banners and sliders for the homepage or landing pages.
However, you can’t just go and apply image masking in all the modules. You need to know what beaver builder modules offer this image masking support to get all the perks of it. Let’s take an example, you want to highlight your headings and make them visually prominent. In this scenario, you can give a shot at including a specific image in the heading text for a masking effect.
Xpro beaver builder addons provide different modules like advanced heading, and animated heading with the option to add custom images. Infuse a creative twist to your heading and get a masking effect.
We have created a template to show you how you can combine image masking with other modules. Take these pointers and implement them effectively on your website!
Also, you can try combining masked photos with parallax scrolling effects to create visually dynamic sections on your website. By masking images and adjusting their opacity, you can achieve engaging parallax effects that add depth and interactivity.
Applying Animations or Effects To Masked Images
Studies reveal that customers enjoy watching visual content 60,000 times faster than text. This is particularly true of moving images, and animations that immediately grab viewers’ attention. One thing is for sure that animations make the website unique and keep you ahead of your competitors.
So, why not create engaging and interactive images by applying different animations and effects? The Beaver Builder image masking module offers multiple features to bring a touch of innovation to your website.
Let’s say you are creating a portfolio or image gallery, you can present your images uniquely and captivate your audience. Use the advanced features of Xpro beaver builder addons and apply animations, hover effects, or transform effects to images with masks.
Buy our premium bundle and get ahold of all the advanced features with versatile functionality.
Personalized Image Border
Let’s take a look at the little things that can have a great impact! Apply different borders on your masked images and bring a touch of innovation to your website. Borders create a depth and refined look to the images, that’s why it’s important to use it effectively.
With the image masking module for beaver builder, you can easily apply custom borders or frames to your images. This way, you can have complete control to personalize the appearance of your images, aligning them with your design preferences.
Ensure Proper Usage
Image masking can be used for different sections on the website. You can use it to create thumbnails, backgrounds, slideshows, banners, and more. Also, you can present your team members, testimonials, gallery, or portfolio uniquely with the image masking module in WordPress. So, make sure you are using it correctly on the website.
Avoid Common Mistakes In the Use of Image Masking
When using the image masking module for Beaver Builder, it’s essential to avoid common mistakes to ensure the proper implementation of masks. Here are some of the mistakes to avoid:
- Choose high-quality images rather than low-resolution images for the desired masking effect.
- Keep the masking effects simple and purposeful.
- Make sure that your masking effects are responsive and work well across different screen sizes.
- Maintain consistency in design elements and styles of masked images.
- Make sure that the masked photos look visually appealing with the background.
By following these tips you can effectively utilize the image masking module for Beaver Builder. This will help you create an engaging experience for your website visitors.
Frequently Asked Questions
What is image masking?
Image masking is a technique to edit images uniquely with different masking shapes. It helps to selectively hide or reveal certain parts of an image. It involves isolating specific areas or objects in an image while keeping the rest of the image intact.
How do we use Beaver Builder image masking module?
All you need is to drag and drop the image masking module on the Beaver builder page. Add the desired image and choose from a list of 55+ pre-built shapes. Make custom changes in the width, height, and opacity of the image as per your liking. For more details, check out our step-by-step guide on how to configure the image masking module in beaver builder.
What is the use of image masking feature in WordPress?
The image masking feature in WordPress helps in designing web-page and presenting the images uniquely in different sections. It can be used to showcase the products, team members, testimonials, galleries, or even background images. Explore other features of the image masking module for beaver builder and unleash your creativity with it!
Can I get pre-made shapes for image masking?
Yes, you can get 55+ pre-made masking shapes using the Beaver builder image masking module. Explore these modern shapes to match your website design.
Can I add custom masking shapes to images?
Yes, Xpro addons for beaver builder provide the option to add custom masking shapes to the images.
Winding Up!
Having a website is easy, but the challenge is to make your website stand out! If you know the latest designing techniques like image masking, there is a chance for you to win that challenge. If you are looking for an All-in-one website solution, then Beaver builder addons have it all! Unleash your creativity using the Beaver builder image masking module and escape the ordinary.
In case you are not aware of other unique modules, take a look at the image scroll, and hover card. In a premium package, you’ll get more revolutionary templates, themes, pro modules, and much more.
What are you waiting for? Hurry and make your site unique that reflects your imagination and vision!