How to Install Xpro Addons For Beaver Builder
Xpro addons for beaver builder provide you with FREE exclusive modules that you can customize the way you want. Make your designing process fun and easy using our amazing modules. Let’s walk you through the step-by-step installation guide of Xpro beaver addons on your WordPress site.
There are two alternative methods to install Xpro beaver addons, choose which one is more feasible for you.
Method 1: Installing Through WordPress Directory
Follow these simple steps to install and activate Xpro beaver addons.
Step 1
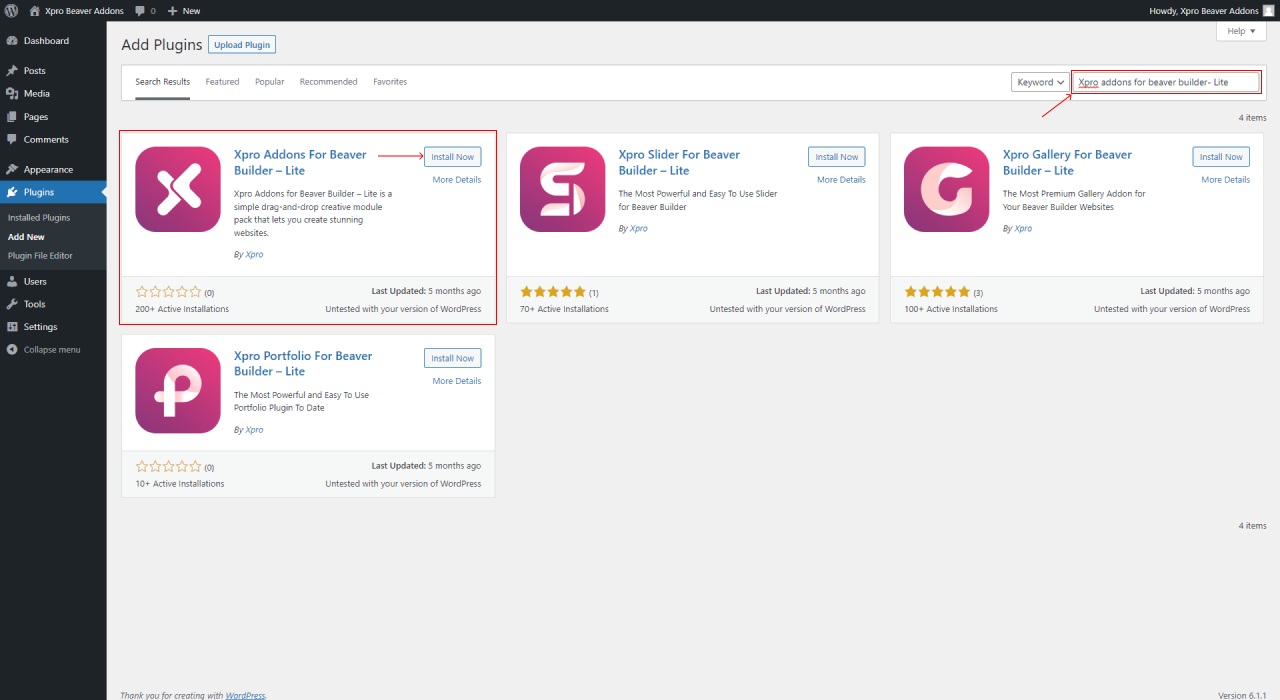
Go to the WordPress Dashboard and the “Plugins” section from the side menu. Click on the “Add New” option.

Step 2
Search for the “Xpro addons for beaver builder- Lite” in the search box.

Step 3
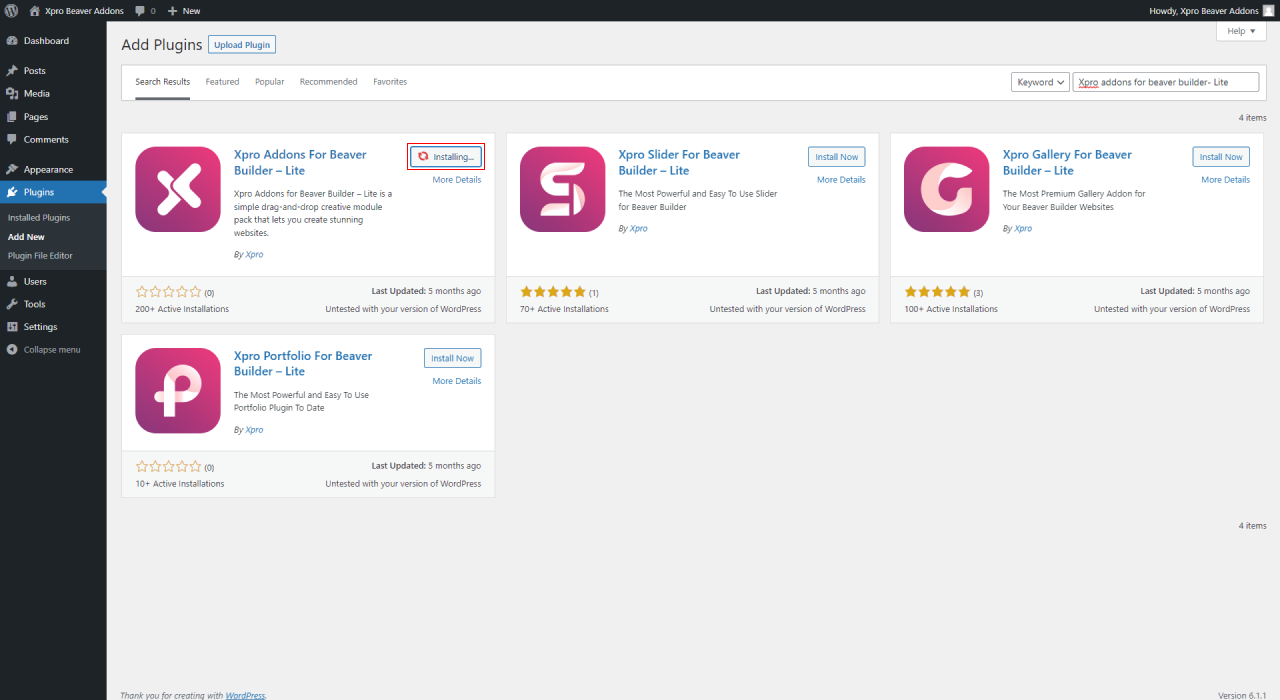
Install Xpro addons for beaver builder and wait for a while. After successful installation, activate it to use for your WordPress site.

Step 4
Make sure the plugin is activated, by checking the “Xpro addons” icon on the side menu of your dashboard.

Method 2: Installing By Uploading a Plugin File
To install Xpro beaver addons using a plugin file, You need to download the plugin file first by going to WordPress. Here are the steps to install the Xpro addons for beaver builder-Lite by uploading a plugin file.
Step 1
Go to your WordPress Dashboard > Plugins > Add New

Step 2
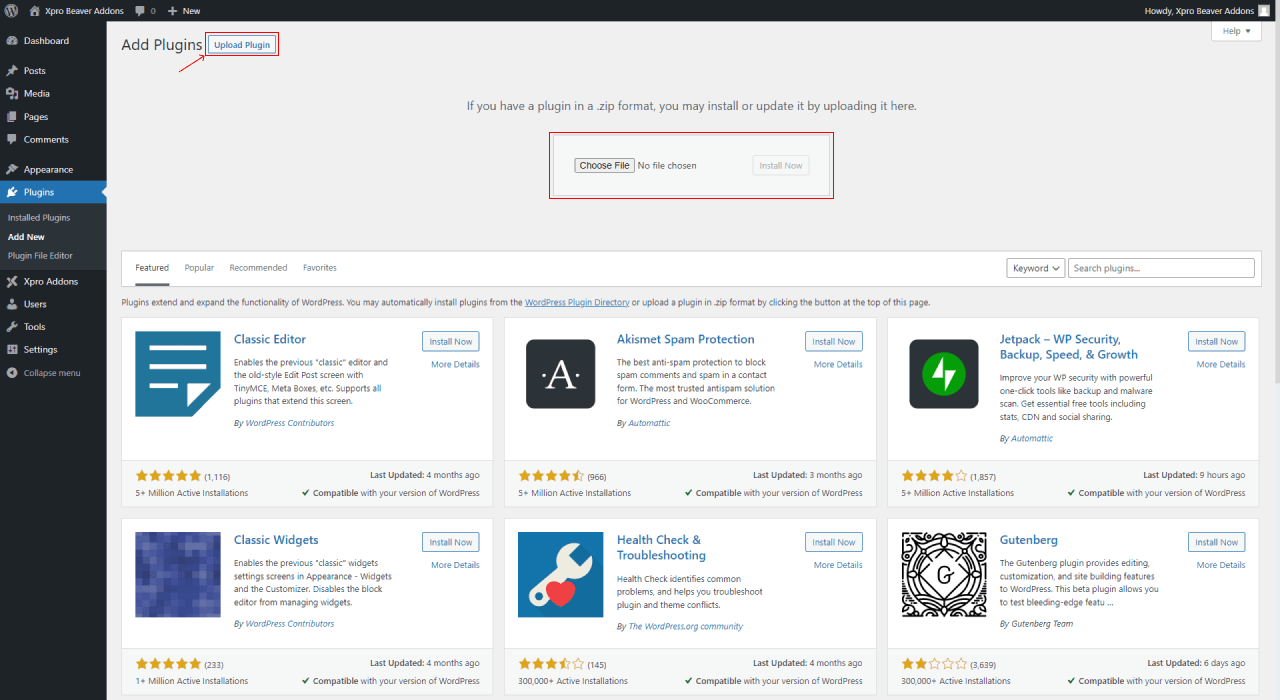
Click on the “Upload Plugin” at the top left corner.

Step 3
Select the zip file of the Xpro plugin from your device and upload it to WordPress to activate Xpro beaver addons.

You might also want to look at our installation guide for Xpro addons for beaver builder- pro.
