How To Add & Configure Heading Module For Beaver Builder?
Do you want to know how you can configure heading module for beaver builder to make your content engaging?
Here we will introduce the powerful heading module to make your text more readable. Headings on websites serve as graphic clue that is immediately obvious to catch the attention. Most of the time readers skip the content and pay attention only highlighted portion of all your content. Headings are not important only for readers but also important for search engines to look for them.
We at Xpro, provide heading module for beaver builder that is fully customizable and FREE of cost. With our heading module, you can easily customize the typography, layout, and effects of individual headings. It comes with dual colors, 100+ Google fonts, stroke effects and 12+ blend modes to make your headings outstanding.
In this guide, you’ll learn how to configure the heading module on your website and use variations with predefined styling.
Requirements
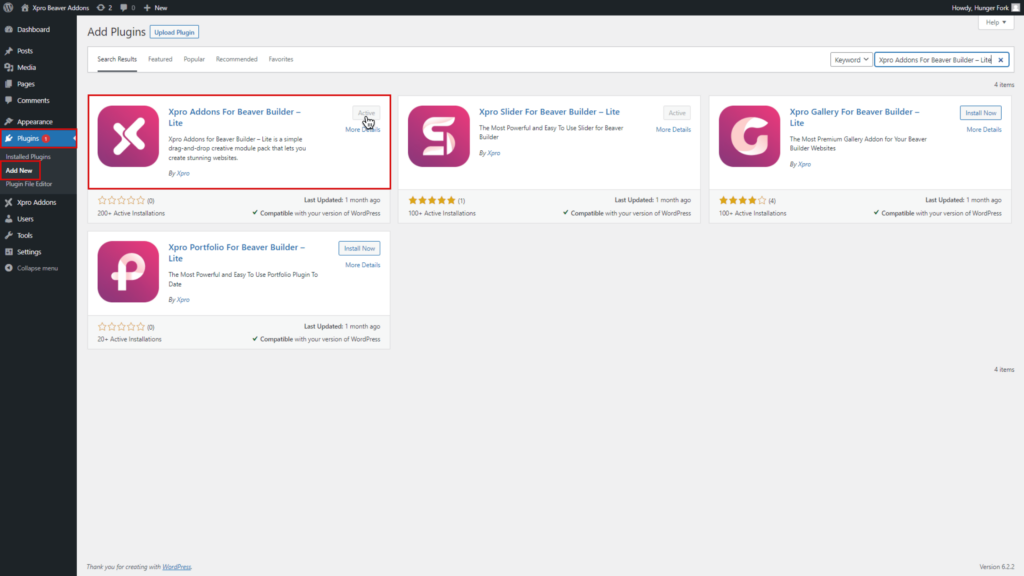
Firstly, you need to install and activate the Xpro beaver builder addons- Lite. For installing this, Click on the “plugins” on the side menu and select “Add new.” Once done, type “Xpro Addons” in the search bar located in the top-left corner. After this, you’ll be displayed with multiple search results, as shown in the image below:
How to Enable Heading Module For Beaver Builder?
To enable the heading module for beaver builder, follow these steps:
Step 1
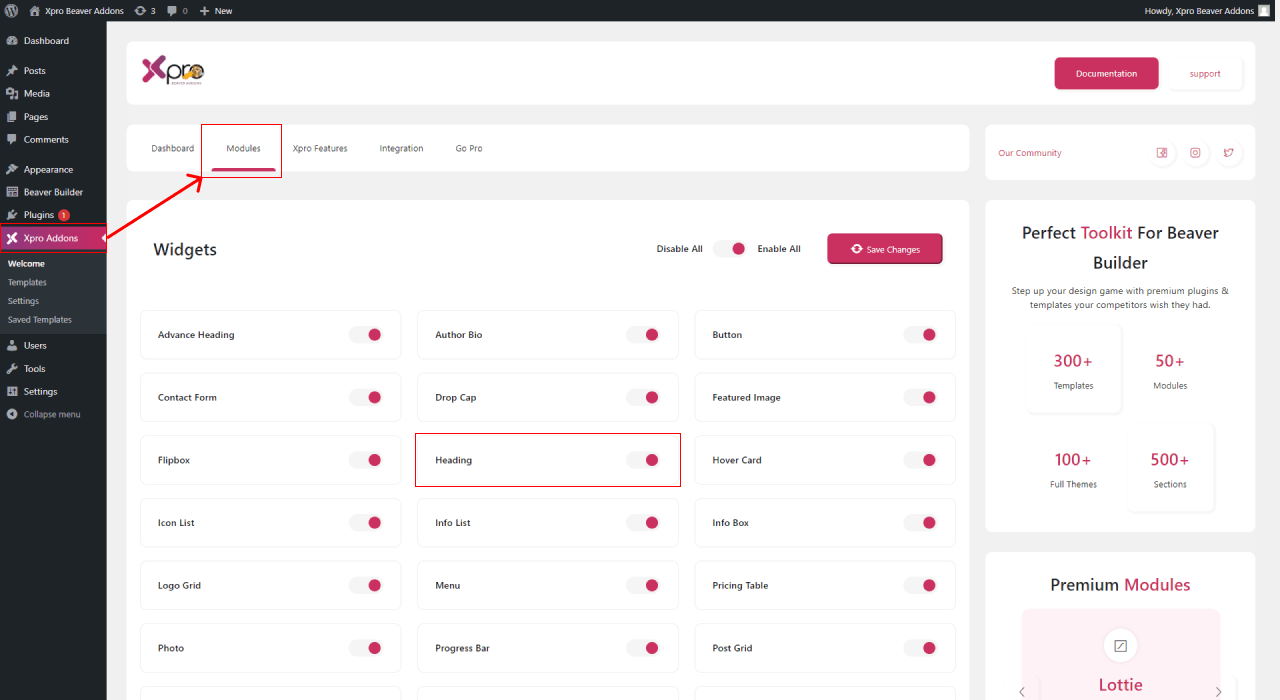
Click on the Xpro Addons option available on the WordPress Dashboard Menu and then click on the Module tab and find the heading module. Toggle the button “ON” to enable it.
Steps to Add & Configure Heading Module for Beaver Builder in WordPress
Follow these given steps to configure our heading module to highlight your text amazingly.
Step 1: Add New Page
To add a heading on your website page, go to your WordPress dashboard and click on the “pages” section from the side menu. Click to “Add new page” at the top left.

Step 2: Drag and drop the heading module
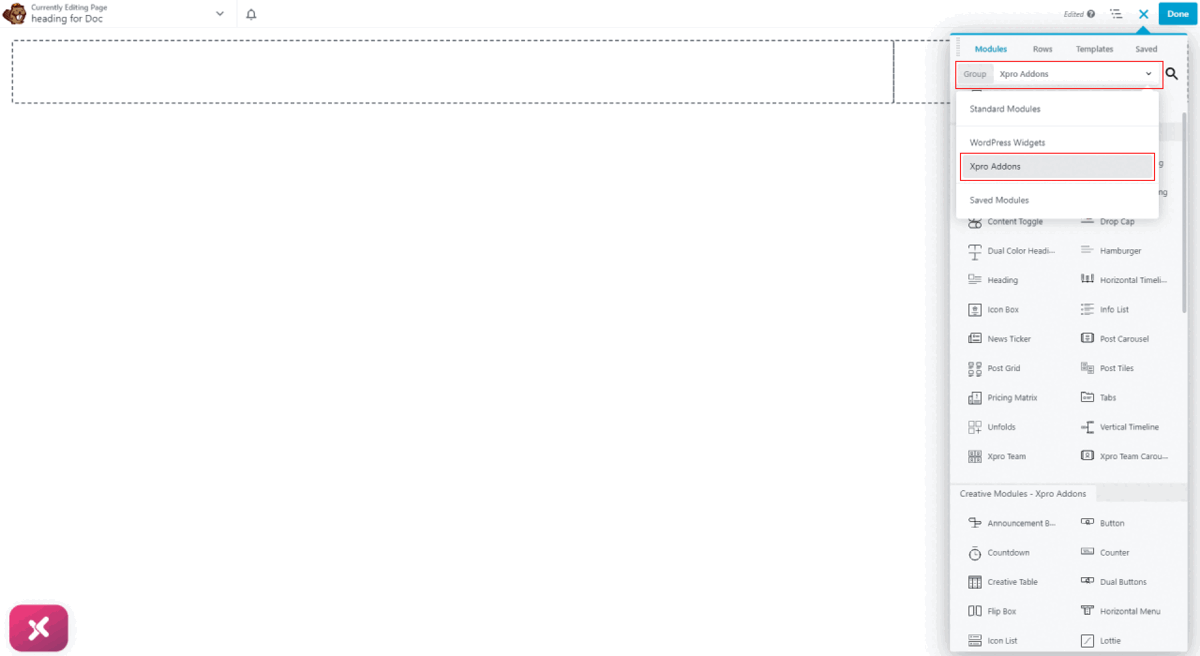
On the Beaver Builder editor page, click on the “+” icon to drag the heading module and see the side menu. As you can see in the module section on the side menu here you will select the Xpro addons after clicking on the standard module. Drag the heading module and drop it on the editorial page.
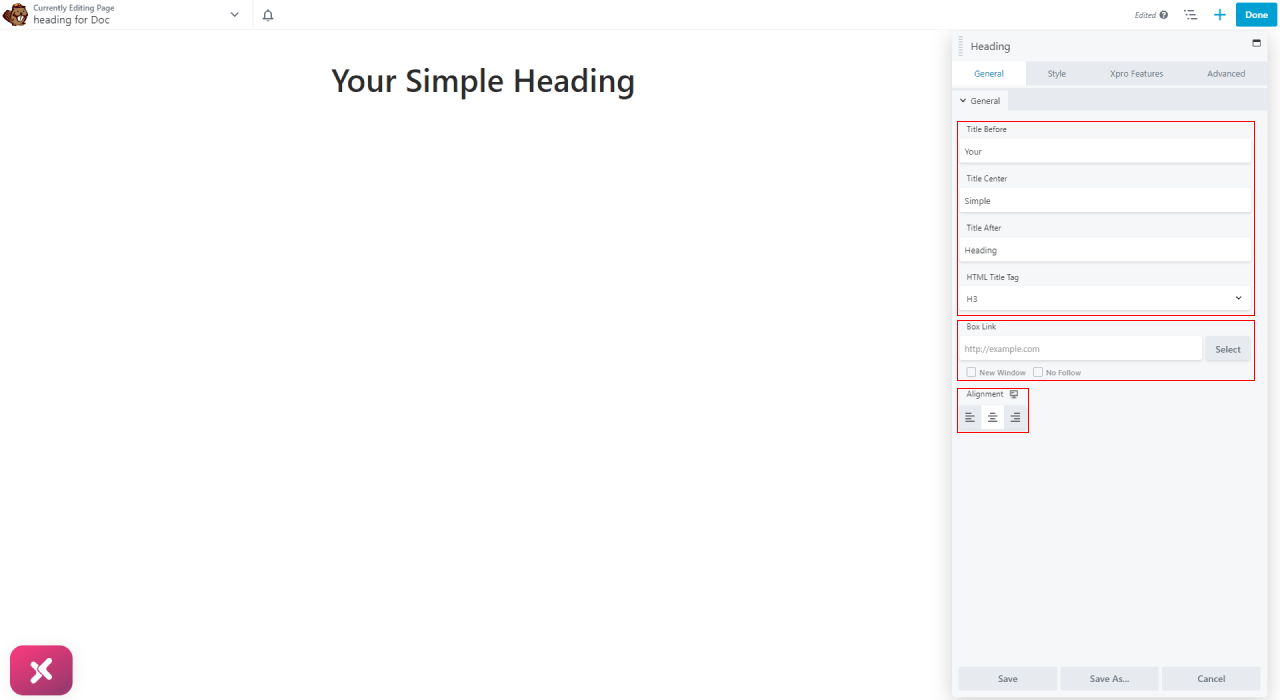
Step 3: General Settings
The General tab contains the following fields.
- Go to the Content section and enter the text for your heading. You can set the Title text in three different fields (before, center, and after).
- Then, you will select the heading level (H1, H2, etc.). This can automatically insert the correct heading tags into the rendered page.
- Add a URL if you want the heading to contain a live link. You can also insert a link for assistance in creating the URL to another page on your website.
- And then you can align your heading on your web page where you want to align.
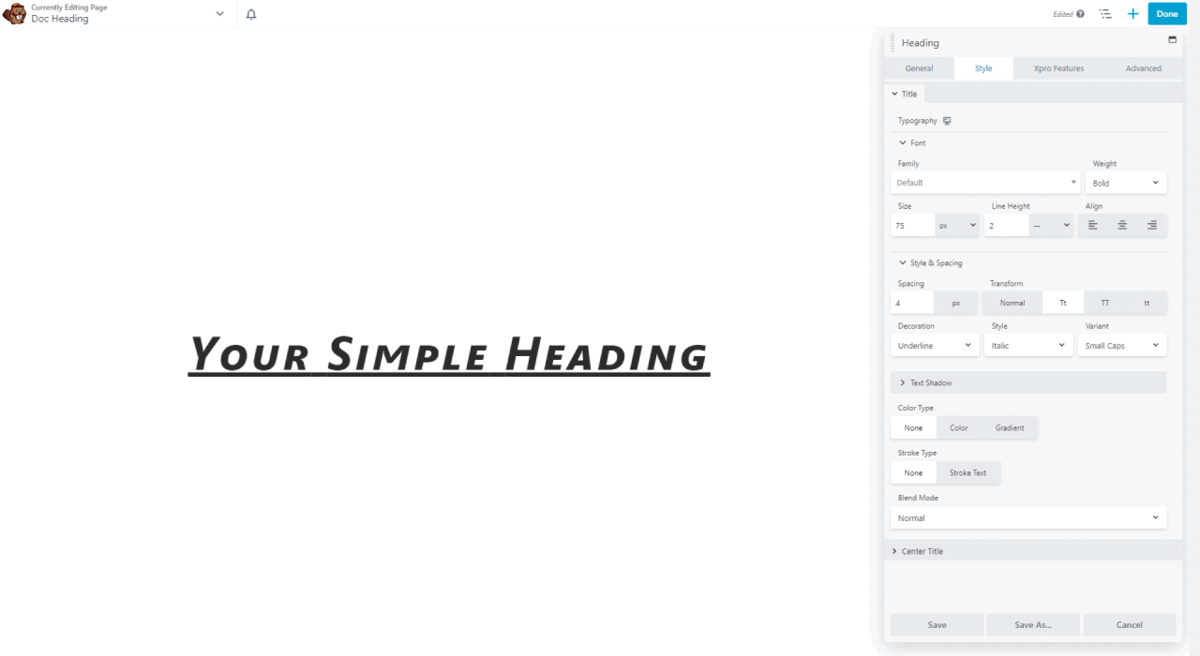
Step 4: Style Settings
You can style your headings and highlight them to grab the attention of visitors with typography, color type, stroke type, and blend mode.
Our heading module style tab contains the following settings:
- Typography section: This is the standard Beaver Builder Typography section, with settings for the font family, weight, size, line height, alignment, spacing, transform, and so on.
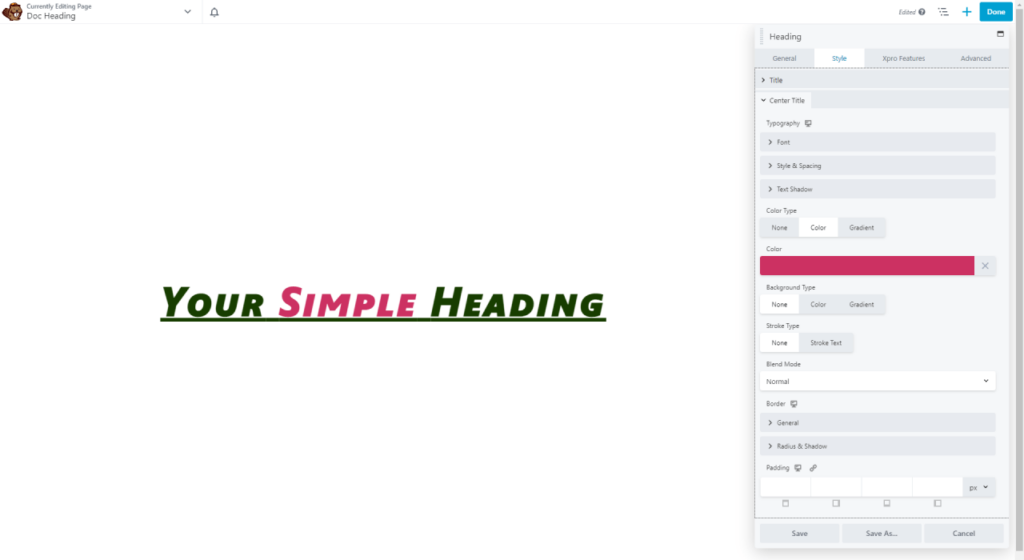
- Color type: Default heading color is usually specified in the theme, but you can choose a custom color here and can apply the gradient.
- Stroke type: You can apply stroke on your headings to highlight them and increase the readability.
- Blend mode: You can also blend your headings to add different styling options by using an overlay, darken, saturation, and other blend modes.
Bonus Point? In this section, you can style your center title to highlight your brand name and make it unique by adding a background, adding text shadow, applying a border, and assign padding.
Best Heading Module For Beaver Builder:
That’s all from our heading module for beaver builder. You can use them sparingly on a webpage to capture the essence of the content in a single phrase. It’s easy to practice heading modules on wordpress.
If you want to enjoy more features to customize your headings, you might check our advance heading module for beaver builder.
So let’s practice our Xpro heading module and do ourselves a favor after using them.
If you have any questions in relation to the WordPress heading module for beaver builder feel free to submit your query in the comments below.
OR, If you want to explore and add more attractive beaver builder modules then check our complete list of beaver builder modules and download now.