How to Configure the Beaver Builder Countdown Timer
Are you looking for a way to captivate customer attention during the sale season? Look, no more with the best Beaver builder Countdown timer module. This module lets you show new events, product launches, sale duration, new campaigns, and much more. This premium module lets you design a neat and sleek countdown timer with unique styling options.
In sale season, you can set a countdown to inform customers that there is a time limit to grab that specific product. Countdown timers are crucial to create a sense of time urgency and push customers into making impulsive decisions that skyrocket your sale-growth.
The Beaver builder countdown timer module is highly user-friendly that lets users drag-drop the timer and provides all necessary customization options including 4+ separator styles, 3+ column layouts, and different action types to design the timer the way you need.
Requirements
You need to install and activate the Xpro beaver builder addons- Lite and then get a premium version of Xpro Beaver Builder Addons. If you already have the plugin installed, just make sure the countdown timer Module is ‘Enabled’, so you can find it in the Beaver Builder page editor.
Here is how you can enable the modules for beaver builder.
How to Enable Beaver Builder Countdown Timer?
To enable the countdown timer module in beaver builder, follow these steps:
Step 1
Click on the Xpro Addons option available on the WordPress Dashboard Menu.
Step 2
From the Xpro Addons Dashboard, click on the Module tab, find the countdown timer Module, and finally, toggle the button to enable it.

Steps To Design and Configure Beaver Builder Countdown Timer
Follow these simple steps to utilize the Xpro Beaver Builder countdown timer module fully.
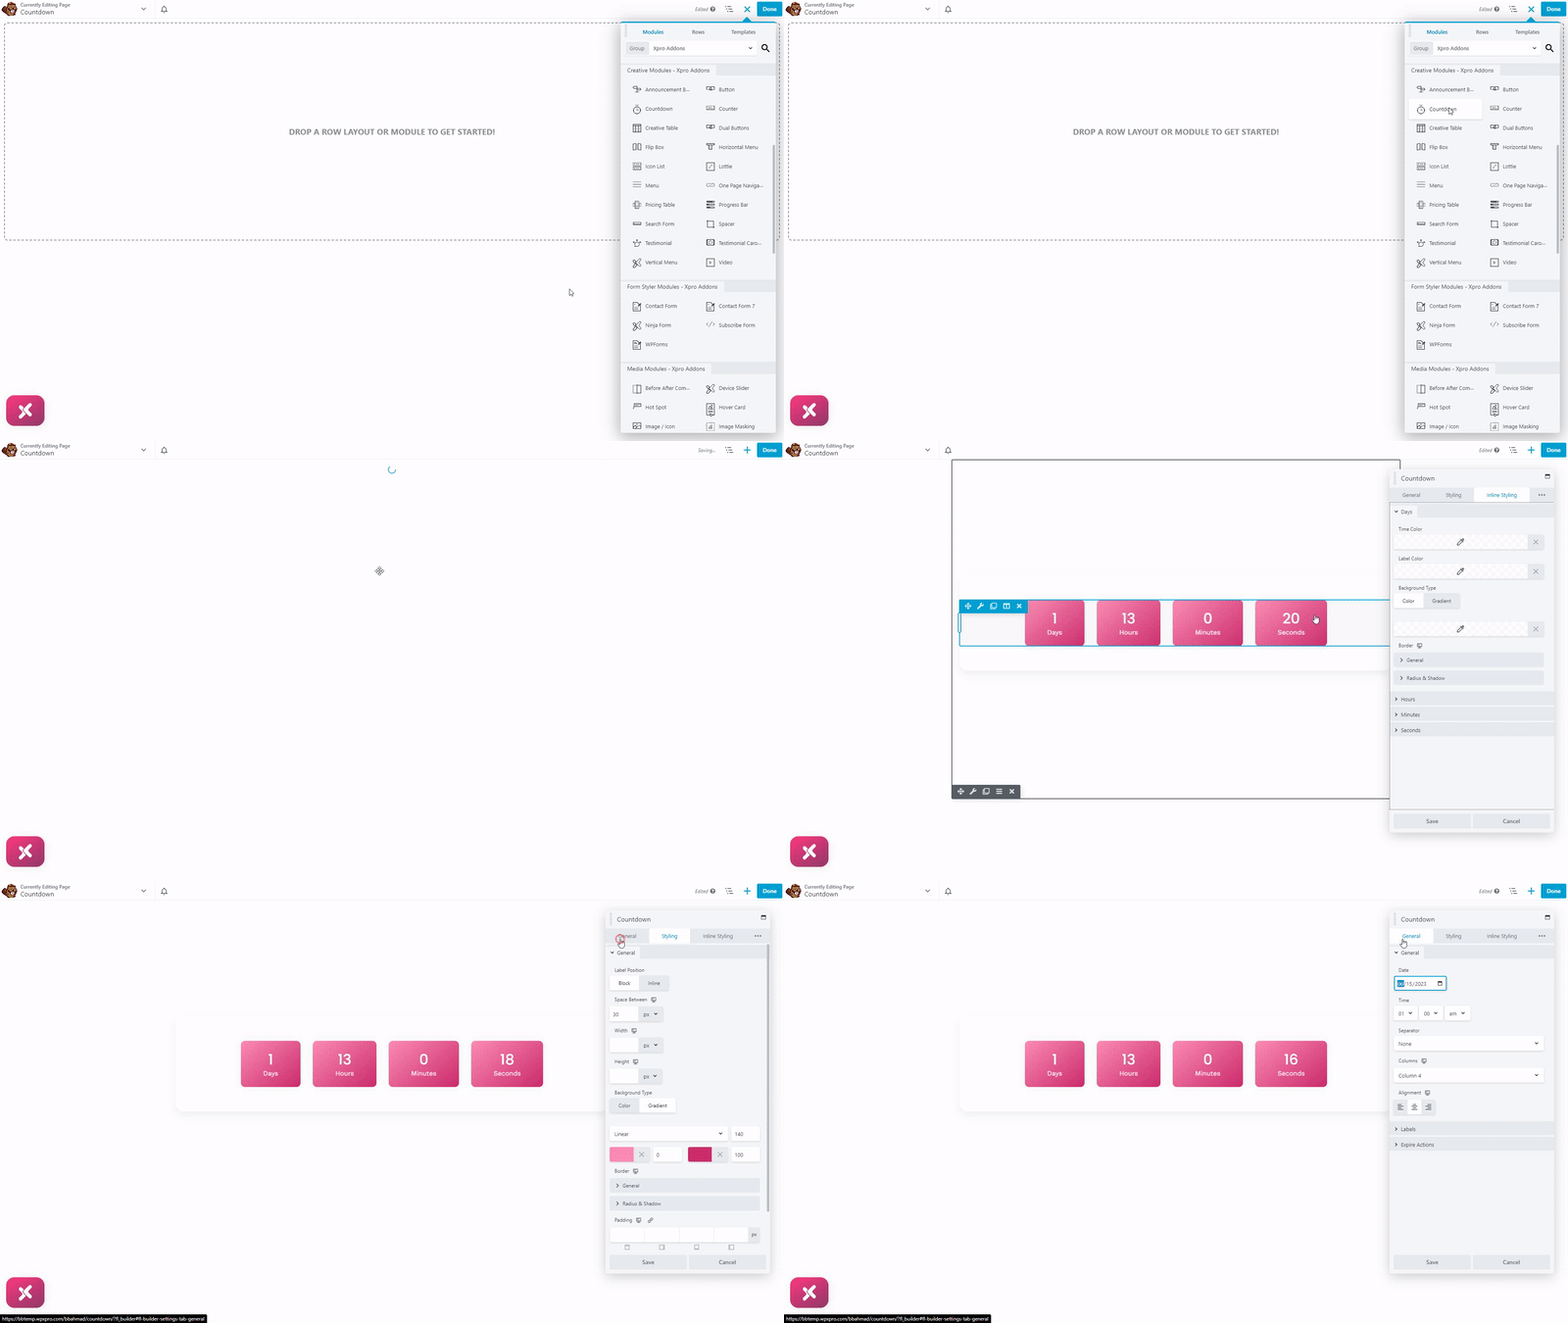
Step 1: Drag and Drop the Countdown Module
- Edit the Beaver builder and select Xpro addons from the side menu.
- Drag and Drop the countdown timer module in beaver builder on your selected area. It will be shown in the beaver builder editor.
- This is the default look of our Xpro Beaver builder countdown timer module.
Step 2: General setting
Add date & time
- Add the date and time to the countdown timer.
- Edit the separator, and choose among 5 separator styles.
- Add a column layout that perfectly suits the countdown timer design. (4 columns)
- Adjust alignment to meet the specific requirements of a countdown timer.

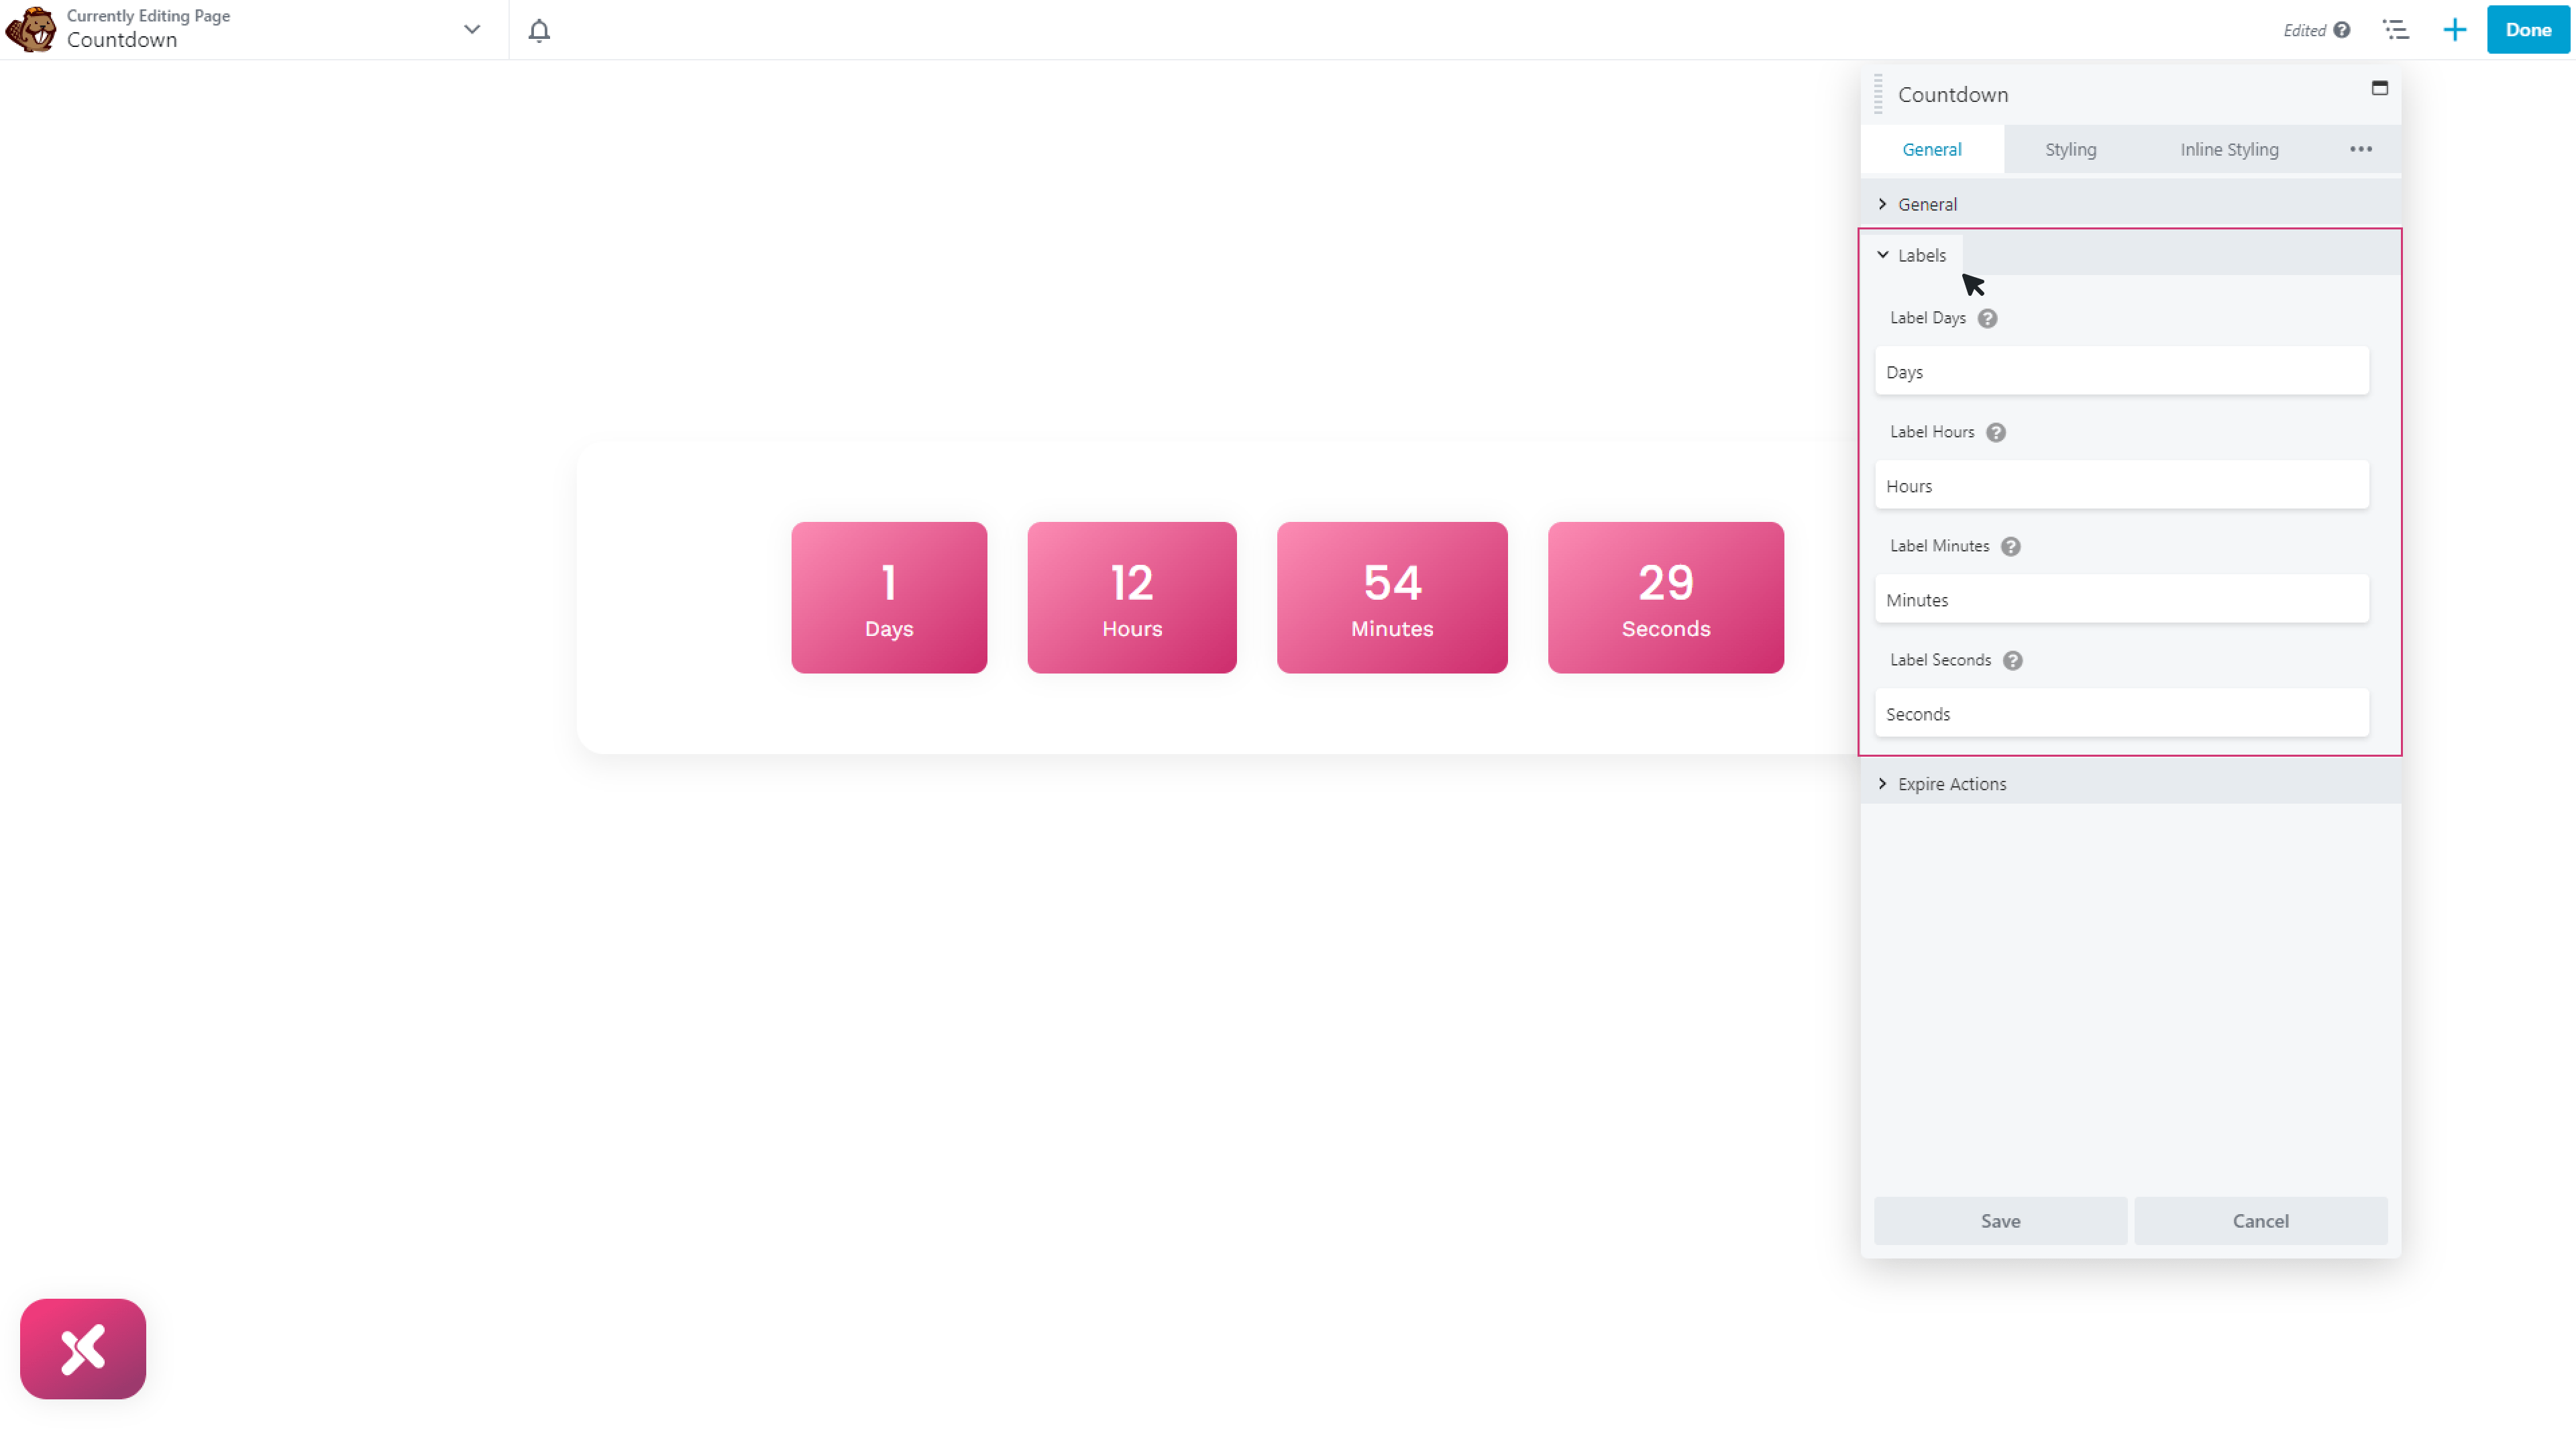
Labels
Set the label for days, hours, minutes, and seconds. This module gives you total flexibility to choose and add labels the way you want.
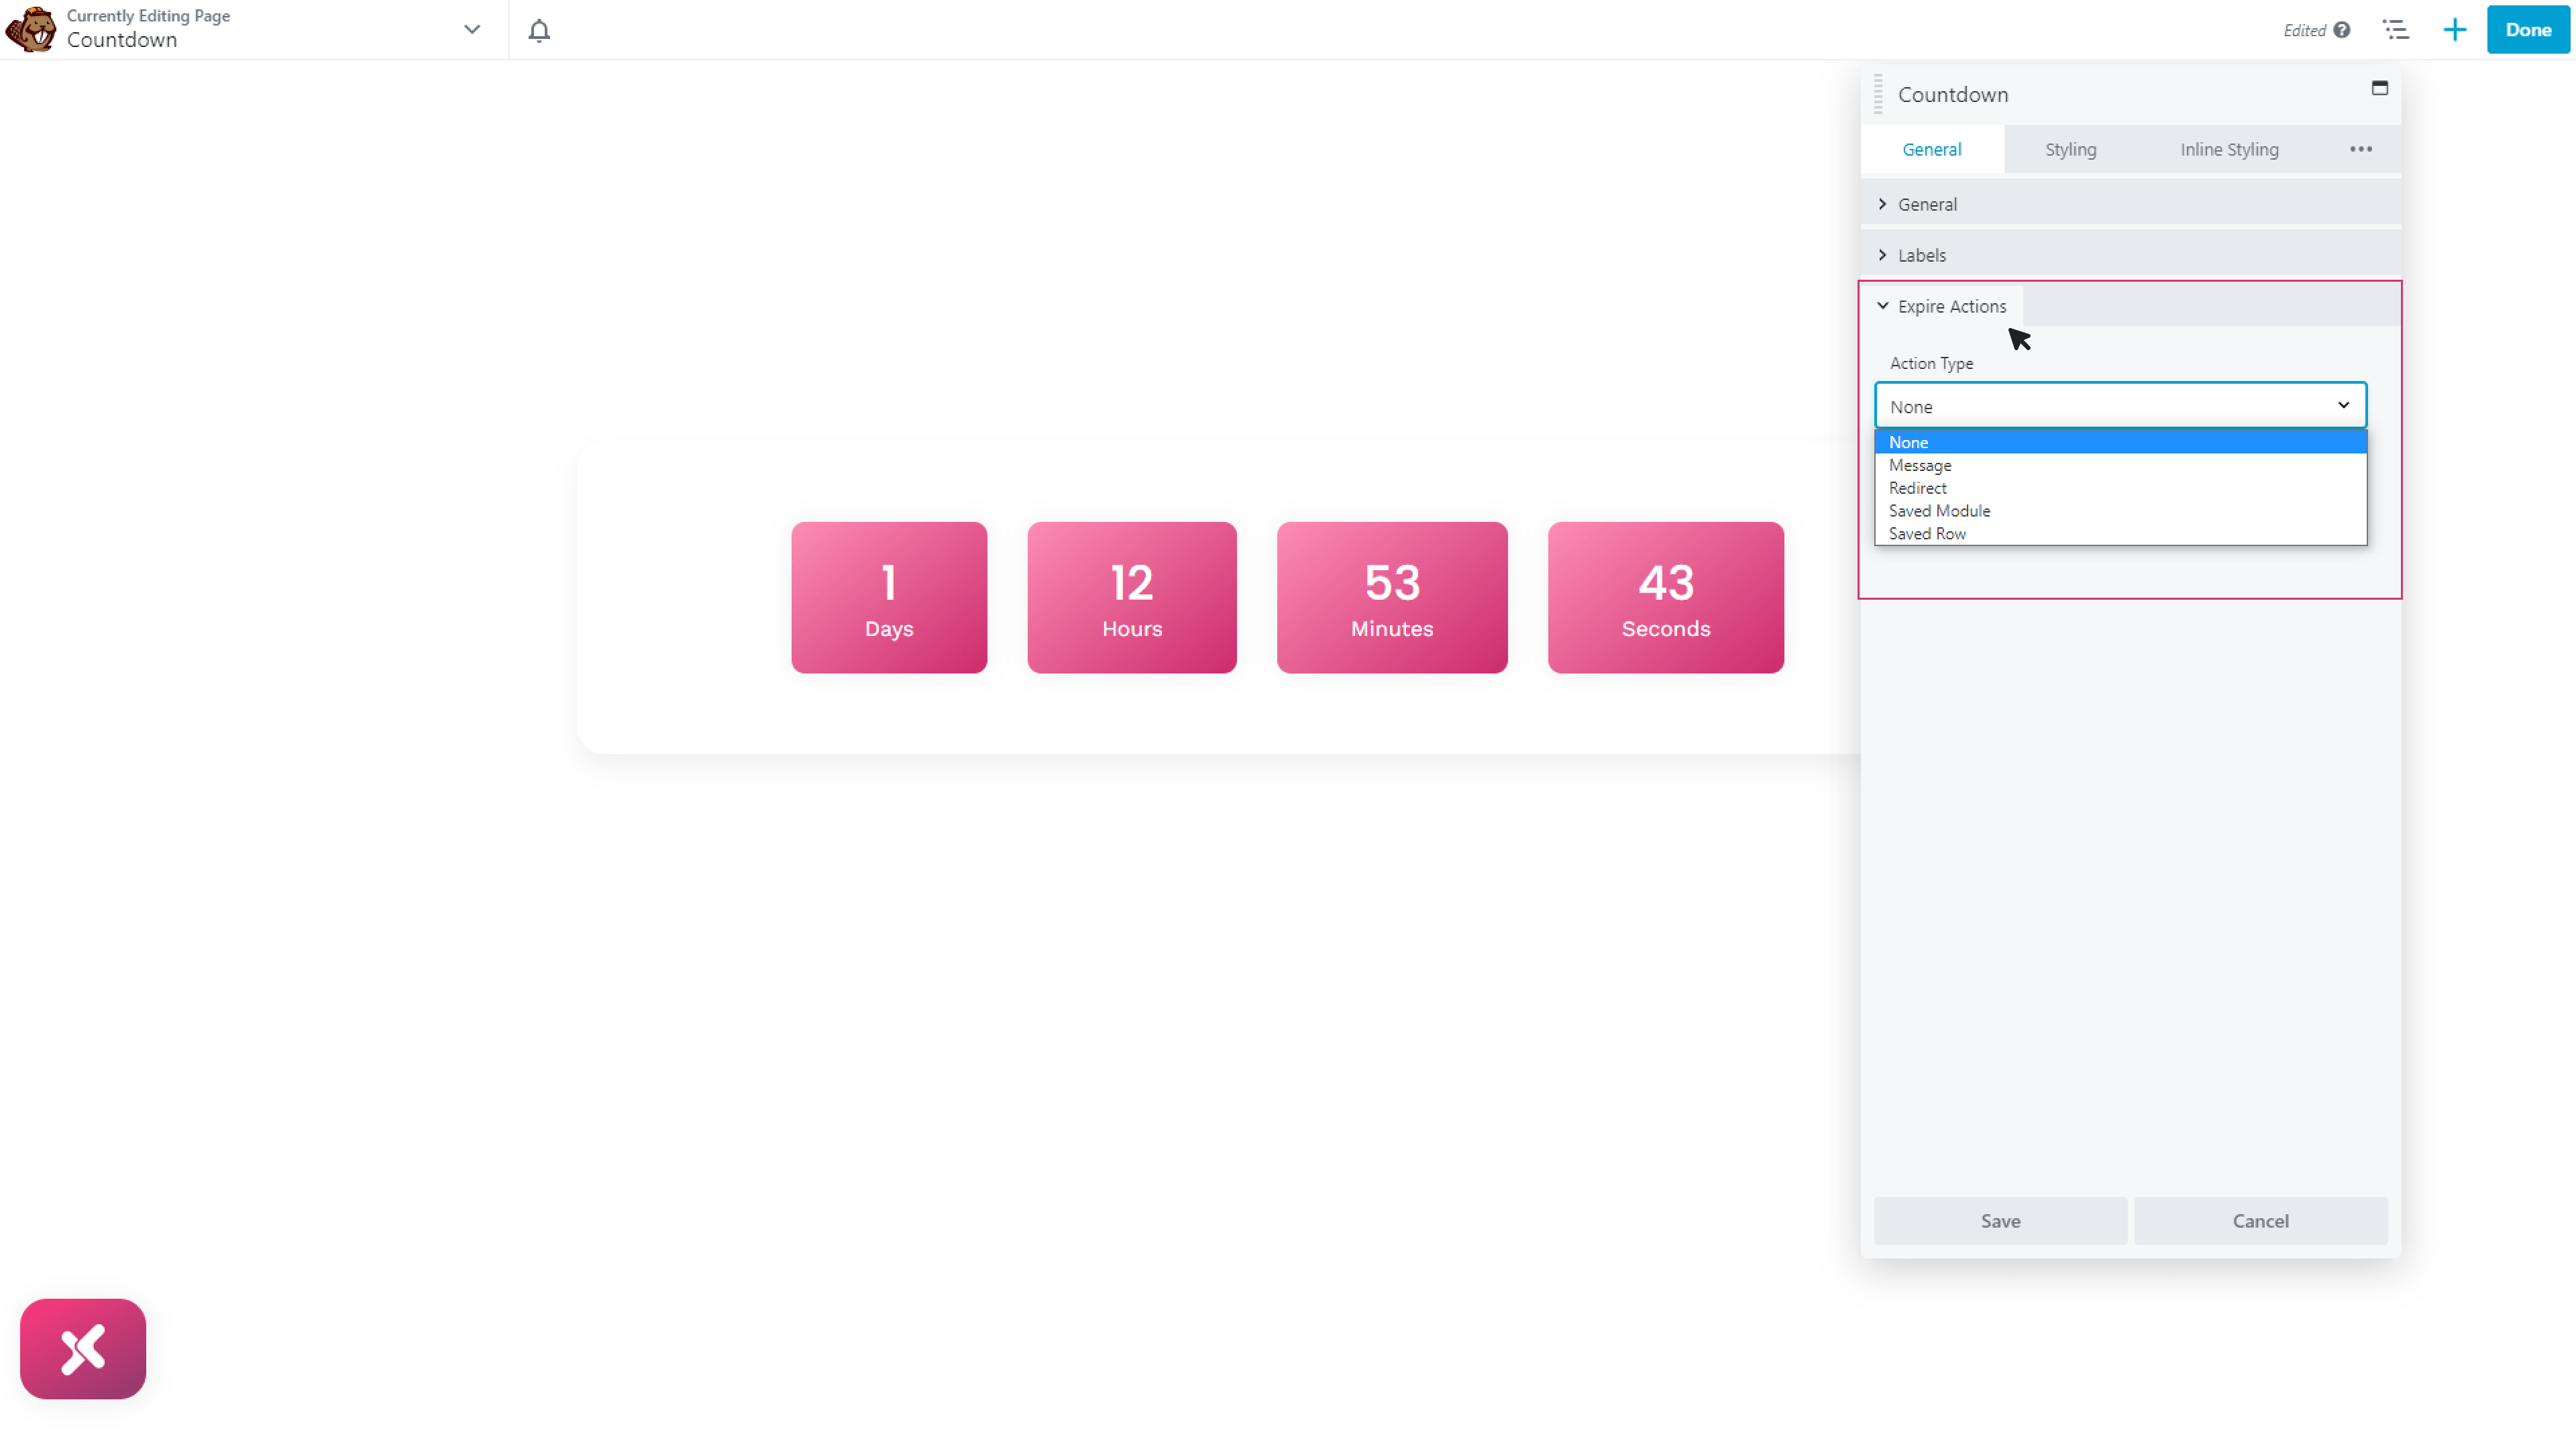
Expire Action
- You can choose the action type (none).
- Add a message when the countdown ends. (End Message)
- Add a link to redirect customers to the sale page. (Redirect)
- Choose the saved module and saved row.
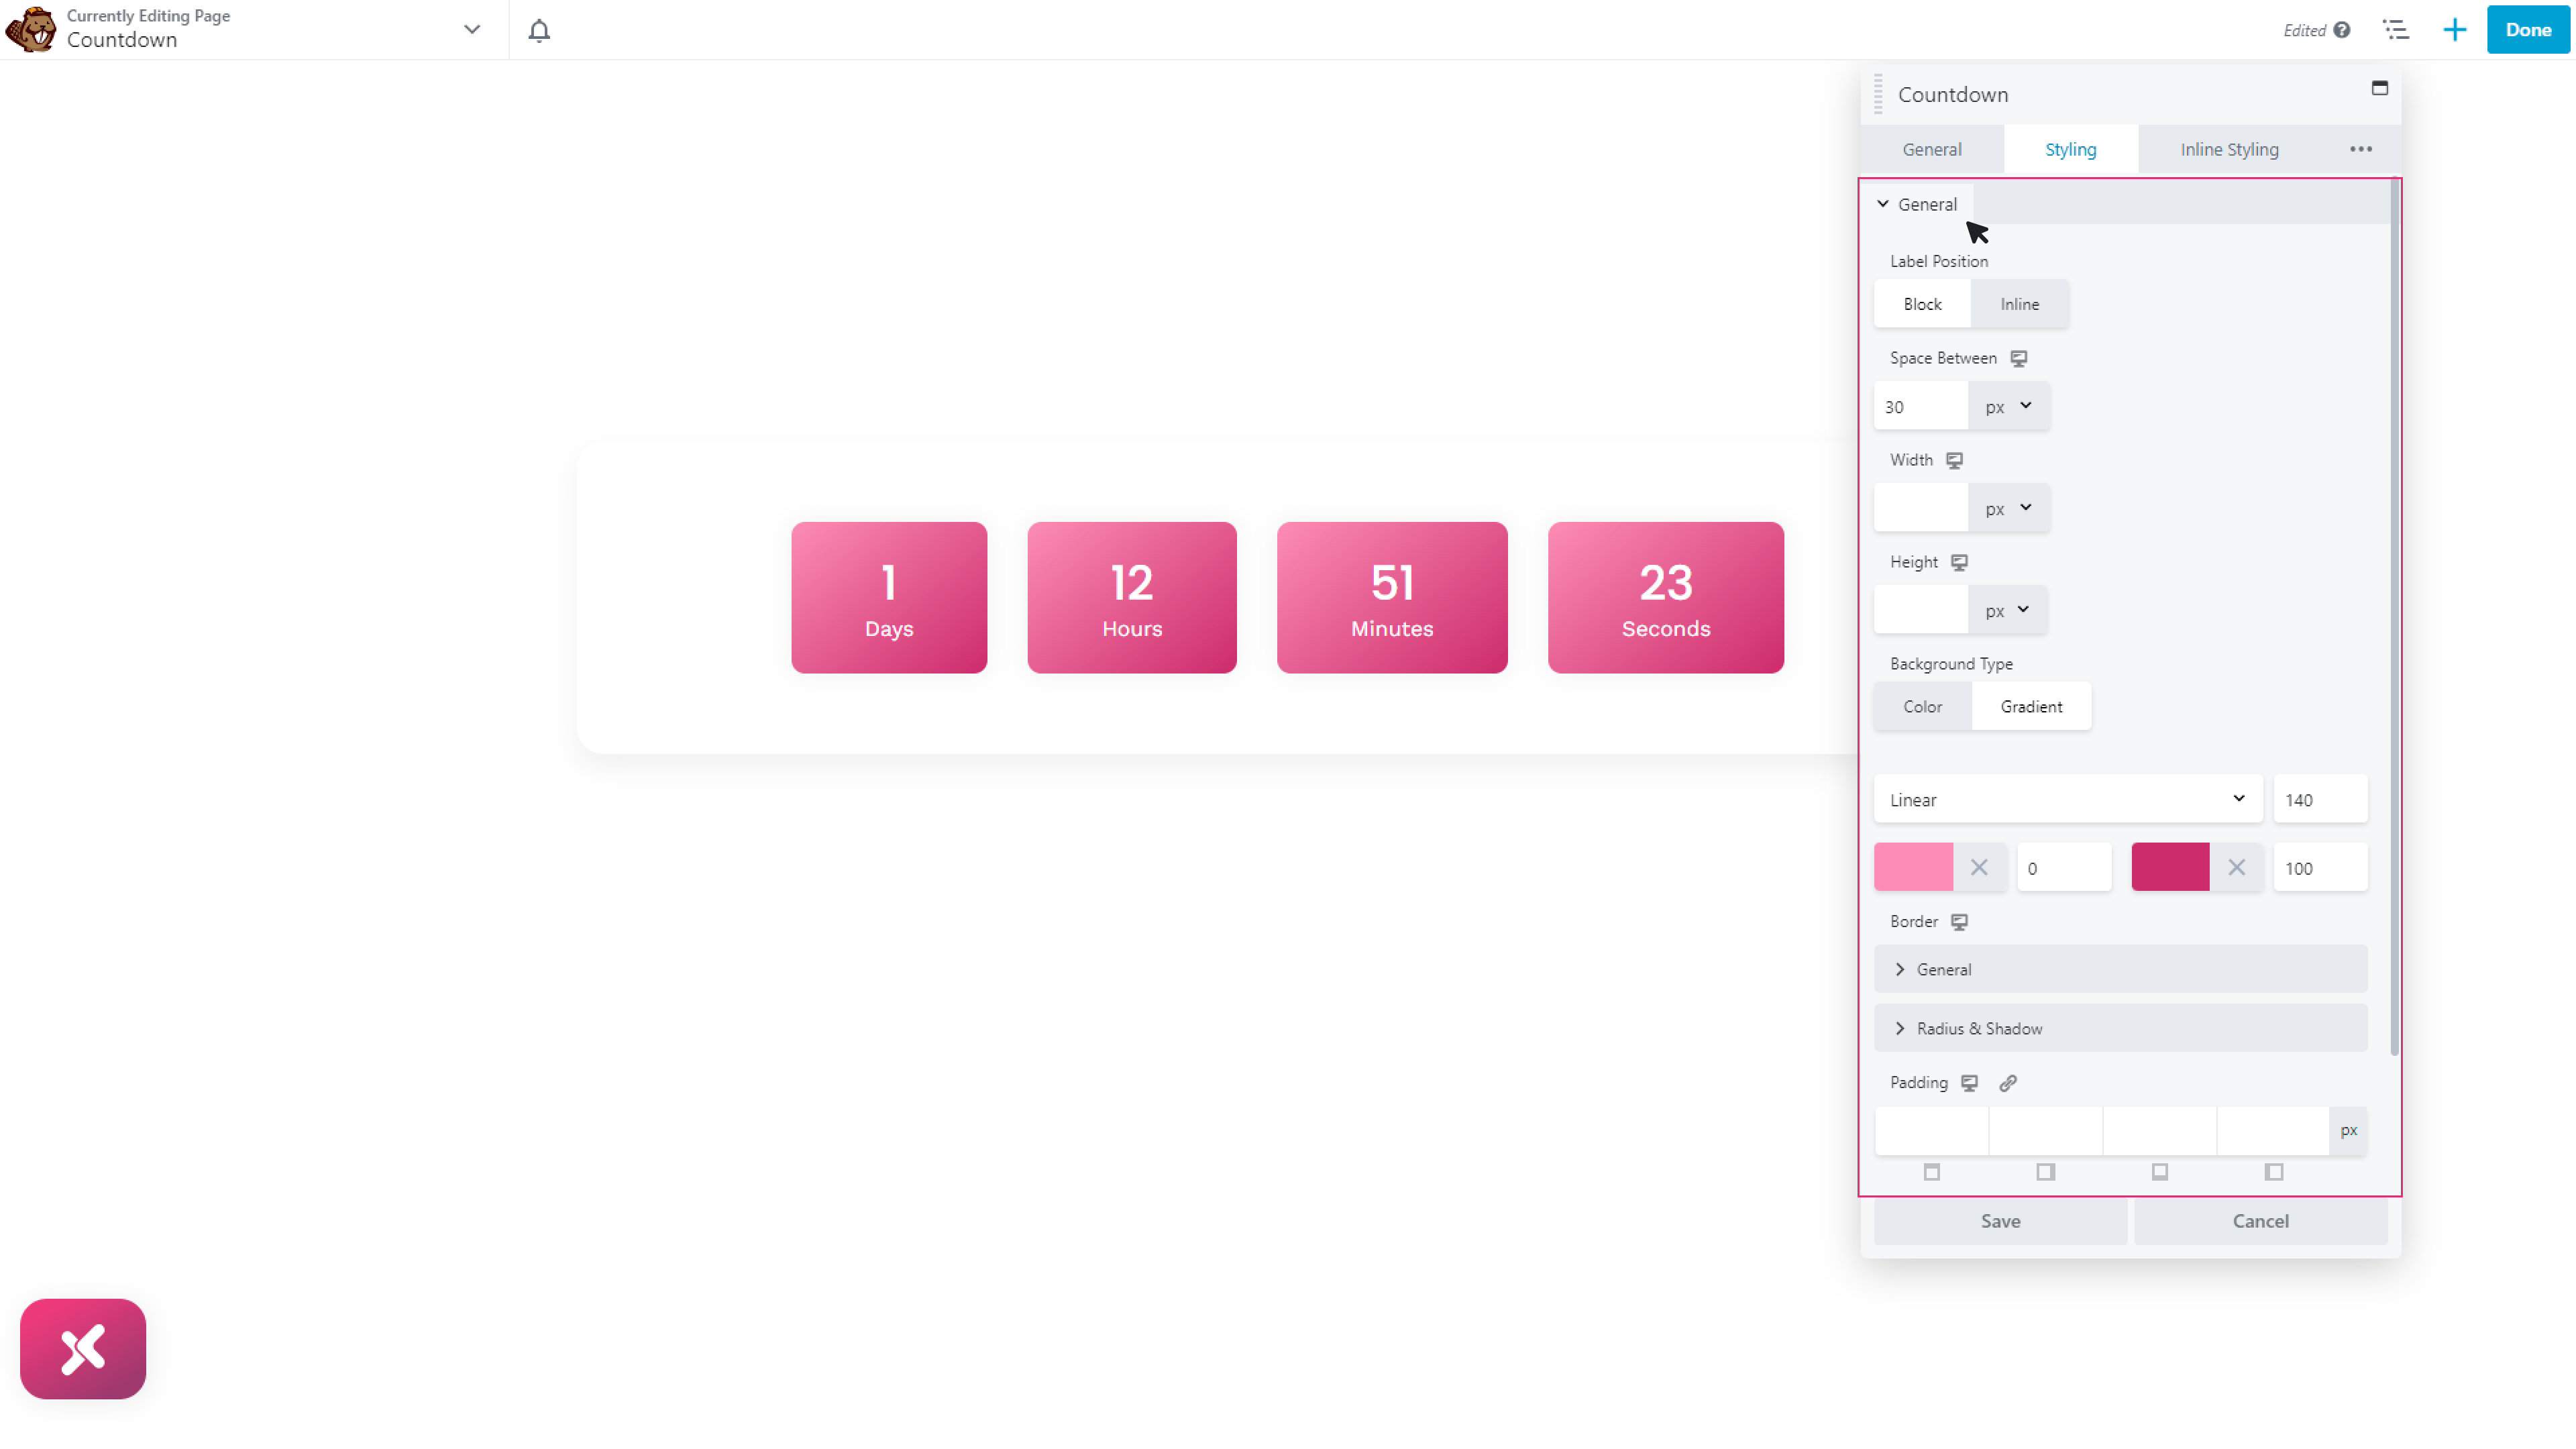
Step 3: Styling beaver builder countdown timer
General styling
- Choose label position block/inline.
- Adjust the space between the columns.
- Adjust width and height.
- Adjust the background type, and give the background color. In gradient background color, choose linear or radial.
- Add a border and give padding.
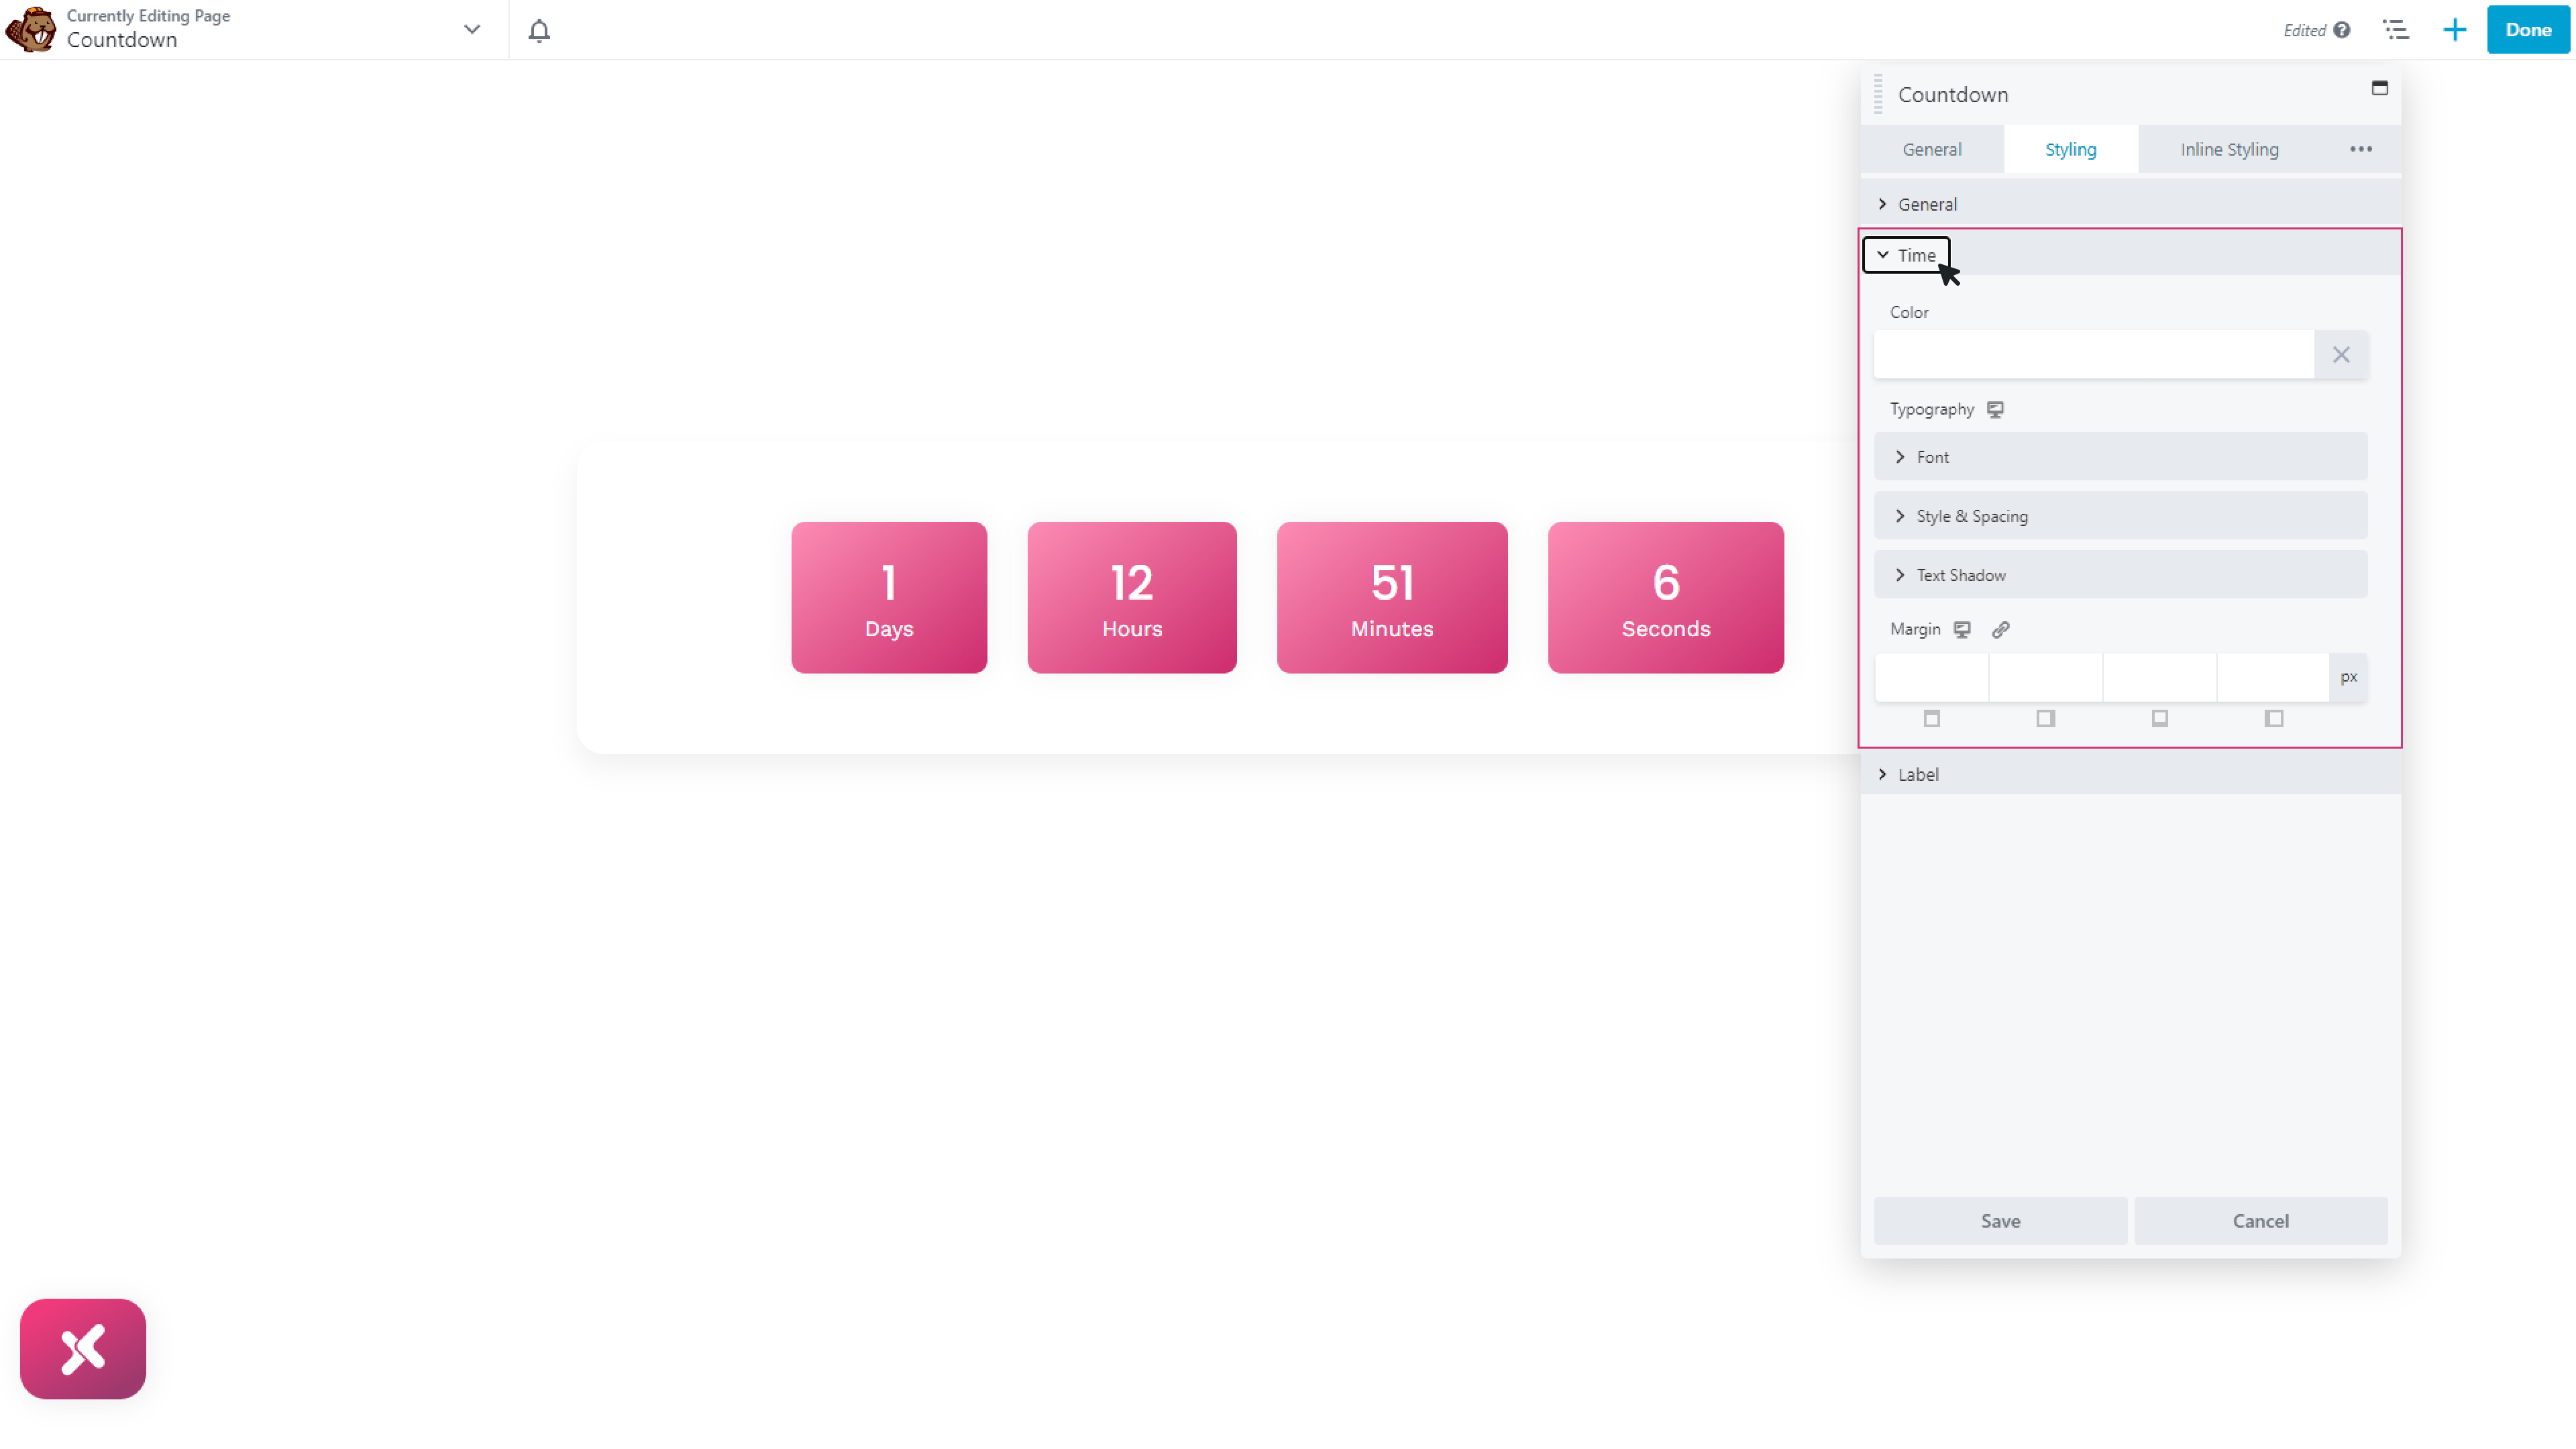
Style Time
- Add color to make the time section attractive.
- Add and edit the typography
- Give margin for the perfect shape
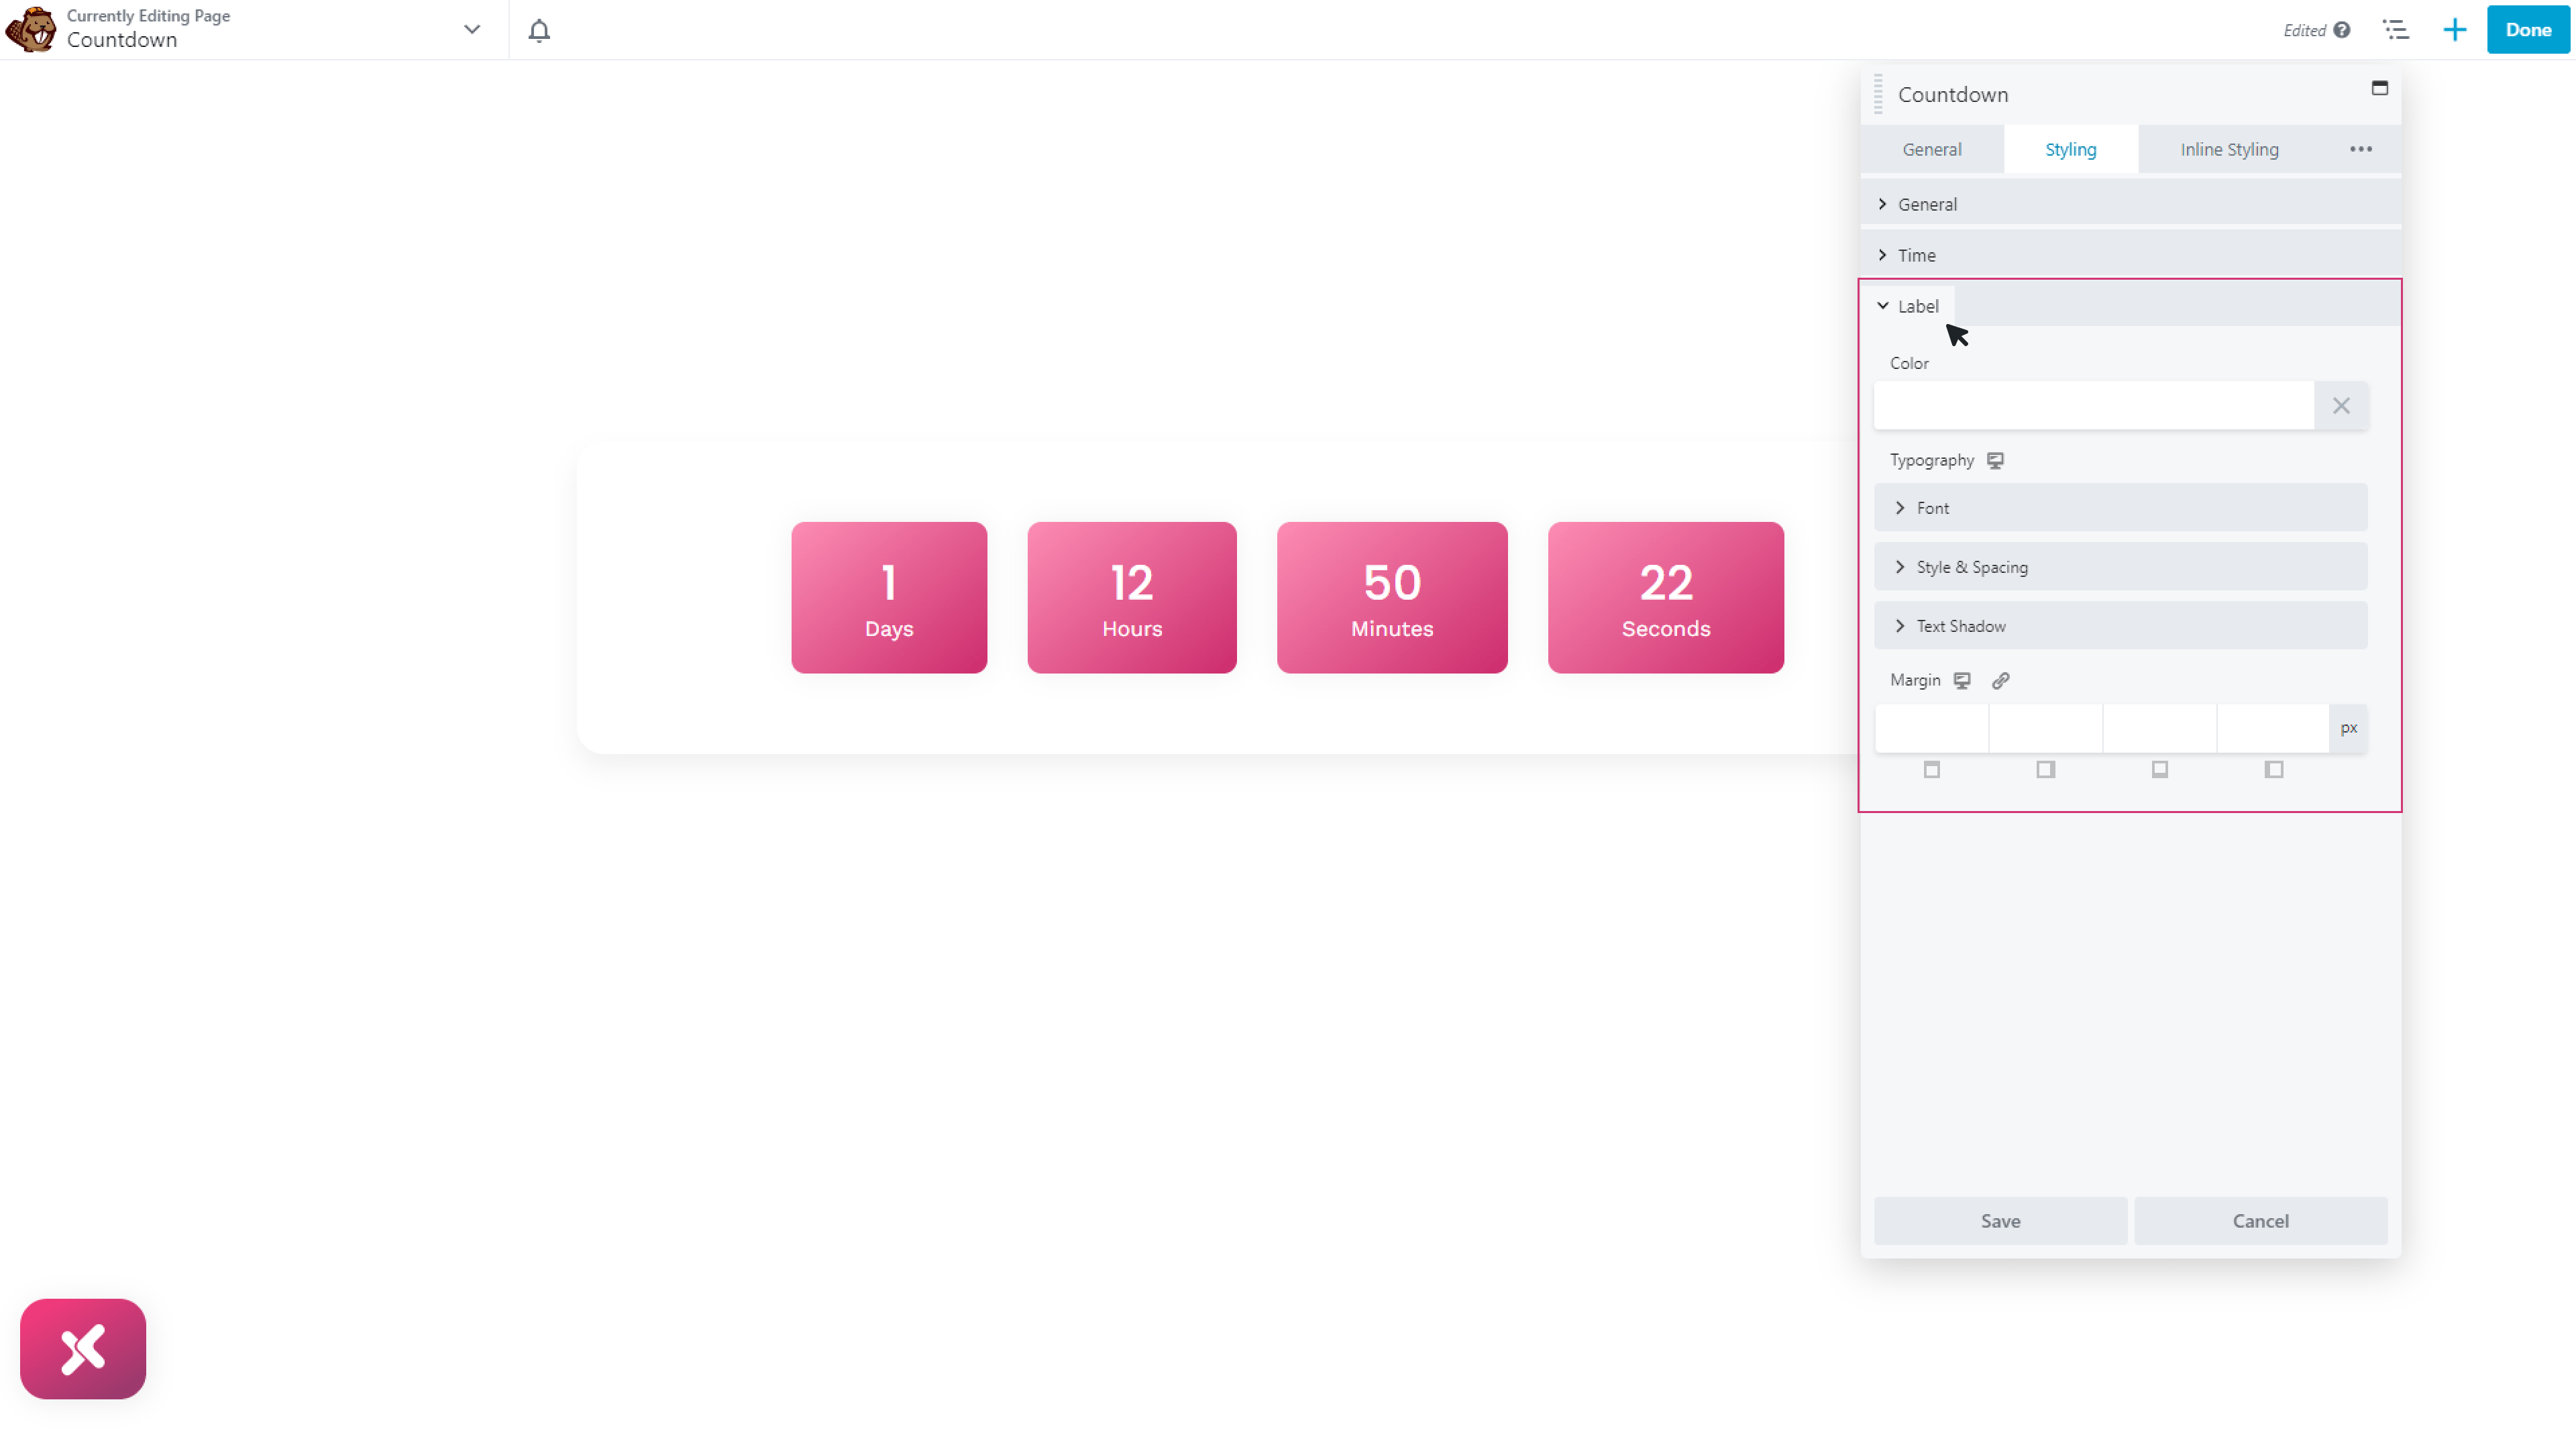
Style Label
- Add different colors.
- Edit typography
- Give margin to the label
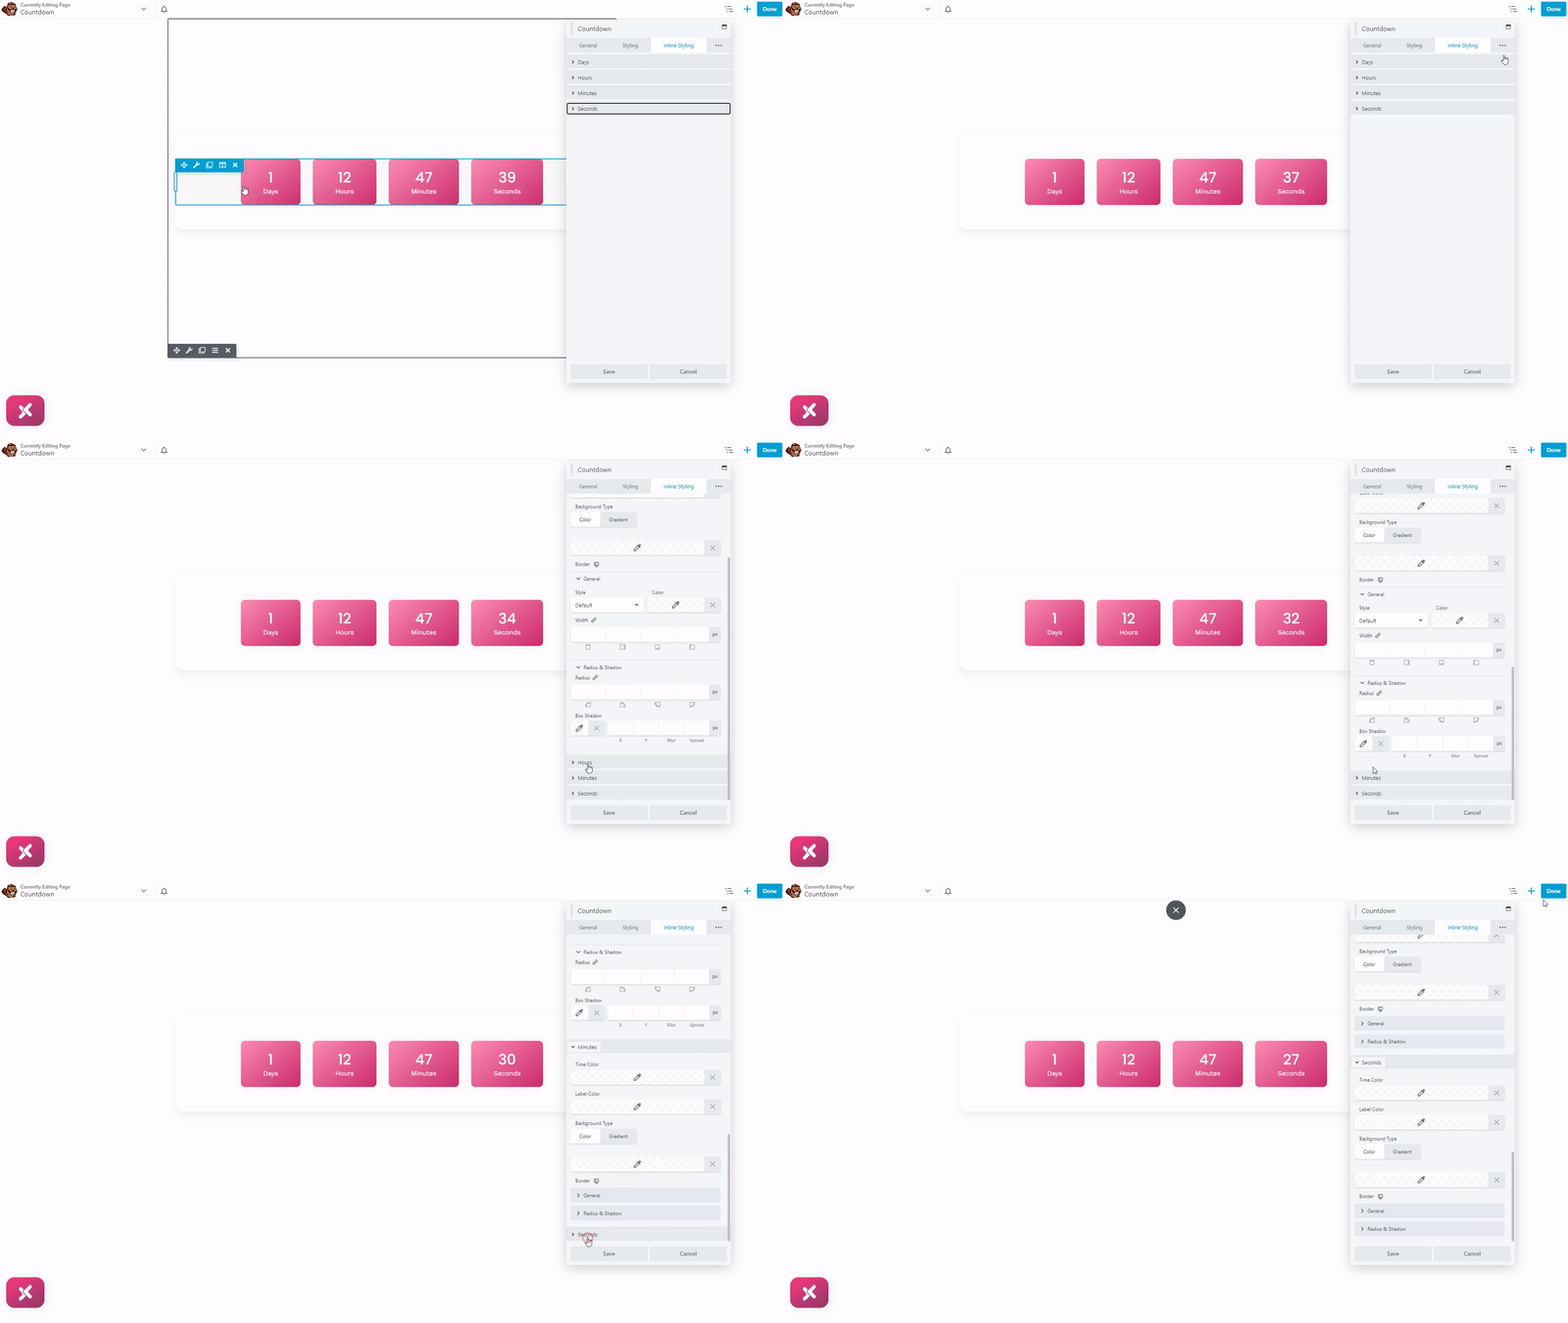
Step 4: Inline styling
Days
- Time Color
- Label color
- Background type
- Border
Hours, Minutes & Seconds inline styling
You can easily edit hours, minutes, and second inline styling like you did in the days section, it’s easy and fun!
Best Beaver Builder Countdown Timer Module
That’s all from our versatile Beaver builder countdown timer module. With this module, you can showcase a countdown timer on your website to encourage visitors to take immediate action. You can motivate users to make a purchase or sign up for a promotion by setting a time limit. The fear of missing out (FOMO) can drive the user to act quickly, increasing conversion and sales.
We hope now you fully understand the functionality of the Bevaer builder countdown timer. It offers complete flexibility over styling options, custom typography, selecting different separator styles and layouts to customize timer appearance, and configuring different actions after the countdown ends.
