How To Purchase Filterable Gallery For Beaver Builder
In case you’re looking for ways to sort your images into categories. The Xpro filterable gallery for beaver builder allows you to categorize tons of images in groups by adding filters. Add multiple filters to one image to make it visible in different sections of the gallery.
Create an attractive and eye-catching image gallery by adding different overlay styles, hover effects, color contrast, and typography. Choose from our diverse collection of pre-built pop-up styles and make your image preview more unique. With the pro version of the filterable gallery, you can make your album gallery responsive for different devices and can also enable dropdown with the filters.
There are multiple other features that you can use to create an enticing beaver builder gallery by unlocking the premium version. Let’s find out how you can purchase and build a custom filterable gallery for beaver builder and make your images easily reachable for your users.
Requirements
To get ahold of all the features like animations, filters, and effects, first, you need to install and activate Xpro addons for Beaver Builder- lite, Xpro gallery for beaver builder- lite, and then purchase a pro version of the filterable gallery.
Steps to Purchase and Install Filterable Gallery
Follow these given steps to purchase and install the pro version filterable gallery for beaver builder.
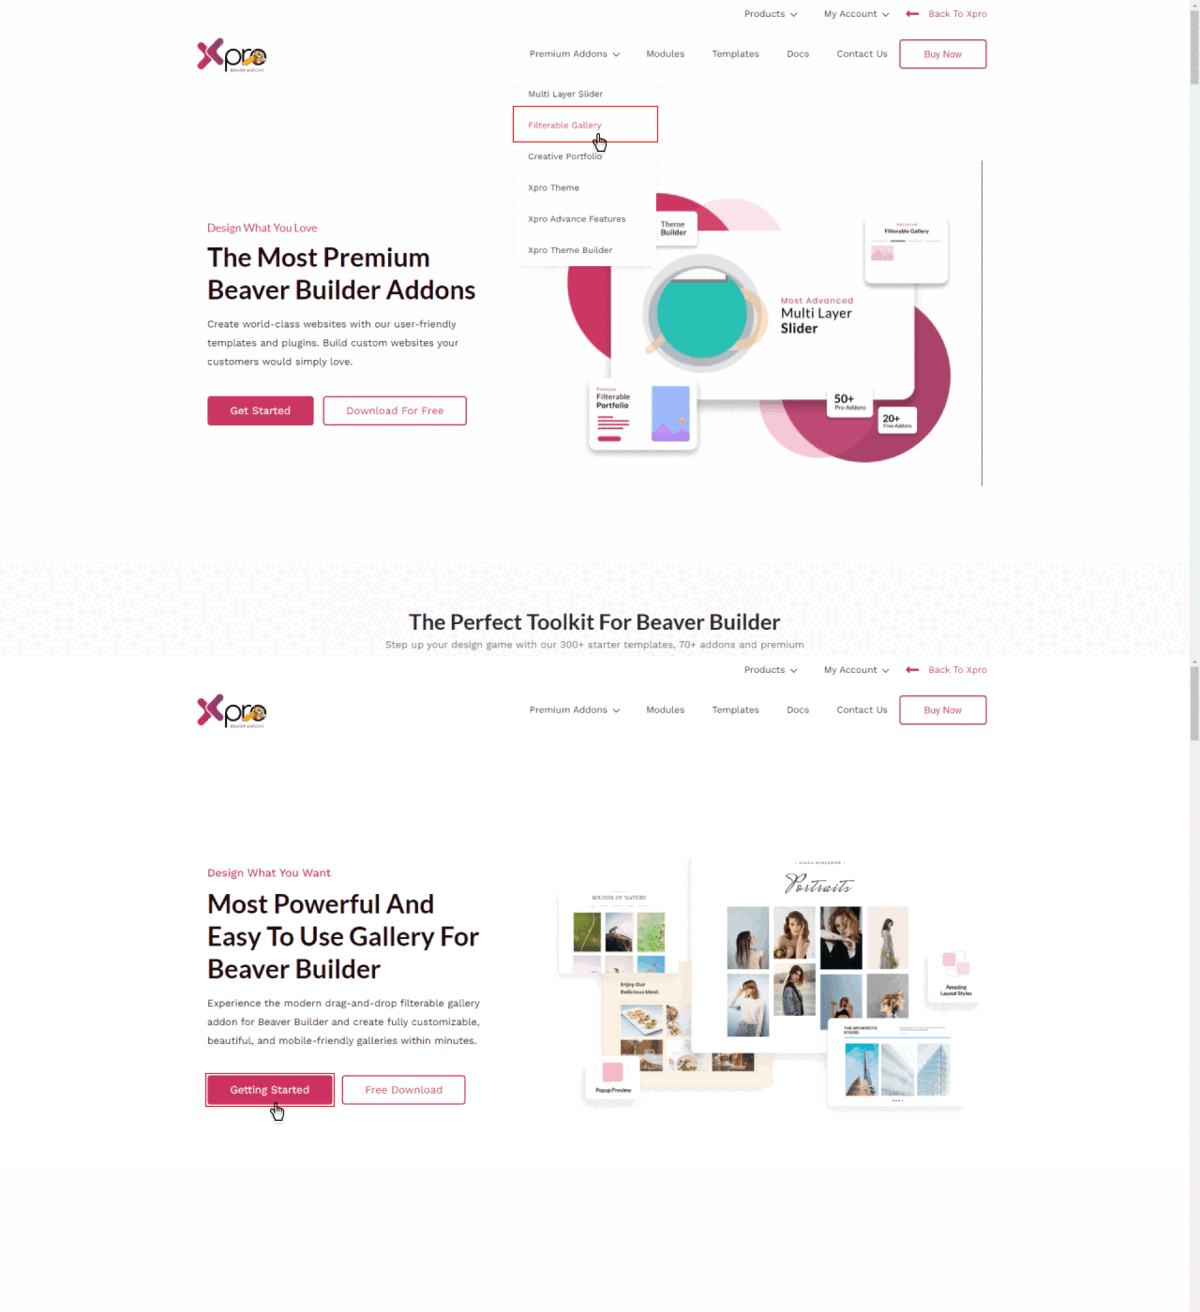
Step 1: Go to Xpro Beaver Addons > Filterable Gallery
Go to the Xpro beaver addons and click on the “premium addons” from the header. A drop-down will appear with different options, select the “filterable gallery” and then the “Get Started” option from the banner.
Step 2: Purchase a Bundle
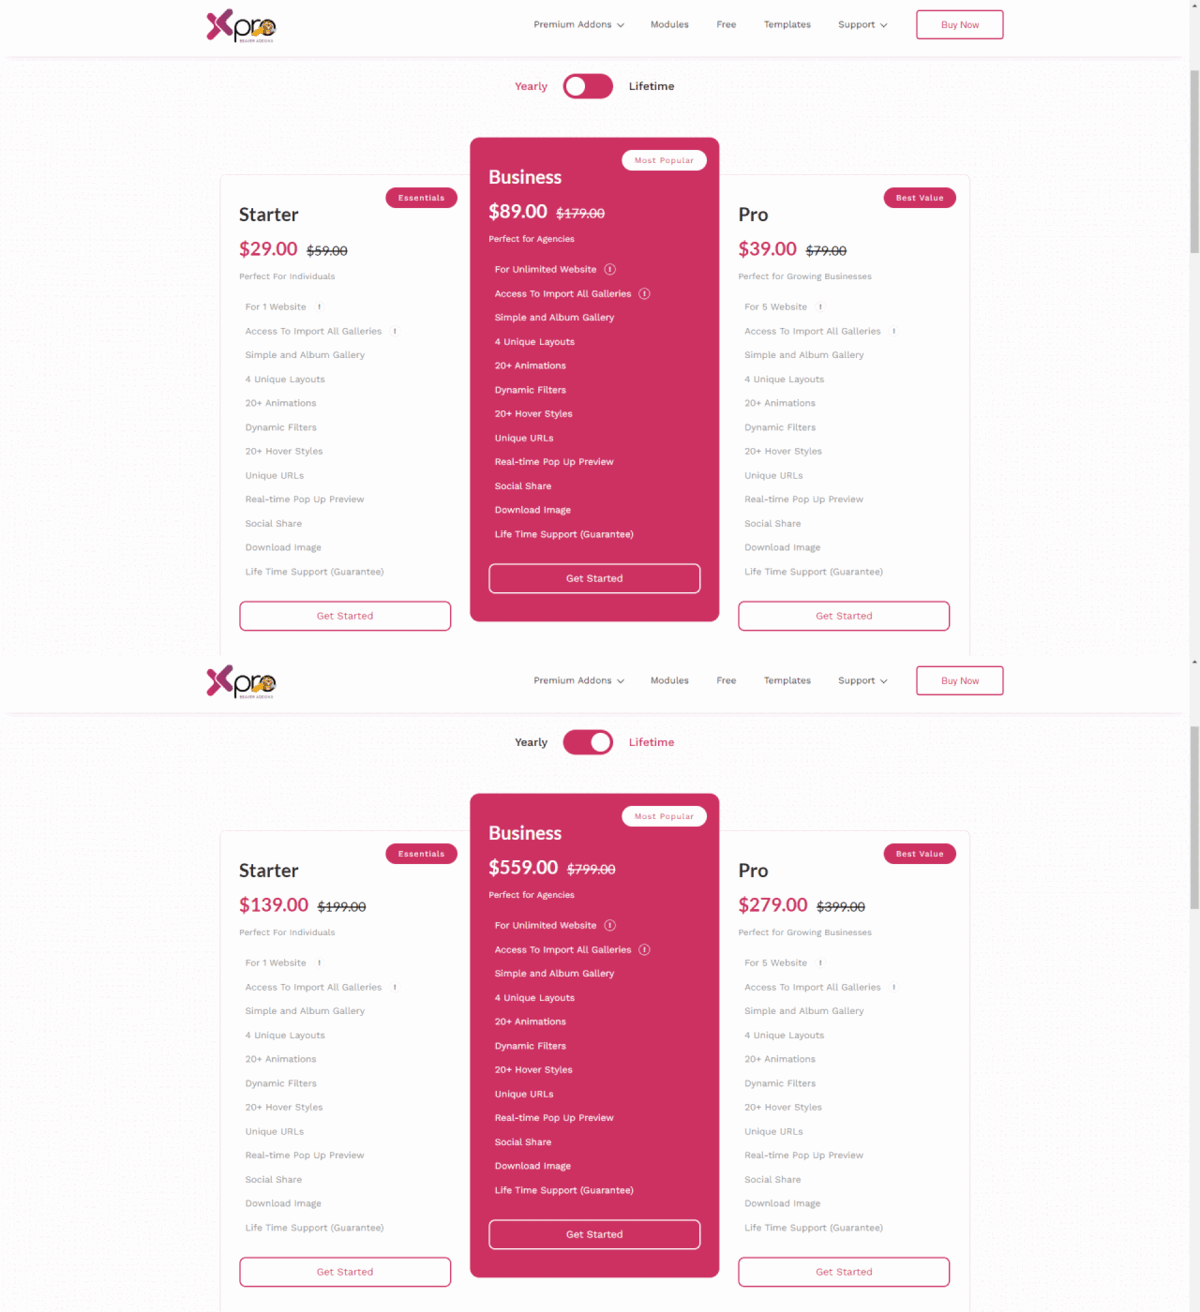
Now, select a bundle that aligns with your needs and click on the “Get started” button to buy it.
Step 3: Proceed to Checkout
You’ll be redirected to the checkout page, fill out all the requirements, and click to purchase the bundle.

Step 4: Open Your Email for Plugin File
You’ll receive an email with the plugin file and license key to activate the filterable gallery for beaver builder.

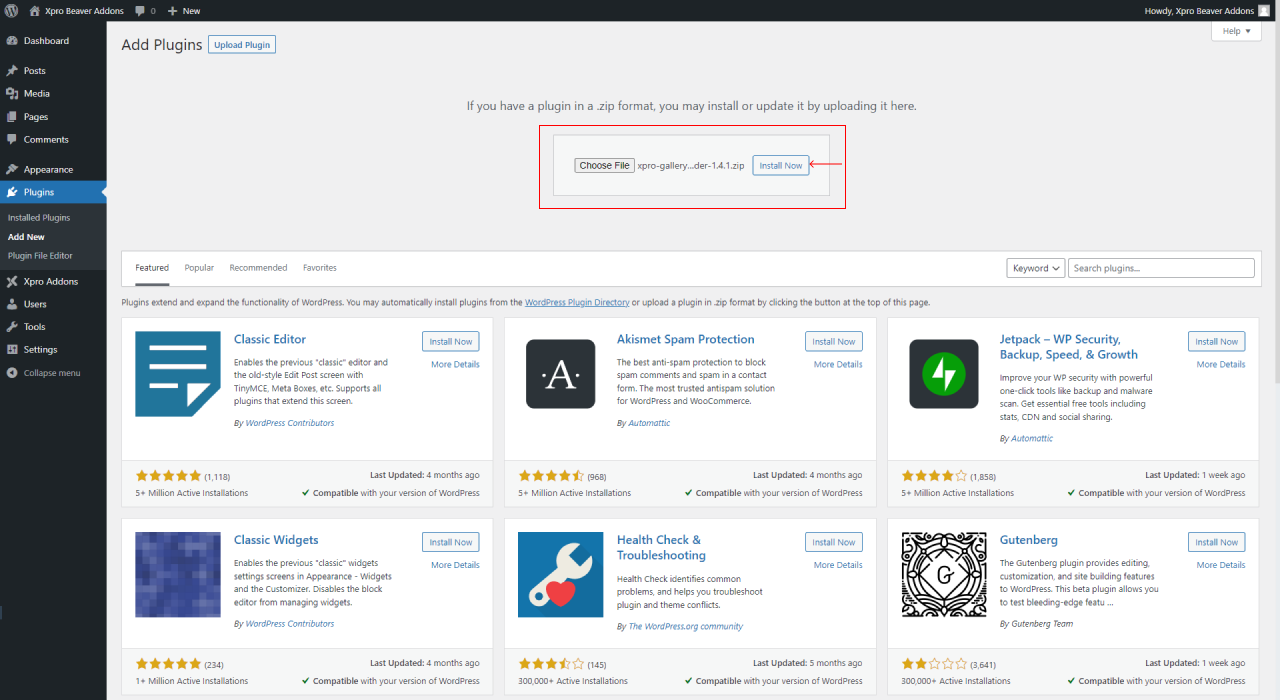
Step 5: Upload Plugin > Activate License Key
Upload a new plugin file on your WordPress dashboard and activate the license key to grab all the features of the filterable gallery.
Step 6: Start Customizing Filterable Gallery
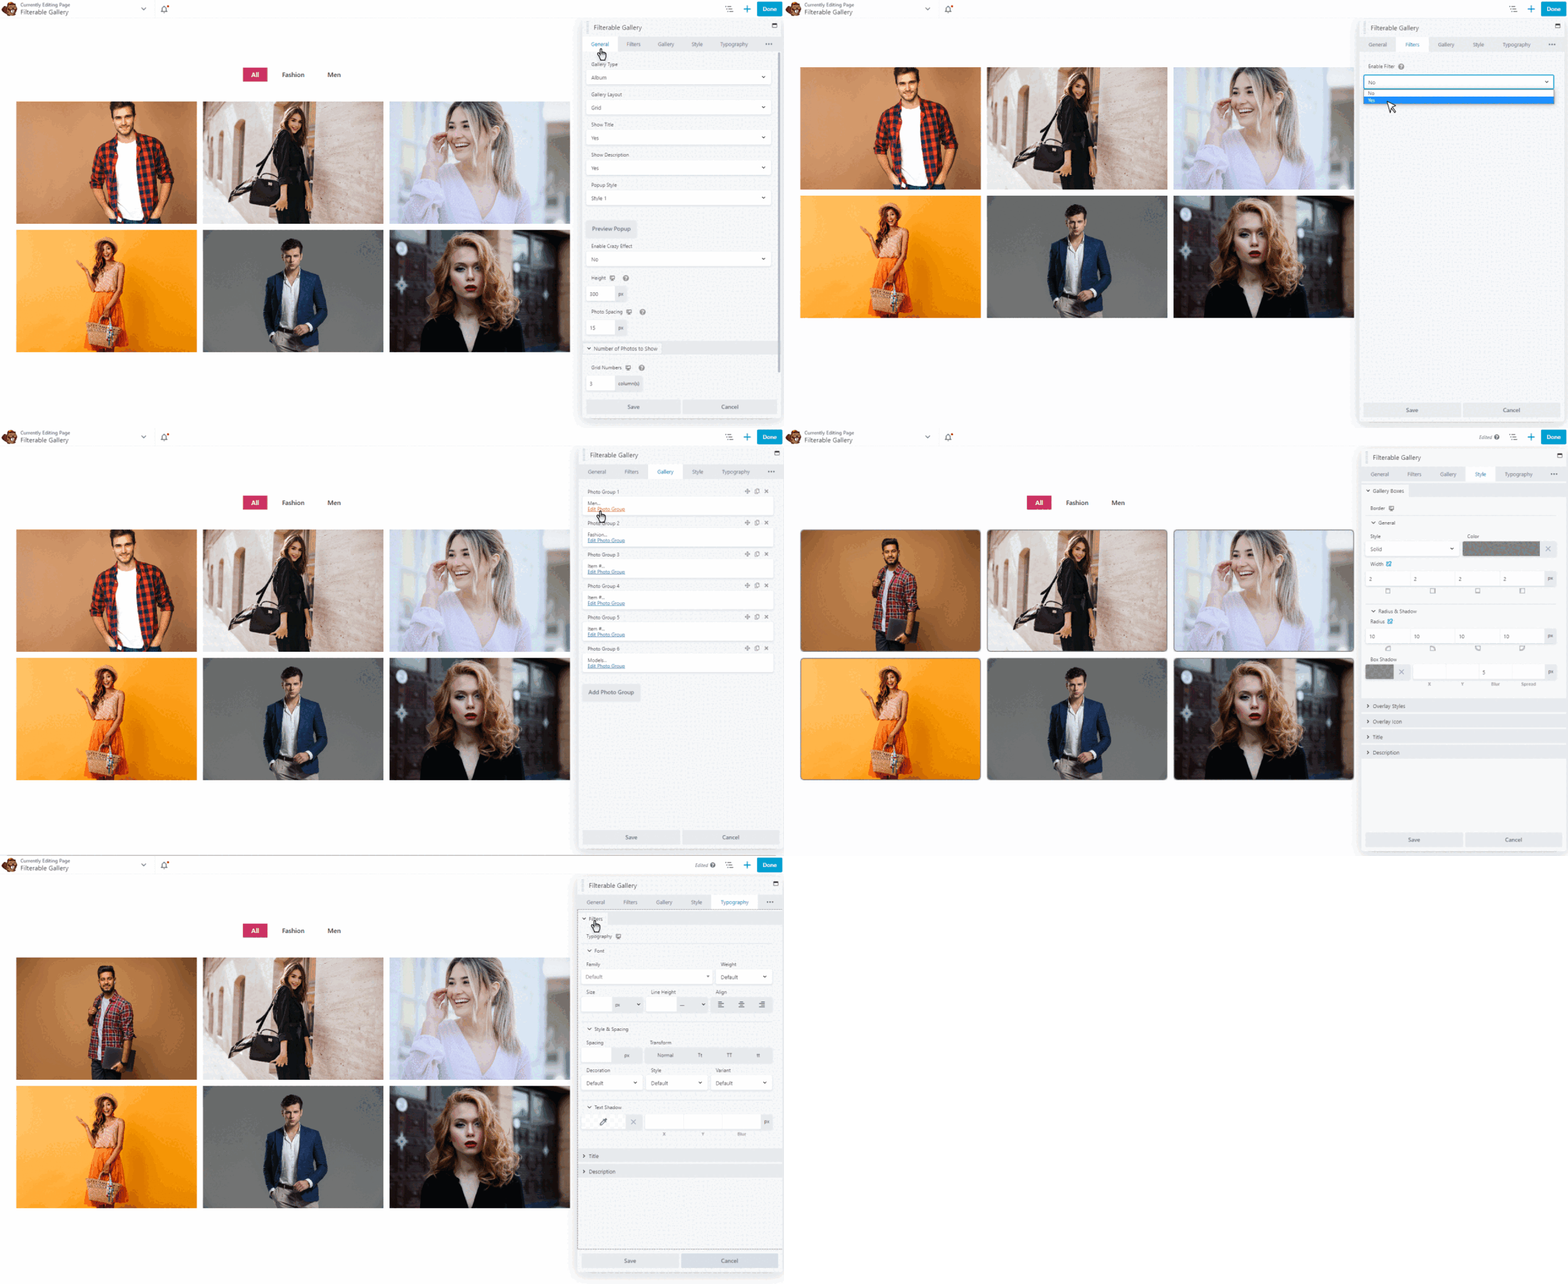
Now, start customizing your filterable gallery by dragging and dropping this advanced module to your beaver builder page and enjoy.
Final Outcome!
Hopefully, you’ve got all the detailed information required to purchase the filterable gallery for beaver builder. Use our features to start customizing and creating a stunning gallery for your website.
You might also wanna look at a detailed guide on how to set up a filterable gallery for beaver builder.
