How to Create A Custom Footer Using Beaver Theme Builder
Are you looking for an easy and quick way to customize the footer of your beaver builder website? An effective footer provides the opportunity for your prospects to take action or get the information they need like contact info, location, or social links. Creating a footer from the scratch was never easy before, but Xpro theme builder made it easy for the users by giving the full freedom to customize it for the WordPress website in beaver builder.
Xpro Beaver theme builder is an amazing FREE plugin that will help you create a custom footer with various styling options. Help your visitors navigate naturally with the well-designed and well-informative footer that includes all the relevant links. With our Beaver theme builder, you can build a custom footer on the fly with the live front-end dashboard.
Display your customized footer uniquely anywhere on your website for the homepage, inner pages, or category pages with our display conditions options. Reveal a good ending for your users and keep them engaged on your website. You can make a custom footer from the scratch or use the pre-built beaver builder footer templates.
Let’s learn how we can use the Beaver theme builder to create a custom Footer.
How to Use Beaver Theme Builder to Design Custom Footer
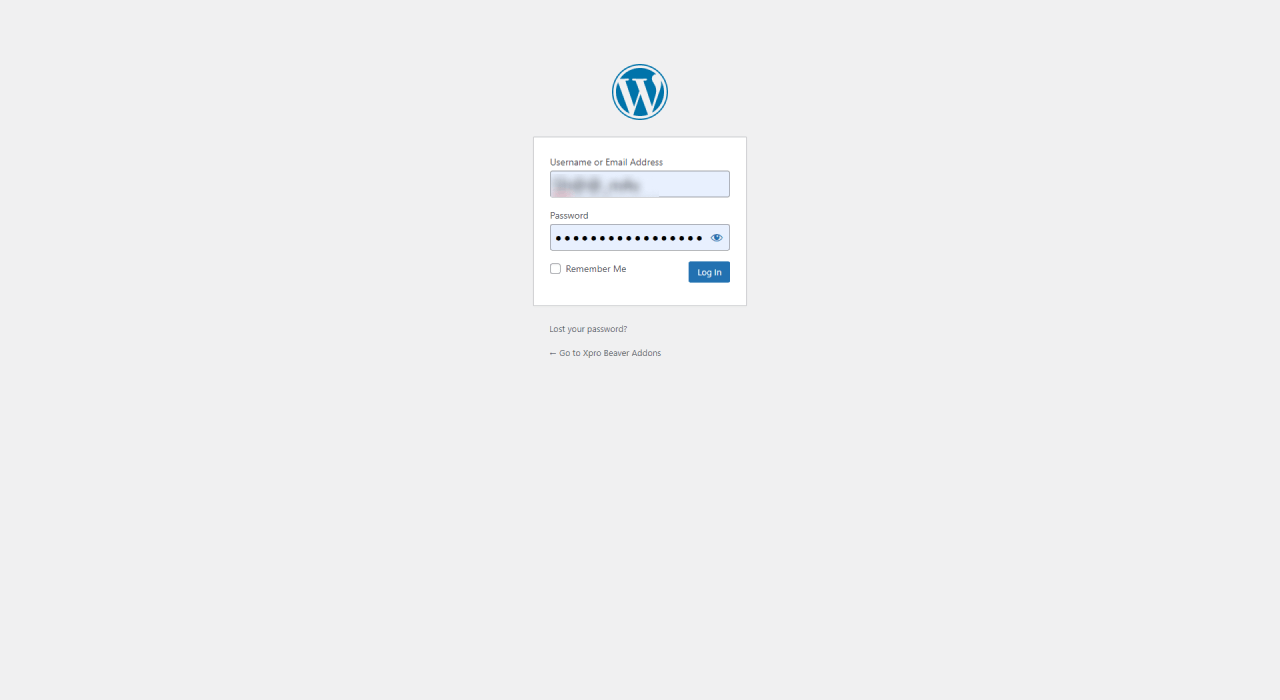
Step 1: Log in to WordPress Dashboard
The first step is to log in to your WordPress dashboard and start editing your Beaver builder page on which you want to design your footer.
Step 2: Click on the Xpro Icon
Click on the Xpro icon at the bottom left corner of the screen. The side menu will emerge with all the layout options.

Step 3: Click on the Footer Layout
Click on the footer layout and “create a new layout” by naming it. You can also edit the previous footer layout.

Step 4: Edit the Footer Settings
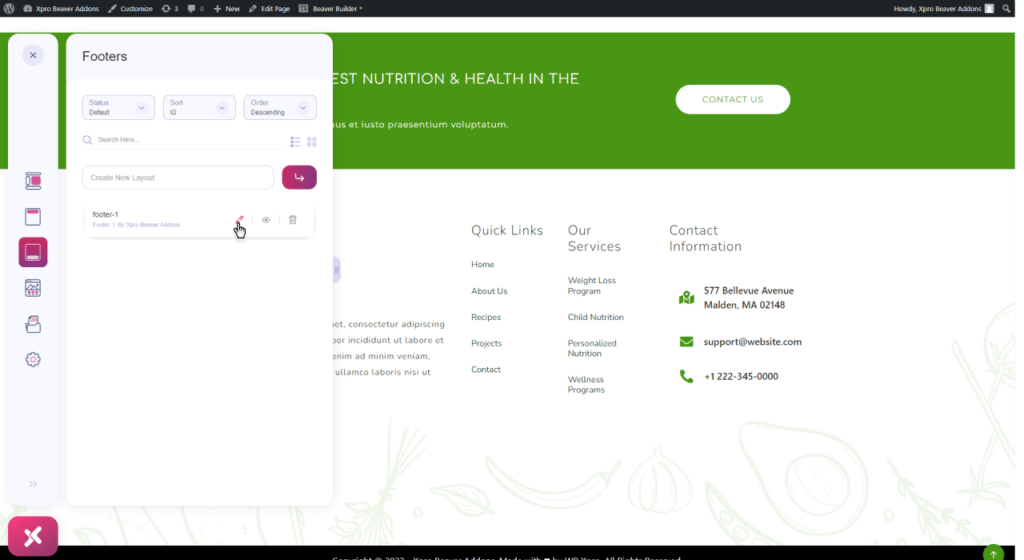
Now start editing the Footer by clicking on the “edit icon” in front of the layout.
- Change the title of the footer, if required.
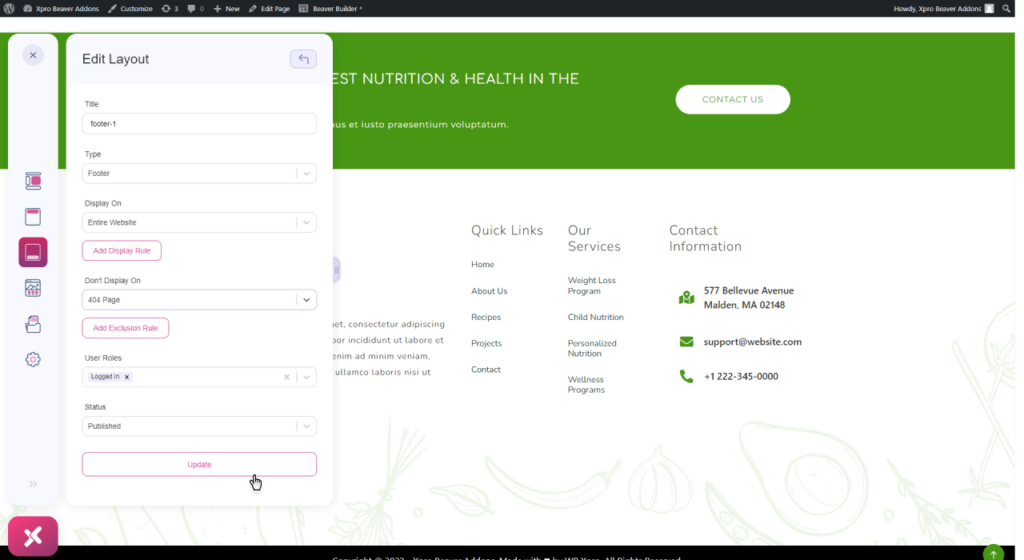
- You can choose to set display condition options. Select the pages on which you want to display your footer or don’t want to display it. You can also add extension rules if you are working with multiple pages.
- Set the user role and status of the footer according to your preferences.

Step 5: Update the Changes
Click to update the changes in your footer and start editing with beaver builder to make your custom footer from scratch.
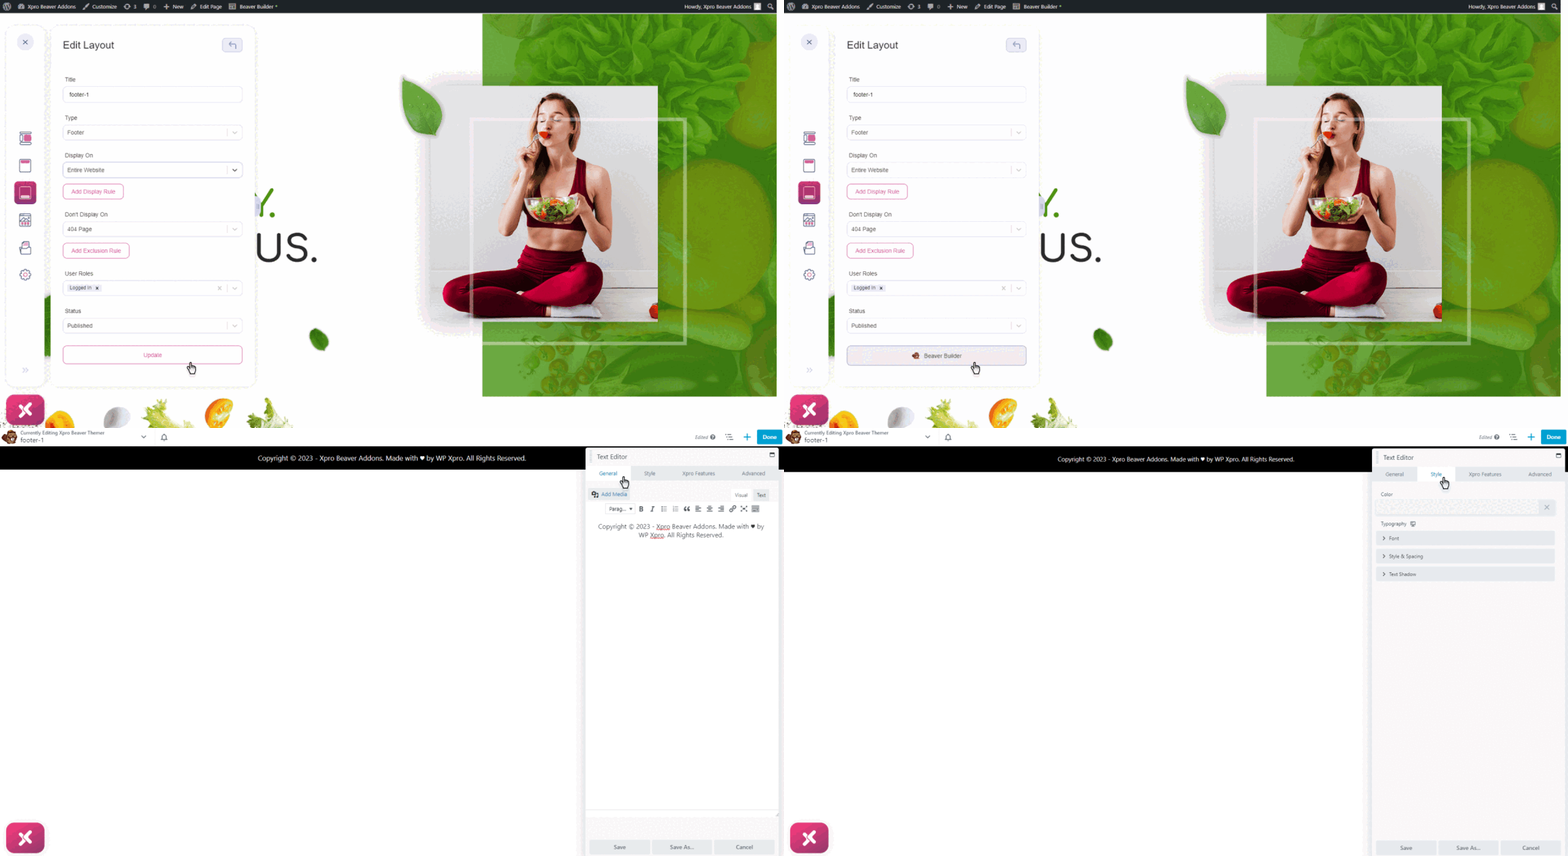
Step 6: Customize the Footer Using Beaver Builder
Now, unleash the designer in you and start customizing the footer by dragging and dropping the Xpro Beaver addons.
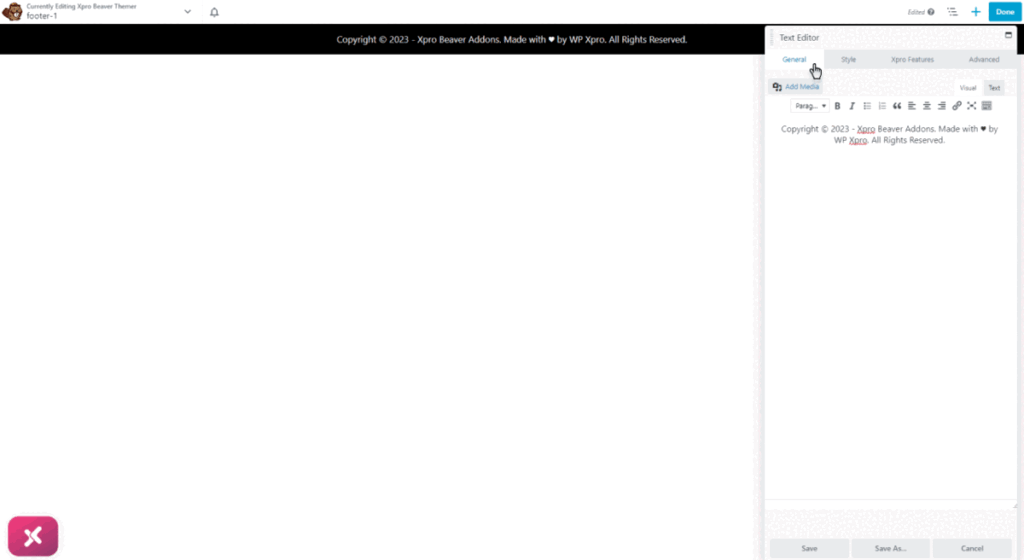
Step 7: Publish the Footer
After you have customized the footer, save the changes and publish it to see the outcome.
How to Use Pre-Built Beaver Builder Footer Templates
Displaying a good and pleasant footer is the second chance to convince your visitors to stay on your page. Make it effortless for your users to navigate to the other pages by providing all the relevant links and information.
In case, you want an easy fix you can just grab this opportunity and try using the Xpro pre-built footer templates for beaver builder. Choose from the 20+ exclusive and unique footer templates to quickly add a professional look to your website.
Step 1: Download the Footer Templates
The first step is to download the footer templates by going to the Xpro addons plugin from the side menu on your WordPress dashboard.
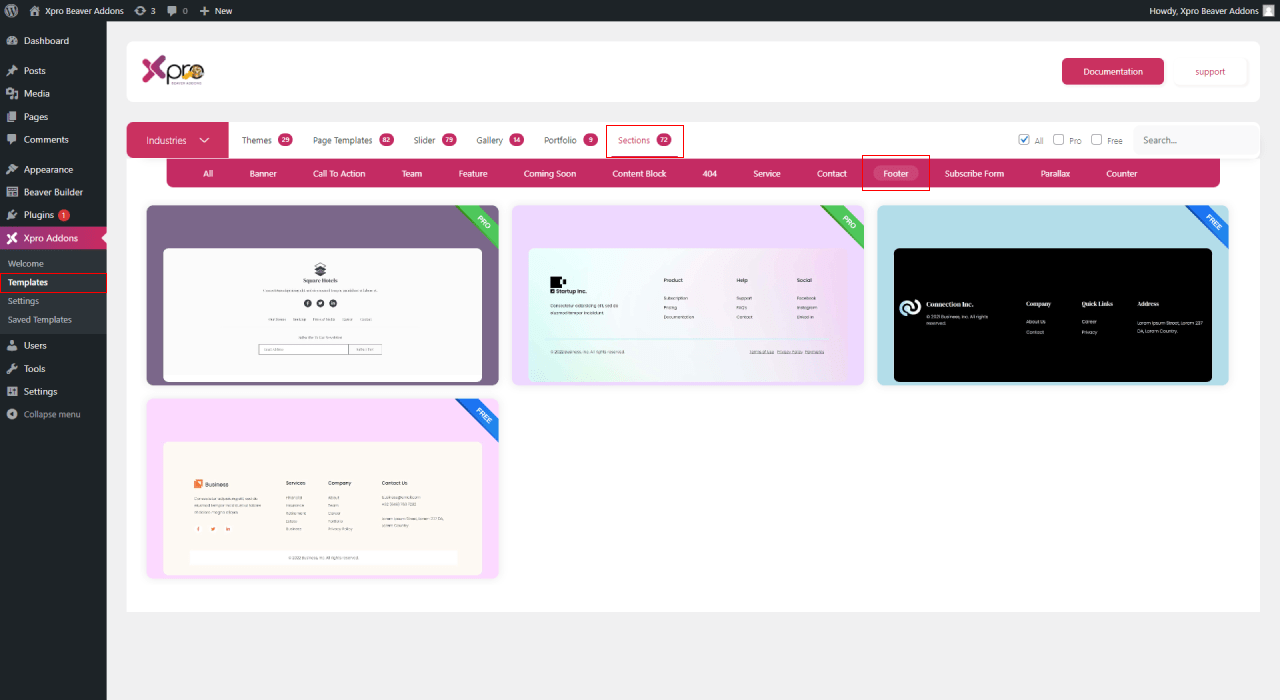
Step 2: Edit your Footer Layout in Beaver Builder
The next step is to create a new layout and then start editing your footer in beaver builder.
Step 3: Click on the Xpro Addons Rows
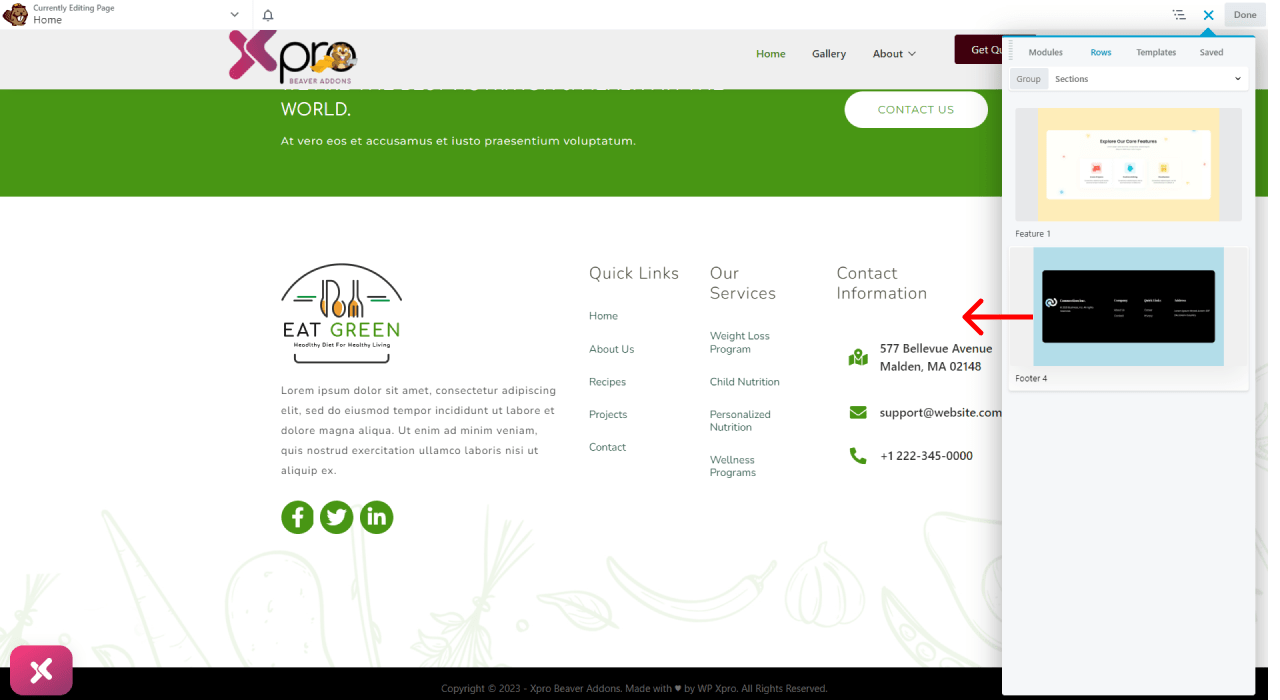
Now, click on the Xpro addons from the dropdown menu at the top right corner of the screen and select the rows section. All your downloaded rows including the footer will be displayed there.

Step 4: Drag and Drop the Footer Template
Drag and drop the selected footer template and start customizing it the way you want.
Step 5: Publish the Footer
Update all the changes and publish the footer on your website.

How to Set Footer Display Conditions for Global Templates
Xpro Beaver theme builder provides amazing customization options to create footers. In case, you want your footer to display on your WordPress website eliminate some specific pages. You can change the display conditions by selecting the pages on which you don’t want to display your footer. This way, you can manage where you want to redirect your users.
Let’s give you a brief demonstration of how you can set the display conditions for global templates.
Step 1: Edit the Footer Layout
Start editing the footer layout by clicking on the live front-end dashboard of the Beaver theme builder.
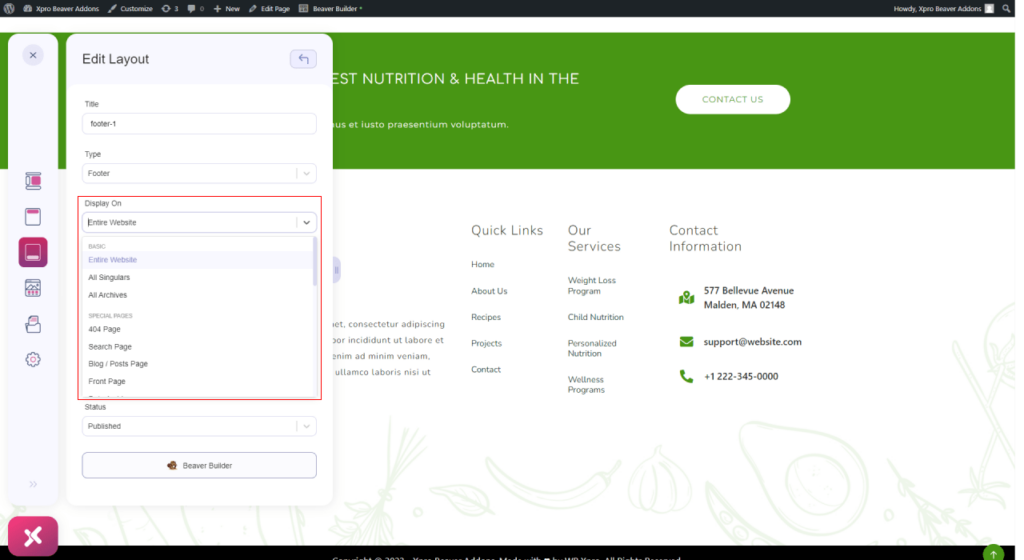
Step 2: Edit the “Display on” Option
From the “Display on” option, make your footer layout appear on your entire website. Select the specific page /post, archives, or more. You can choose to add multiple display rules for your footer layout.
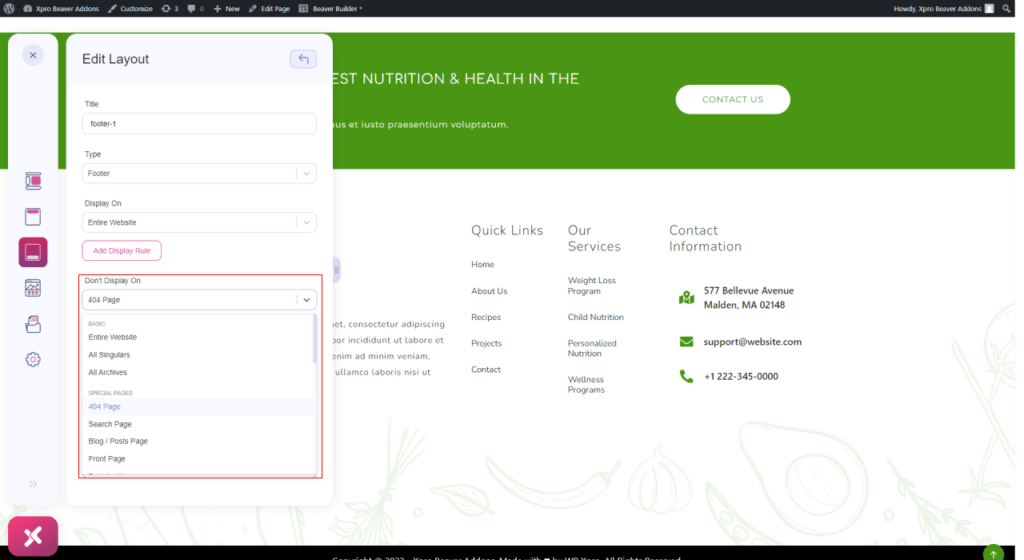
Step 3: Edit the “Don’t display on” category
Now, edit the “don’t display on” category by scrolling down and selecting the “specific pages/posts/taxonomies, etc” and then add the extension rule to the specific pages like the cart or checkout page.
Step 4: Update the Settings
Update the settings and all of the display conditions will be applied on your website.
Takeaway!
Here you are! This is all from our guide on creating a custom footer for beaver builder. You have got all the information needed to design an effective footer layout for your website. Now you can easily create the footer using our Xpro Beaver theme builder.
We have 130+ amazing creative modules that you can use with our vast library of beaver builder templates to design the footer for your website.
