How To Create A Custom Header Using Beaver Theme Builder
Creating a good header gives a sleek look to your website and improves user experience. So, how about getting the ultimate freedom to design a custom header in beaver builder? Sounds intriguing, right?
Xpro Beaver theme builder has got you covered! It comes with a lot of persuasive features that you won’t require any extra plugins with it to customize your themes. Help your visitors look into your website with easy navigation by displaying less cluttered headers. Our theme builder will help you create stunning customized or sticky headers for your WordPress website. Typically, you could only customize a few parts of the theme only by investing a bulk of your money. But with our intuitive and FREE plugin, you can enjoy complete control of customizations within minutes.
We have a live front-end editor with extended options that makes the customization easy and fun. With our Beaver theme builder, you can customize a theme from scratch or edit the parts of the pre-built templates that require changes. Design and display the responsive header anywhere on the website using our diverse conditions options like headers for home or inner pages, or specific category pages.
Let us make the decision easy for you by allowing you to take a look at our features of the Xpro Beaver theme builder.
Requirements
To start making a custom header with the Beaver theme builder, all you need is to install and activate the Xpro addons for Beaver builder- lite”
You might also wanna check our detailed installation guide.
How to Setup Beaver Theme Builder To Design A Custom Header
Let’s get into an easy step-by-step guide for you to design a custom header using the Beaver theme builder.
Step 1: Log In to WordPress Dashboard
The first step is very simple, you just need to log in to your WordPress admin dashboard. Start editing the page you want to design a header for.
Step 2: Click on the Xpro Icon
On the front end, the Xpro icon will be visible at the button left side of your page. Click on it to view all the customizations and layout options.

Step 3: Click on the Header Layout
Click on the header layout and “create a new layout” by naming it or editing the existing one.

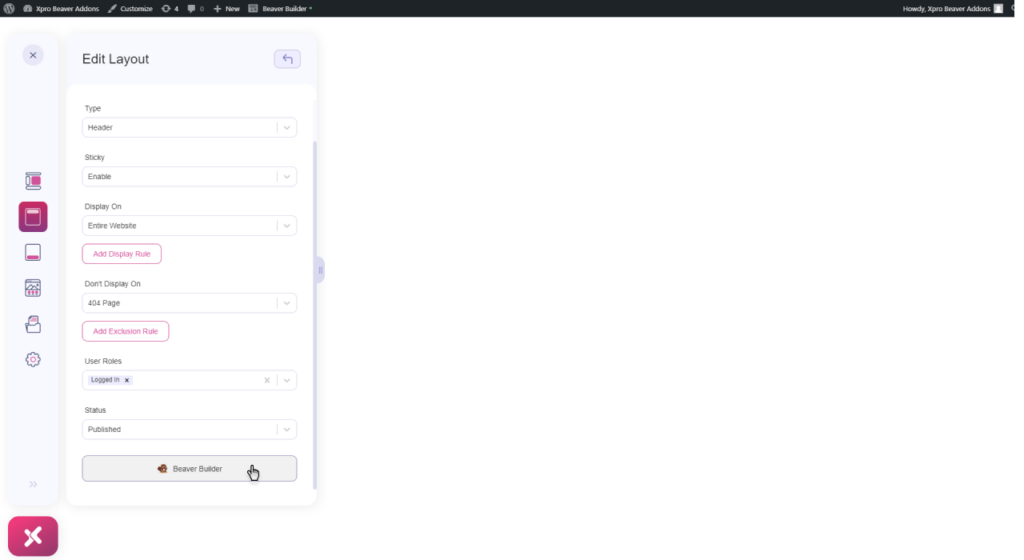
Step 4: Edit the Header Settings
Now, the next step is to edit the header by hovering over the “edit icon” right next to your new layout.
- Here, you will be able to change the title or even the type of layout. Choose to enable or disable the sticky header.
- Select where you want to display or hide your header.
- Select the role you want to assign to your users like if you want to show a header to your logged-in users, administrators, editors, and much more. Make a separate header with different navigation options according to your users.
- Select the status you want for the header layout.

Step 5: Update the Changes
Click to update all the changes and open the beaver builder site to get started.
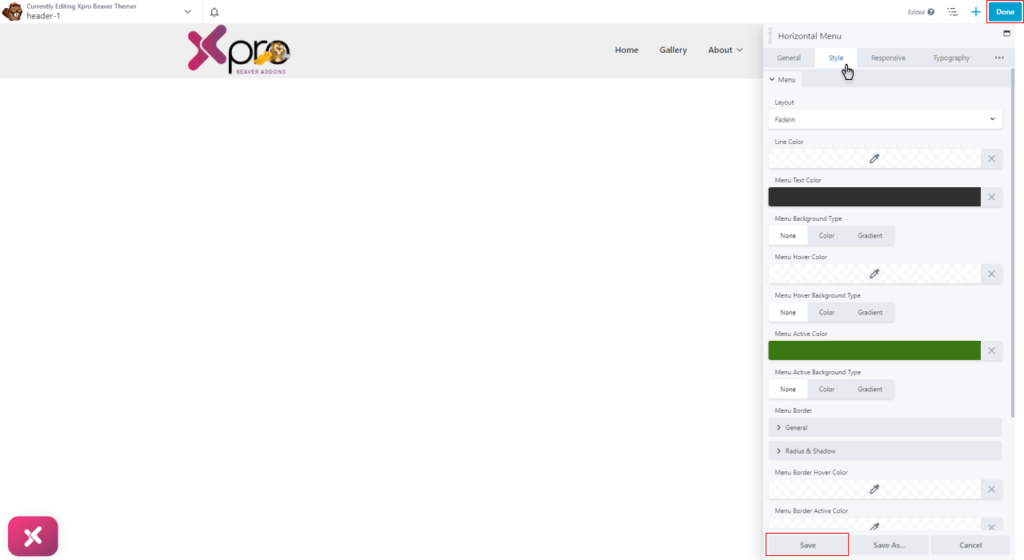
Step 6: Customize the header using Beaver Builder
This is the step where the fun parts begin. All you need is to start customizing the header from the scratch by dragging and dropping the modules of Xpro beaver builder addons.
Step 7: Publish the Header
After you have done customizing the header, save the changes and publish the outcome to see how it will look on your website.

Use Pre-built Beaver Builder Header Templates
Give your users a clear path to explore all the content of your website by making an eye-catching and easy navigation header. As mentioned above, you can not only create a header from the scratch but can also use our 5+ pre-built header templates if you don’t want to put so much effort into it.
Add a professional look to your website by quickly adding the header templates and contrasting them with your website accordingly by making changes to them. The steps to add header templates are quite easy.
Step 1: Download the Header Templates
Download the header templates that you have chosen by going to the Xpro addons plugin from the side menu.
Step 2: Edit your Header Layout in Beaver Builder
Create a header layout and start editing it on your beaver builder site.
Step 3: Click on the Xpro Addons Rows
Click on the Xpro addons rows from the dropdown menu by clicking on the top right corner of the screen.
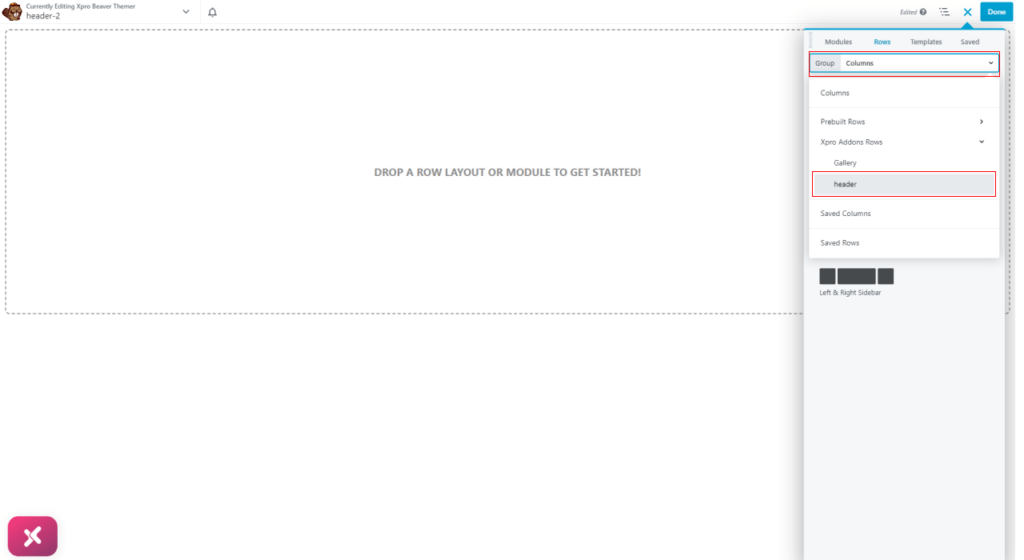
Step 4: Drag and Drop the Header Template
All the saved header templates will become visible. Drag and drop the header template and personalize it the way you want! You can create custom changes in all modules in the header template.
Step 5: Publish the Header
Save the changes you have made and publish the header on your site.
Wrapping Up!
There you are! You have learned all the steps to create a custom header in beaver builder. In conclusion, you can have a diverse range of configuration options to create a custom header using the Xpro Beaver theme builder. Enjoy easy customizations and create any page quickly with our theme builder.
You can also learn how to create a sticky header using Beaver theme builder!