How to Display Horizontal Timeline Module for Beaver Builder
Looking to showcase historical events in a neat and sleek style. Timeline is the best choice to tell your story. The horizontal timeline module for beaver builder is competitive for making fancy timelines. This module gives complete control over editing and customization. The exclusive styling features make the timeline classy and match your brand aesthetics.
Furthermore, our drag-and-drop interface is very user-friendly. You can easily add events, change dates, and add multimedia content like images and videos.
The timeline module for beaver builder meets the user’s unique needs. Showing the history of a company or the progress of a project is a piece of cake with this module. This module is perfect to display roadmaps like nobody else. It offers powerful features, plus it’s a great way to show your brand’s innovation.
So, Let’s get started to see how you can fully use this fantastic module!
Requirements
You need to install and activate the Xpro beaver builder addons- Lite and then get a premium version of Xpro Beaver Builder Addons. If you already have the plug-in installed, ensure the horizontal timeline module is ‘enabled’ from the Xpro beaver builder addon dashboard. So you can find it in the beaver builder editor.
How to Enable horizontal timeline Module for Beaver Builder?
To enable the module, follow the further steps:
Step 1:
Once you activate, click on the Xpro addon on the left side of the wordpress dashboard and go to the module section.
Step 2:
Scroll down the module section and search the horizontal timeline module. Then finally, toggle the button “ON” to enable it.
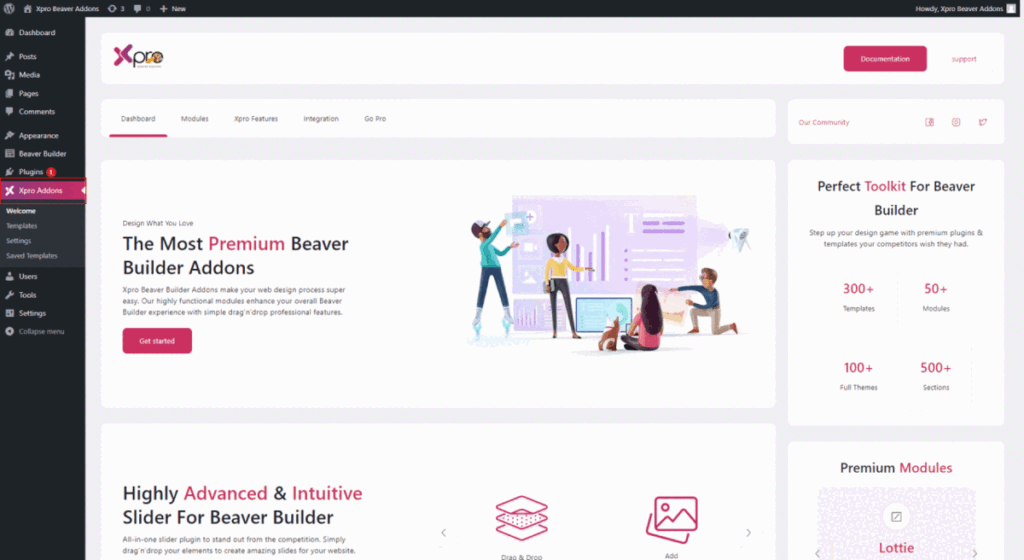
Step to style and configure Horizontal Timeline Module for Beaver Builder
The timeline module for beaver builder is a perfect choice to display events. You can style an attractive timeline with bullet icons and content media.
Here’s a step-by-step guide on how to use this fantastic timeline module for beaver builder:
Step 1: Drag and drop the horizontal timeline module
- Click on the Xpro addon section available in the beaver builder editor.
- From the Xpro addon section, drag and drop the horizontal timeline module on the page.
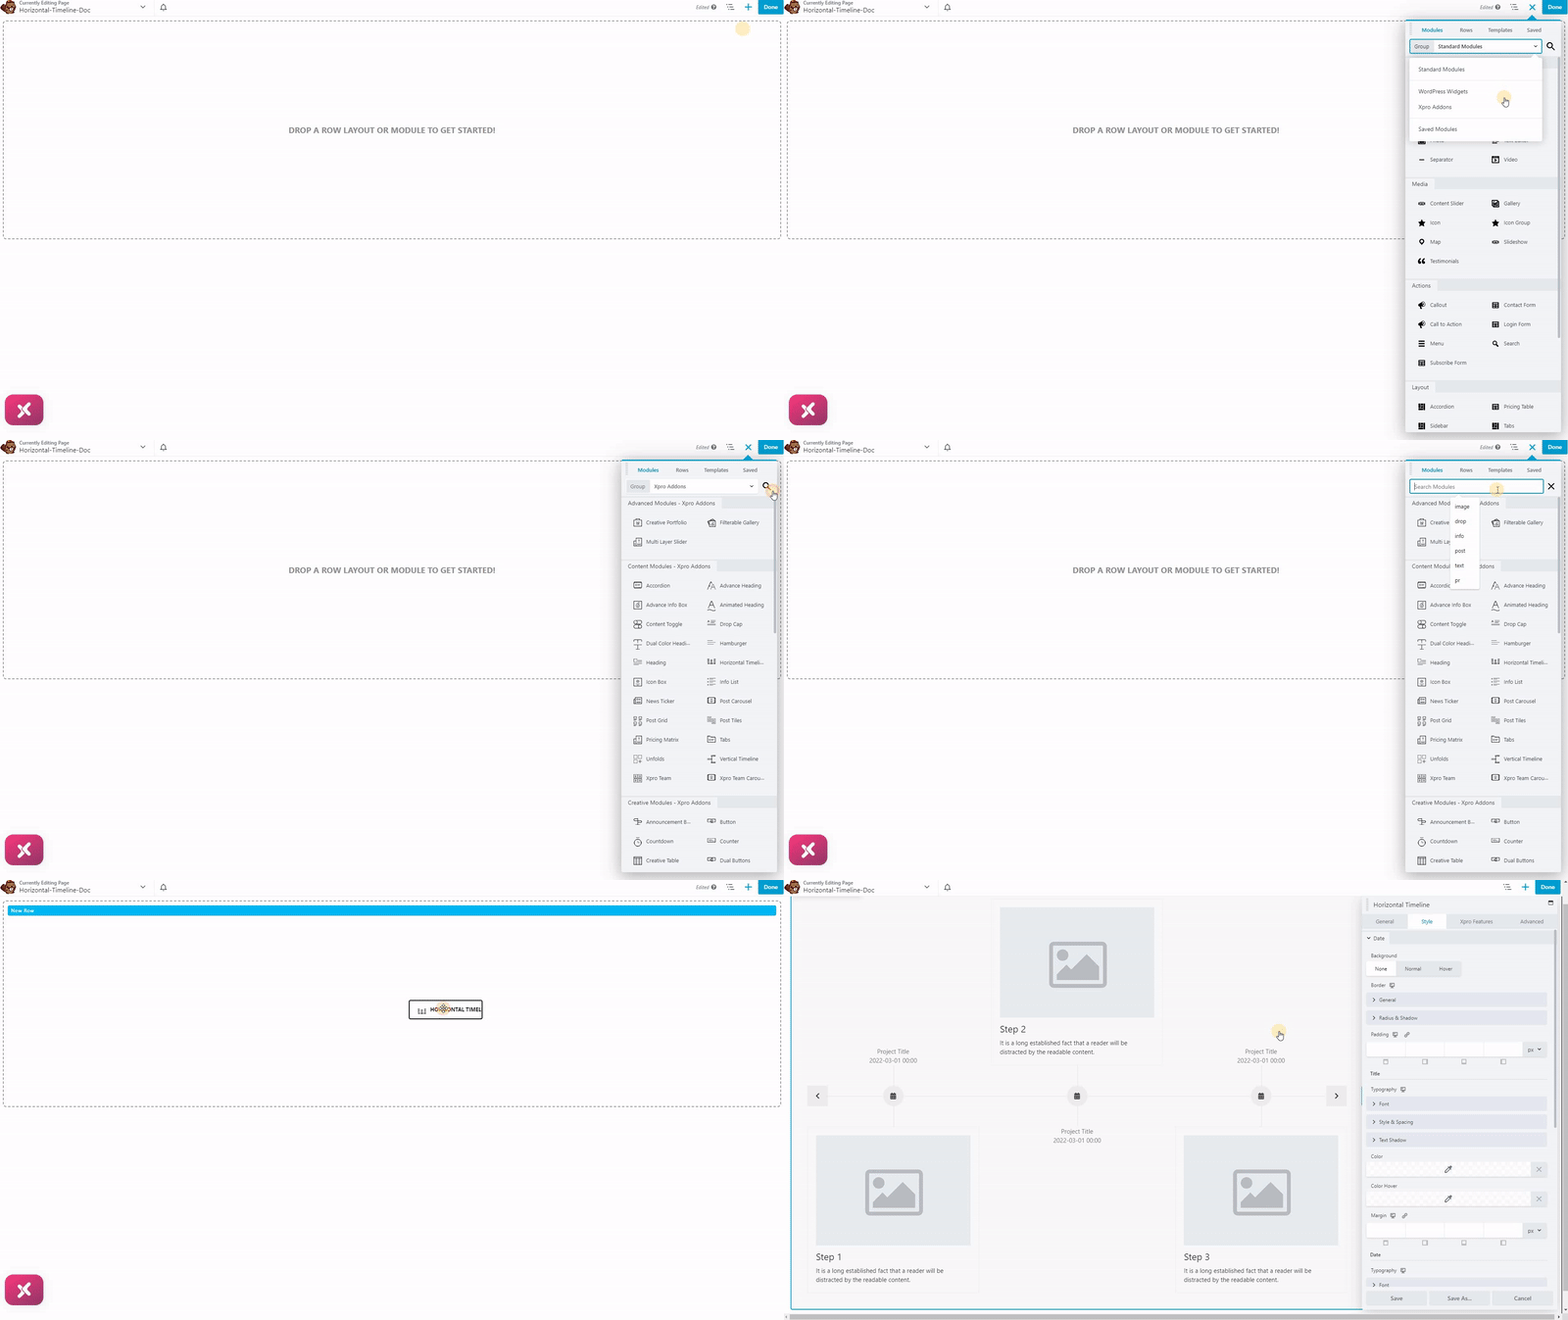
This is the default view of our horizontal timeline module for Beaver Builder.
Step 2: General setting
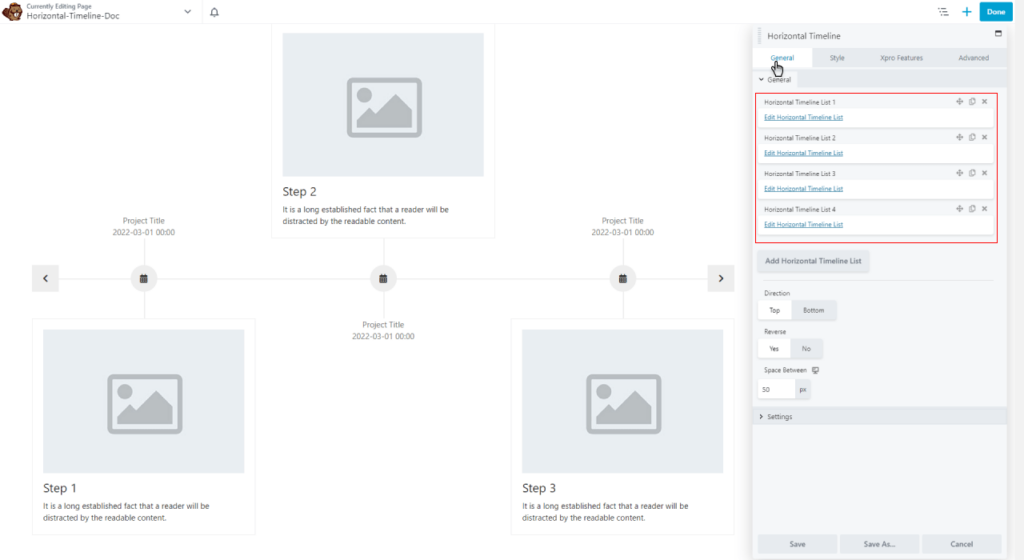
Add a horizontal timeline list
- In the general section, there are multiple options to add your desired number of lists.
- You can copy, drag and cancel the list anytime as per your need.
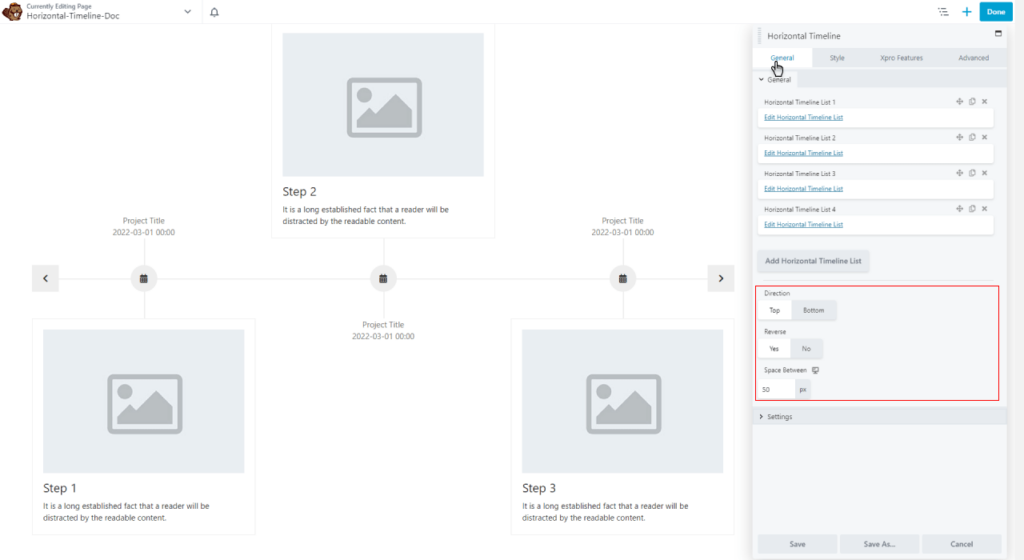
- Reduce the space between lists and reverse the direction of the list the way you want.
Settings
Follow the below instructions to adjust the settings of the Xpro horizontal timeline:
- Select the number of items from 1 to 6 on your timeline.
- Enable loop and autoplay to make the timeline visuality easier and smooth for users.
- Adjust autoplay timeout and enable Nav and the dot below in settings.

Step 3: Edit each horizontal timeline list
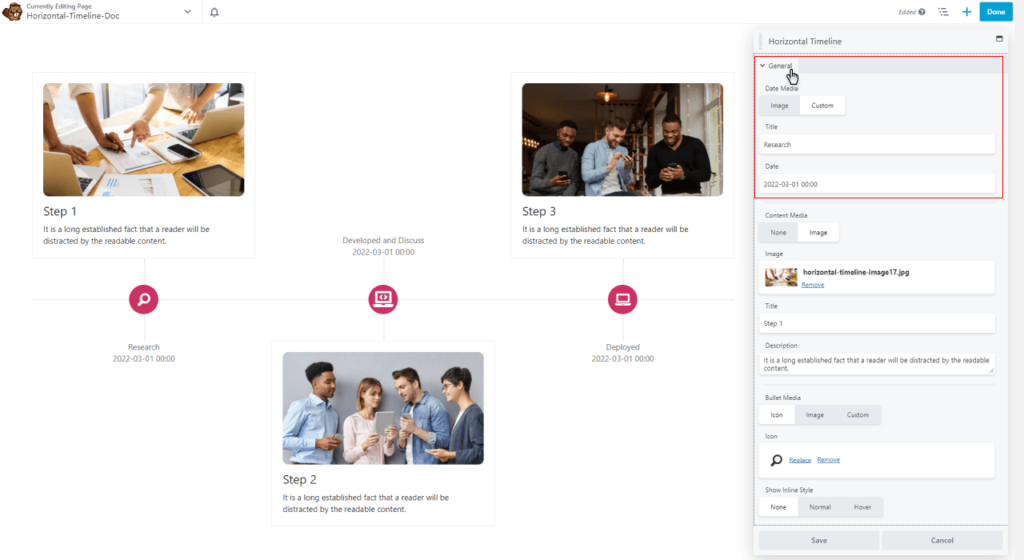
- Date media
Click on the image and add a photo of your choice or customize it by adding the project title and date.
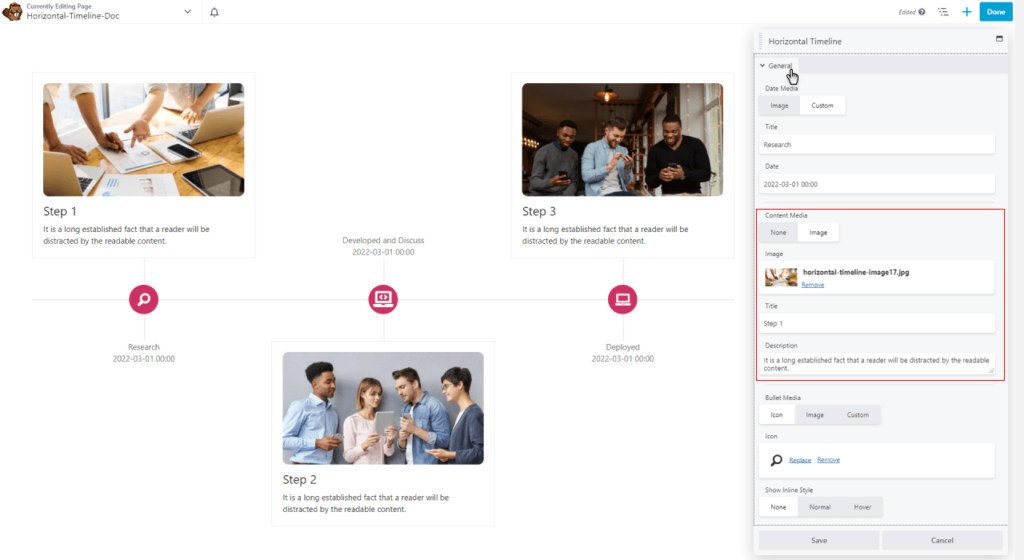
- Content media
Xpro horizontal timeline module for beaver builder shows multiple content options. In content media, you can add a suitable title and description within an image.
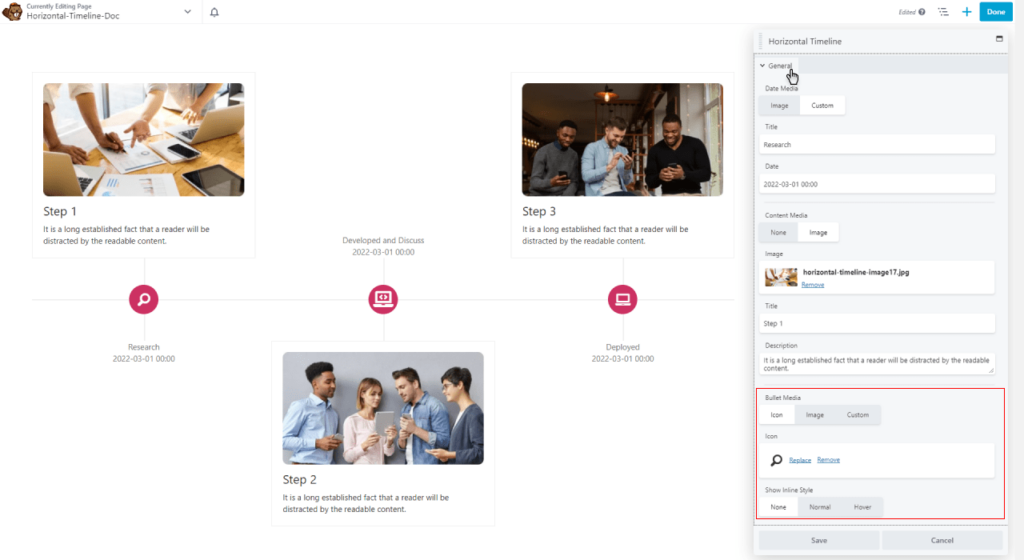
- Bullet media
Make your timeline visually appealing by adding bullet media. Furthur, add icons with images and titles or without them, the way it suits your web design.
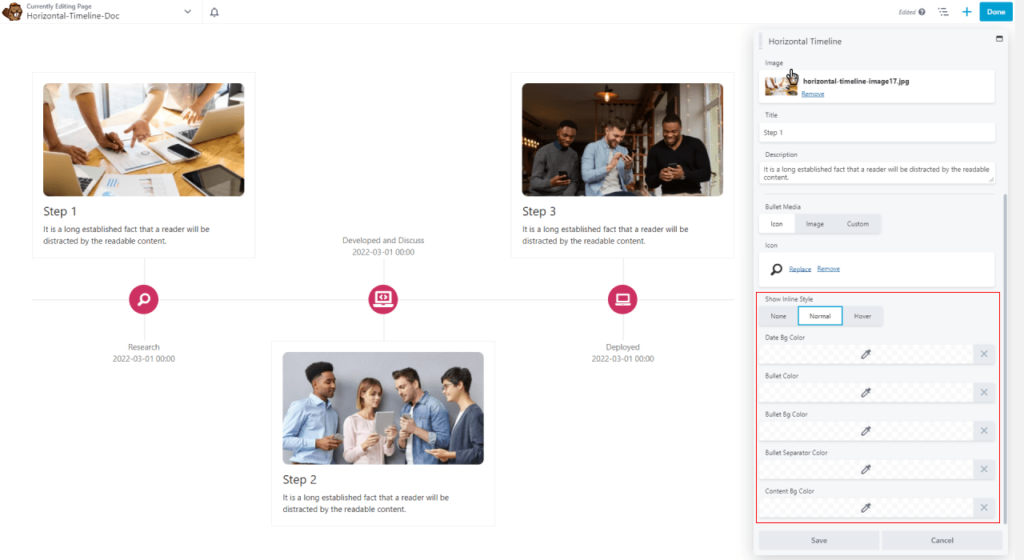
- Show inline-style
Add a unique inline style and attract audience attention toward your progress history. Here it gives you diverse editing options for the visual design of the timeline. Moreover, you can add bullet color and content background color as per your choice.
Step 4: Styling horizontal timeline module for beaver builder
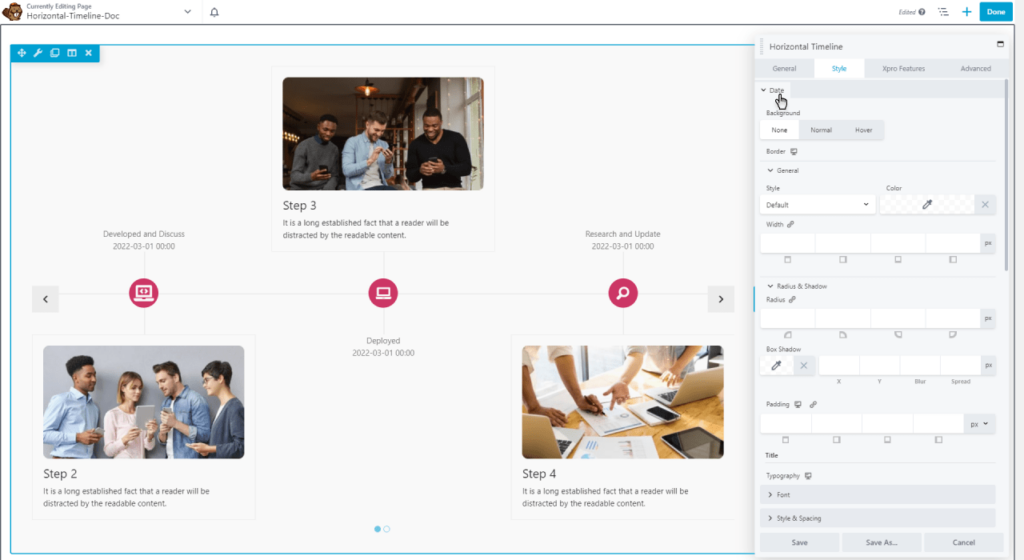
Date style
- Add a date and adjust the background color, border style, color, and padding.
- Give the title of the project in the typography section with several setting options.
- Next, pick a suitable alignment and adjust the spacing. (Decoration, transform, variant).
- Lastly, hover the color of the text shadow, give a margin, and add the image with perfect width and border-radius.
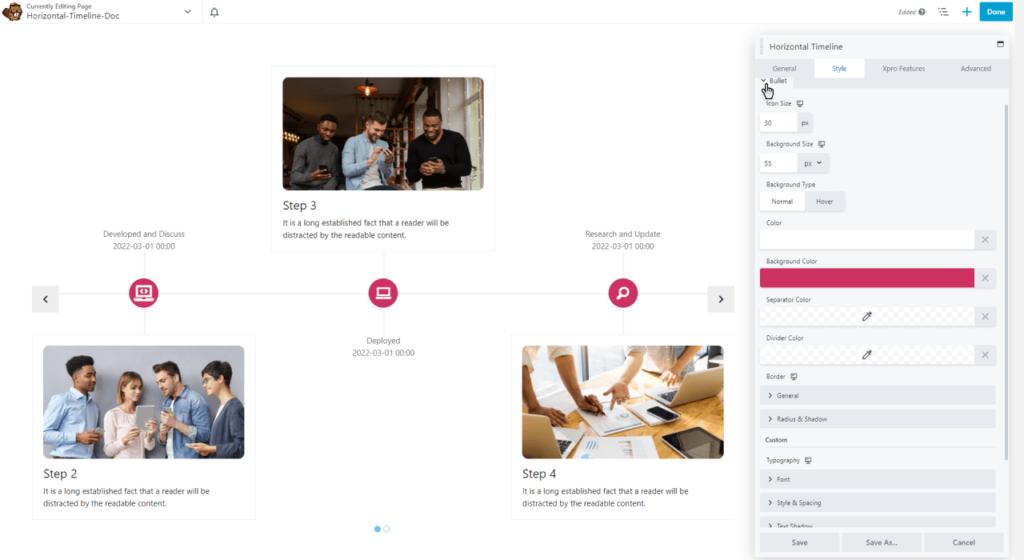
Bullet style
- In bullet style, add an icon and adjust the background color, size, separator, and divider color.
- In a general setting, change the radius and shadow as per need.
- Besides, create a customized icon list by adjusting the typography section.
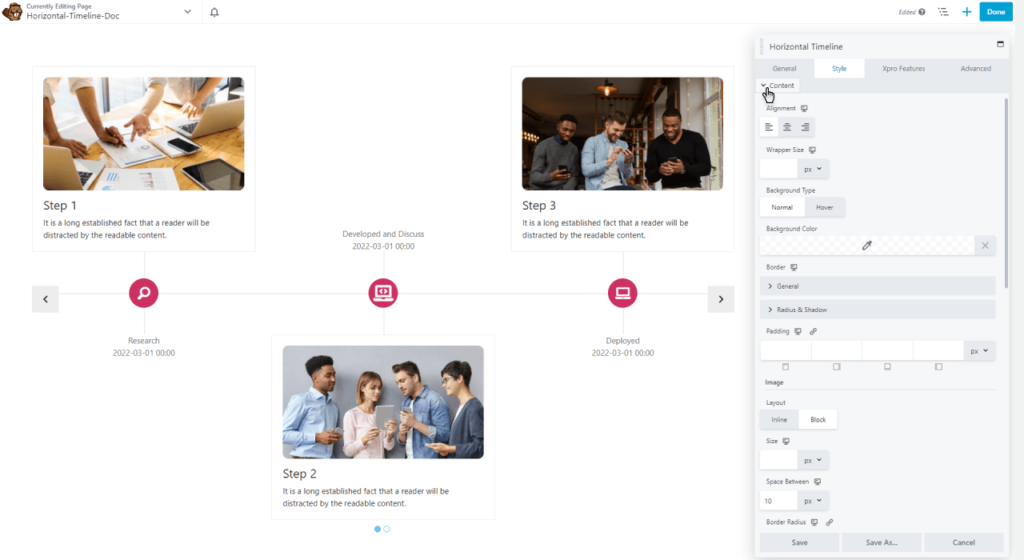
Content style
- Add content and adjust alignment.
- Add background type, color, border, and padding, and wrapped the content to make it easy to read.
- Add images and make a beautiful layout by adjusting the size and space between the pictures.
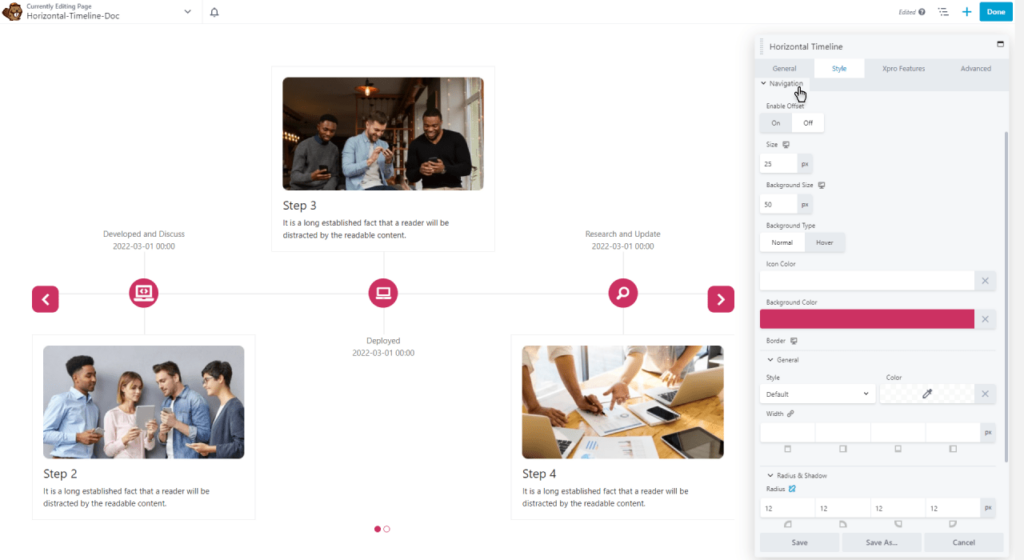
Navigation style
- To enable offset, you can turn on and off the navigation menu as needed.
- Use icon color, background color, size, and type in navigation style.
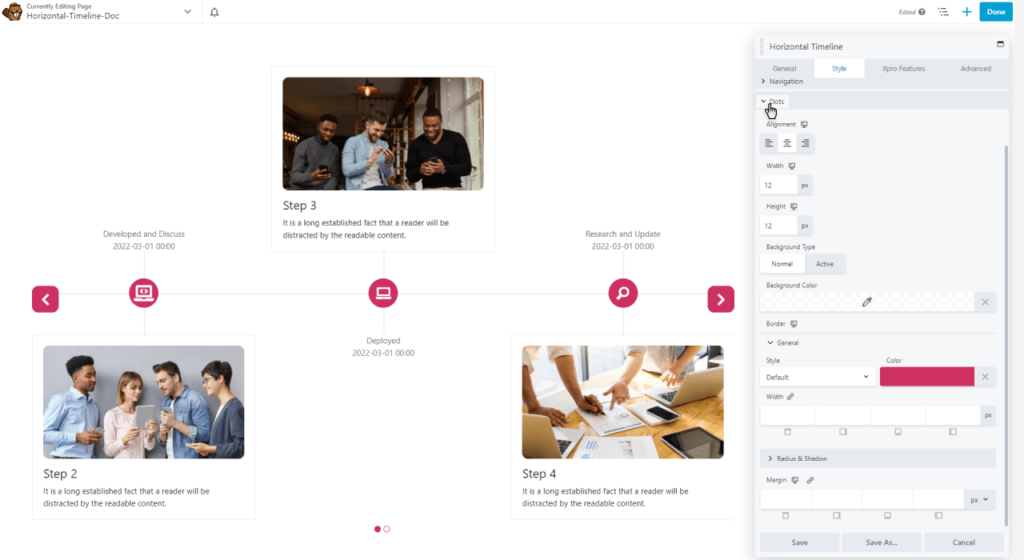
Dot style
- Add alignment and adjust width and height.
- In the dots section, the background type and color options are also available.
- Adjust the border and margin and style an attractive timeline.
Best horizontal timeline module For Beaver Builder
In conclusion, Xpro’s horizontal timeline module for beaver builder is best to showcase progress history in a unique way. It gives you amazing editing options to make your timeline more attractive.
This pro module allows you to display information in the order of time from the left to right side of the web page. Creating an engaging timeline has become easier with timeline module for beaver builder.
So, what are you waiting for? In order to try, install and activate horizontal timeline module for beaver builder and display historical events in an attractive way.
