How to Add Beaver Builder Vertical Timeline Module?
Do you want to show the progress of your company in an awesome flow? Or, do you want to display the phases of your product production in an extraordinary manner to impress your visitors? Xpro Vertical Timeline Module for Beaver Builder can help you do all of that!
This module lets you add UNLIMITED item lists! You can choose unique media options, insert colorful icons/images in the bullets, change hover colors, and more! Now, users don’t have to memorize overwhelming codes to add vertical timelines to their Beaver Builder WordPress websites. Because this module has a user-friendly interface that works without coding!
Its incredible drag-and-drop feature, custom media & styling options, and easy-to-navigate panel help users create a stunning vertical timeline in no time. Best part? Users can view the vertical timeline in real time!
Let’s dive in and learn how to use this amazing module!
Requirements:
In order to get started, install Xpro Beaver Builder Addons – Lite and purchase its pro version. If you already have set up the addon, ensure that the vertical timeline module is enabled from the Xpro Addon dashboard.
Steps to Adding Vertical Timeline Module to Beaver Builder WordPress Page
Step 1: Drag and Drop the Module
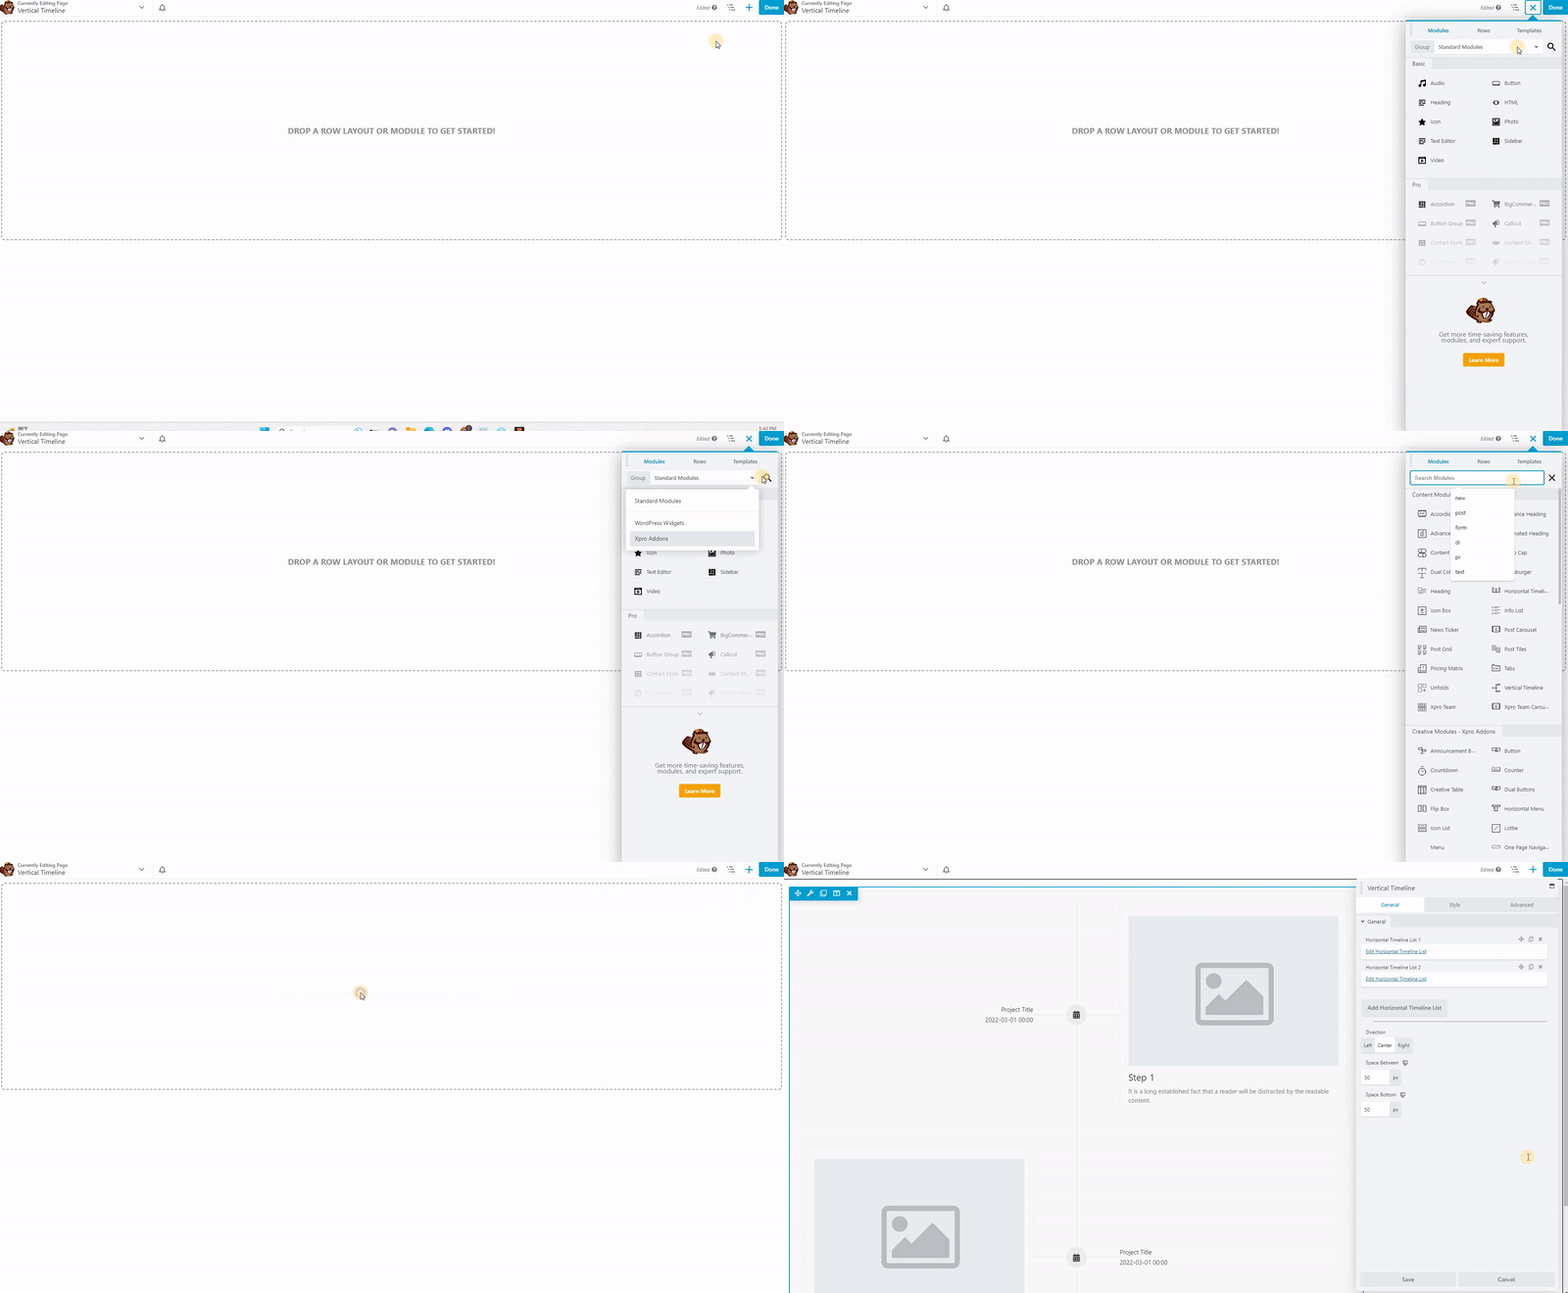
First, open the WordPress page where you’d like to add this module. From the side menu change the “Group” to “Xpro Addons”. Done? Now, simply locate the vertical timeline module. Drag and drop it on the screen to continue.

Step 2: Insert Information
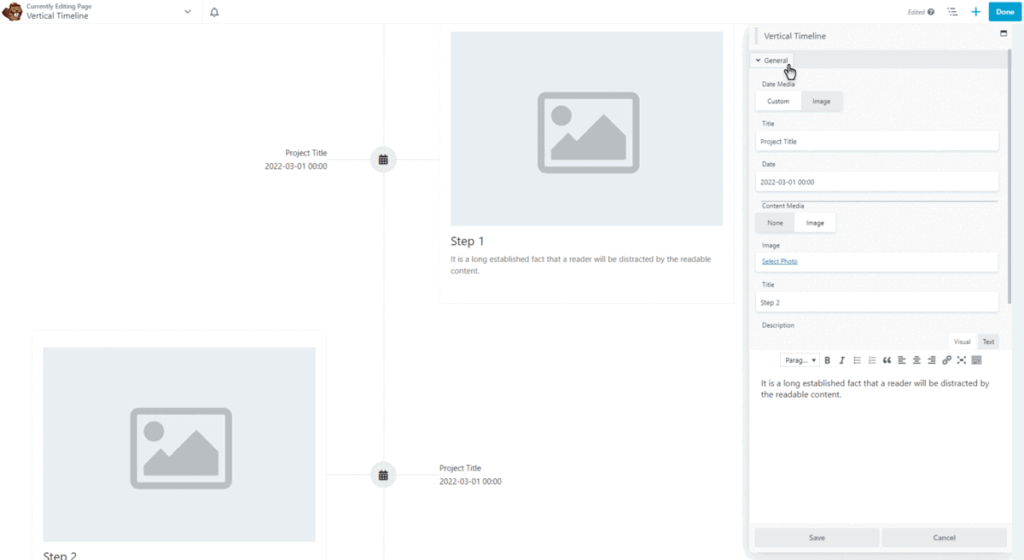
Once the Vertical Timeline module for Beaver Builder has been added, you can start adding the information via the customization panel. Click on “General” to continue.
What Can You Do Here?
Add Unlimited Vertical Timeline Lists
With Xpro Vertical Timeline module for Beaver Builder, you can add as many items as you’d like to the list. Simply, click on “Add Horizontal Timeline List”.
Edit & Stylize each Vertical Timeline List Separately
You can edit each item list as per your website’s specific needs. For this, click on “Edit Vertical Timeline List”. Here users would be able to insert images to date media, content media, and bullet media. Besides, users can also choose the custom layouts for each media if they don’t want to add images. Further, you can also play with inline styles to stylize bullet media.
Set Direction and Spacing
In the “General” section, users can set the direction of the module, i.e., Left, Center, and Right. Plus, adjust the horizontal and vertical spacing between each item list.

Step 3: Stylize As Per Your Needs!
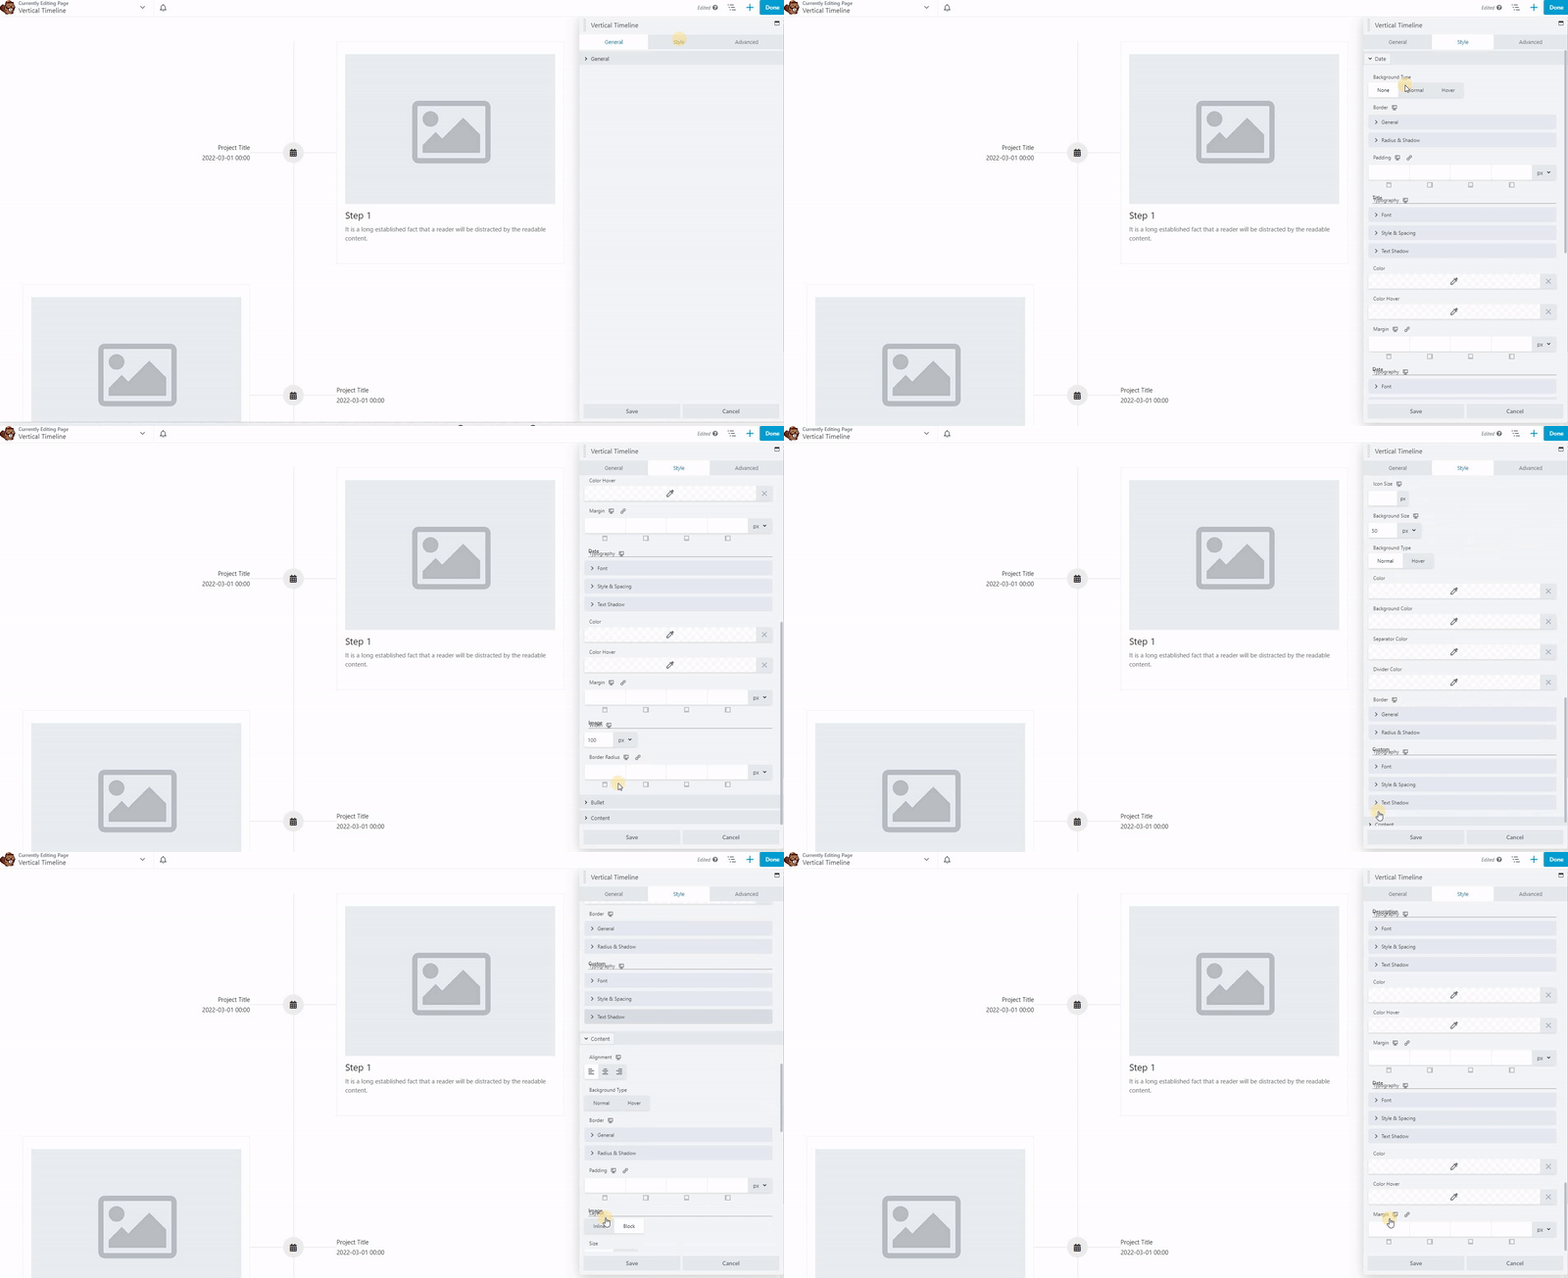
Click on “Style” located on the top bar on the side menu to customize the “Date”, “Bullet”, and “Content” sections. Here you can set backgrounds, change font color, add hover effect, set shadows, adjust border, and do a lot more with your module.
Simply click on the bars to explore the options and start editing your vertical timeline module for Beaver Builder.

Final Words!
Before creating a vertical timeline, decide what data and in which sequence you’d like to display it on the website. And, then with this best pro vertical timeline module for Beaver Builder, you can easily create an awesome vertical timeline to captivate the audience. Just be careful with the design and ensure that it perfectly blends with your entire WordPress website’s theme.
On the other hand, if you’d like to show the information in horizontal bars, you can also go for the horizontal timeline module for Beaver Builder.
In case of any queries, you can contact us anytime or leave us a comment below. Our technical support team is always here to help you out!
